Introduction
 In our previous blog, we saw you how to read/write Azure Table Storage data. Now in this blog, we will see How to Read/Write Azure Queue Storage data in SSIS. To illustrate, we will use ZappySys SSIS PowerPack, which includes several tasks to import/export data from multiples sources to multiple destinations like flat files, Azure, AWS, databases, Office files and more. They are Coding free, drag and drop high-performance suite of Custom SSIS Components and SSIS Tasks. If you like perform other operations on Azure Blob Storage Files (e.g. Download, Upload, Create, Delete) then check these articles.
In nutshell, this post will focus on How to Read/Write Azure Queue Storage data in SSIS using the following Source/Destination.
Component Mentioned in this article
Prerequisite
- First, you will need to have SSIS installed
- Secondly, make sure to have SSDT
- Download and install Microsoft Azure Storage Emulator
- Download and install Microsoft Azure Storage Explorer
- Finally, do not forget to install ZappySys SSIS PowerPack
NOTE: If you want to use Live account (Azure Storage) then you can skip Step #3
What are Azure Queues?
Azure Queue storage is a service for storing large numbers of messages. You access messages from anywhere in the world via authenticated calls using HTTP or HTTPS. A queue message can be up to 64 KB in size. A queue may contain millions of messages, up to the total capacity limit of a storage account.
Common uses
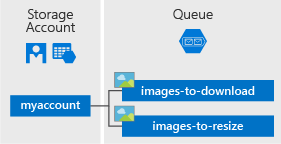
Microsoft Azure Queue Concept
Common uses of Queue storage include:
- Creating a backlog of work to process asynchronously
- Passing messages from an Azure web role to an Azure worker role
- The Queue service contains the following components:
Getting Started
In order to start, we will show several examples. Zappysys includes an SSIS Azure Queue Storage Source that will help you in reading data of Queue and SSIS Azure Queue Storage Destination that will help you to write data in Queue. Here we are showing you is, how to Read/Write Azure Queue Storage data in SSIS.
You can connect to your Azure Storage Account by entering your storage account credentials. Here I am showing an example of the use of the local Azure Storage Emulator.
Setup Azure Storage client tools and Create Queue
- Once you have downloaded and installed storage emulator You can launch Microsoft Azure Storage Emulator from its Physical location or from the desktop or start menu shortcut.

Azure Storage Emulator Physical Location
- If you can see the below-attached Command Prompt screen after Emulator started. Then you can proceed to start Microsoft Azure Storage Explorer as the Azure Storage Emulator is started successfully.
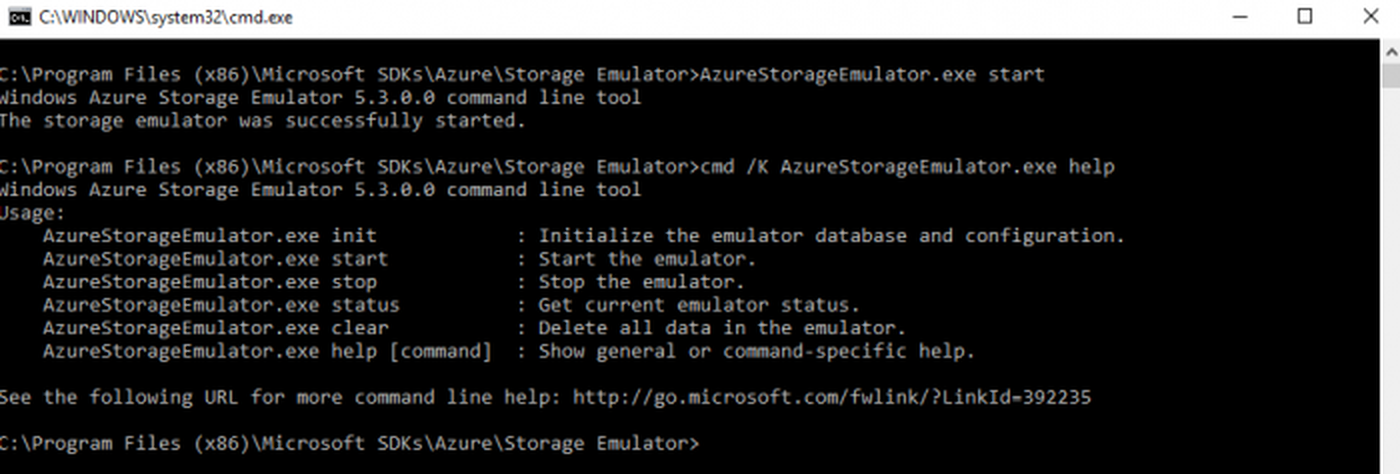
Command Prompt Screen after Microsoft Azure Storage Emulator Started
- Now, you have to download and install Microsoft Azure Storage Explorer and then you can launch Microsoft Azure Storage Explorer from its Physical location or from the desktop or start menu shortcut.

Microsoft Azure Storage Explorer Location.
- If you don’t have Azure Storage account then it’s easy to get FREE Trial Azure Storage account or use your MSDN to get credit each month which will be more than enough for real testing. If you prefer to avoid all this hassle then Microsoft provides another great way to test Azure Storage functionality is totally offline mode on your local machine. You can just download Azure Storage Emulator and start testing.
- Click here to learn more about how to configure Azure Storage Emulator for Testing and Development purposes. In order to connect to Azure Storage Service from SSIS, you will need Storage AccountName and an AccessKey. Ask your SysAdmin or responsible person to provide that information to you. Here are sample Account Name and Access Key(this is just example key which may differ in your case)
12Account Name: mystorageaccountAccess Key: Eby8vdM02xNOcqFlqUwJPLlmEtlCDXJ1OUzFT50uSRZ6IFsuFq2UVErCz4I6tq/K1SZFPTOtr/KBHBeksoGMGw== - For Creating a Queue, First of all, you need to go to Microsoft Storage Explorer Window. Then you can go through like this way (Storage Accounts –> (Development) –> Queues. Right-click on Queues and Select Create Queue and give a name you want.
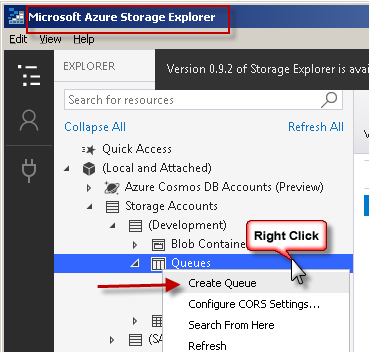
Microsoft Azure Storage Explorer – Create Queue
Write data using ZS Azure Queue Storage Destination
In this tutorial, you will learn how to write data into Azure Queue Storage. We will use ZS DummyData Source for practice it but you can use a suitable Source Adapter. So, Let’s start, In this SSIS we will write data into Azure Queue Storage using ZS Azure Queue Storage Destination.
- Once you have created Azure Storage Queue and you got valid Account Name and AccessKey (for the local emulator you don’t need this) you may proceed to create new SSIS package. In BIDS/SSDT create a new SSIS package.
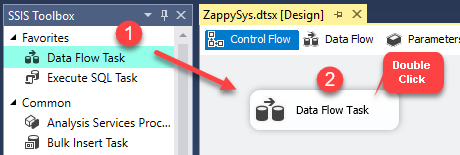
- From the SSIS toolbox drag and drop Data Flow Task on the control flow designer surface and double click on it too.

Drag and Drop SSIS Data Flow Task from SSIS Toolbox
- Click here to create Azure Storage Connection.
- From the SSIS toolbox drag and drop Dummy Data Source on the dataflow designer surface.
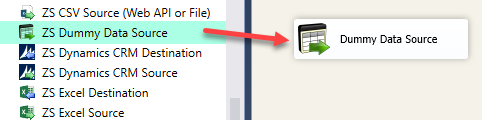
DummyData Source – Drag and Drop
- Double click Dummy Data Source to configure it. From Template pick JsonDocuments and enter row count=100 to generate 100 JSON documents and click OK to save.
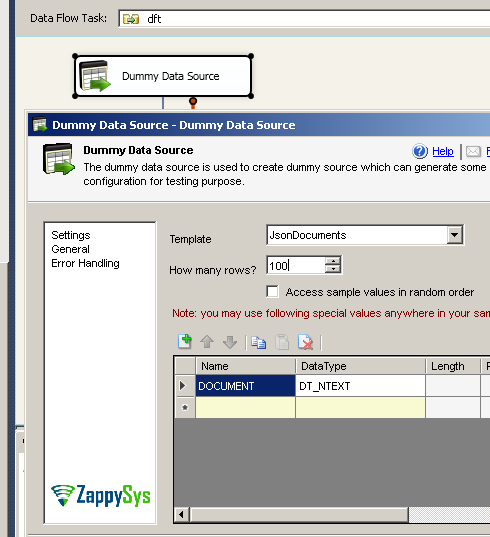
DummyData Source – Configure
- Let’s drag and drop Azure Queue Storage Destination on the dataflow designer surface from the SSIS toolbox.
- Now single click on the Dummy Data Source, once you see the blue arrow from the source connect it to Azure Queue Destination.
- Double click Azure Queue Destination to configure it. Select the connection we have created before.
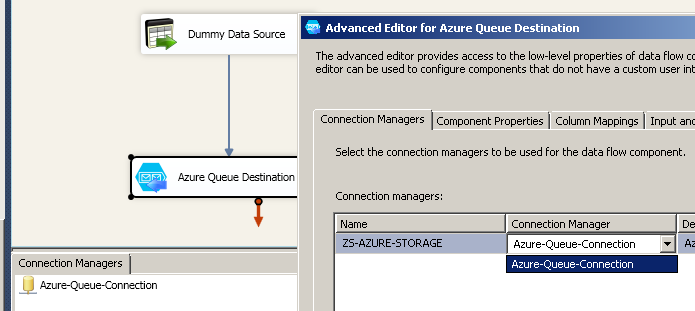
Configure Connection Manager
- Click on [Component Properties] tab and select the Target Queue from the dropdown list.
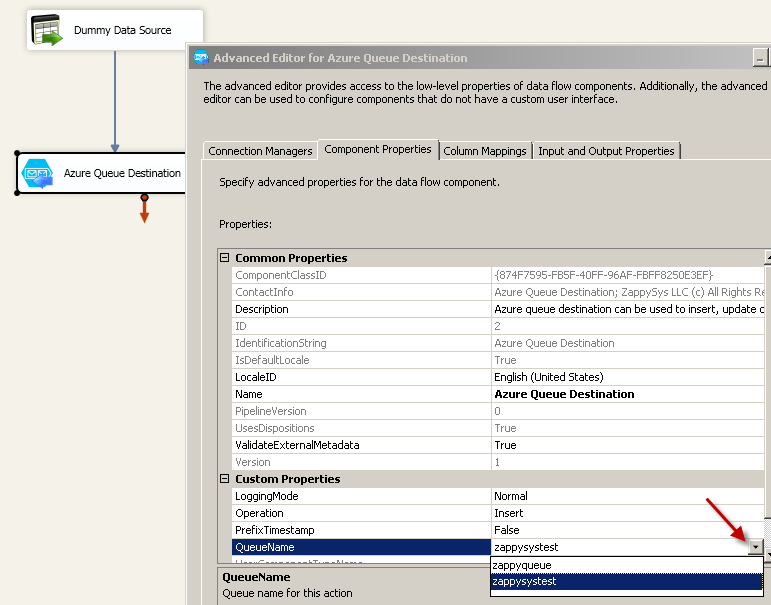
Configure Component Properties
- Click on [Mappings] tab and verify mapping. Map Document column from upstream to the MessageText target column.
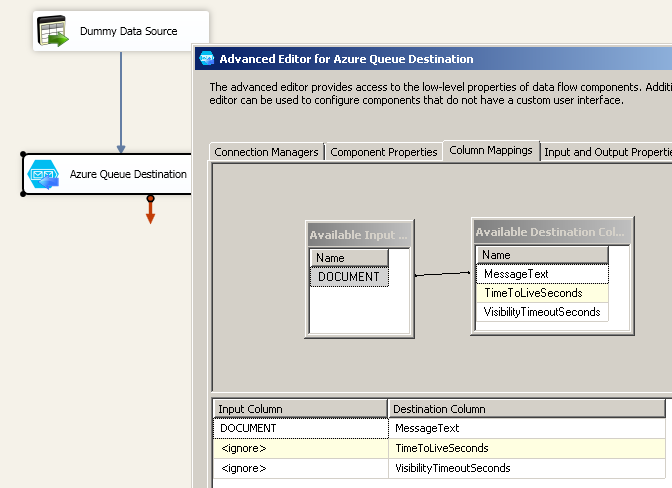
Configure Column Mappings
- Click OK to save settings.
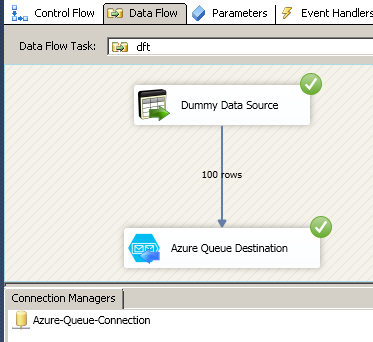
- Execute the package and verify target data by going to your Azure Queue. We use Azure Storage Explorer.
SSIS Execute Package
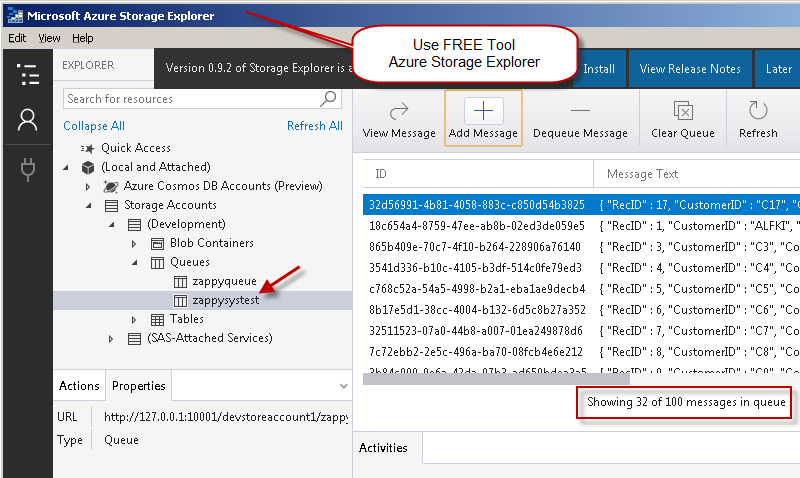
Microsoft Azure Explorer – Verify Queue Data
Read data using ZS Azure Queue Storage Source
- Here you may proceed In BIDS/SSDT to create a new SSIS package.
- Now, Drag and Drop SSIS Data Flow Task from SSIS Toolbox.
SSIS Data Flow Task – Drag and Drop
- Double click on the Data Flow task to see the Data Flow designer surface.
- From the SSIS toolbox drag and drop ZS Azure Queue Storage Source on the dataflow designer surface.
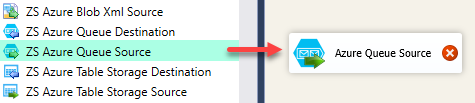
SSIS ZS Azure Queue Source – Drag and Drop
- Double click Azure Queue Storage Source to configure it.
- Select Azure Storage Connection we have created before and select queue from the dropdown and click on preview.

Configure Azure Queue Source
- Click on OK button to save configure.
- Now, you can use a suitable Destination Adapter from here. In this case, we used Trash Destination.
- From the SSIS toolbox drag and drop Trash Destination on the data flow designer surface.
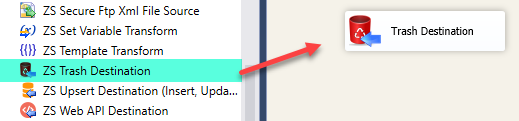
SSIS ZS Trash Destination – Drag and Drop
- Now single click on the Azure Queue Storage Source once you see the blue arrow from the source … connect it to Trash Destination.
- Double click on ZS Trash Destination to Configure it.
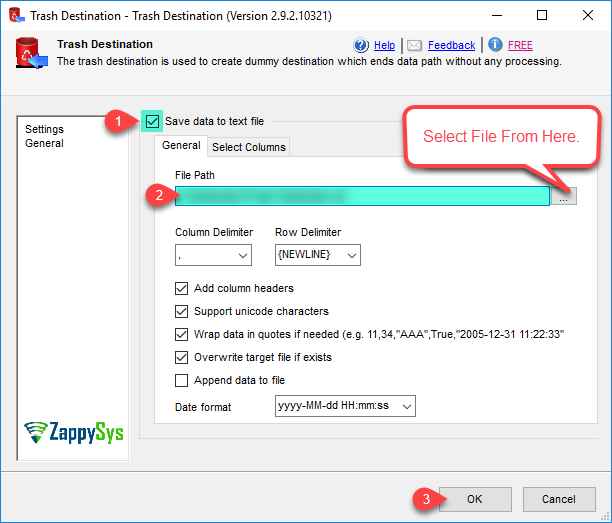
SSIS ZS Trash Destination – Configure
- Click on OK button to save Trash Destination configure setting UI.
- Execute the package and verify source data in the data viewer.
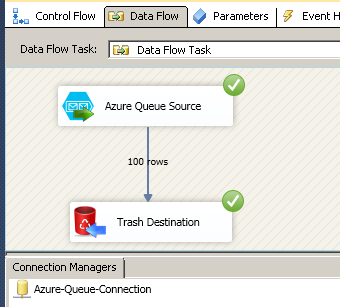
SSIS ZS Azure Queue Source – Execute the Package
- After messages read from Azure Queue, the same message cannot be read again until VisibilityTimeout. By default Queue, visibility timeout is used (-1 means use default) but you can override it on the source UI.
Conclusion
In this blog, we learn How to Read/Write Azure Queue Storage data in SSIS. We used the Azure Queue Destination for write data and Azure Queue Source to read data. You can download SSIS PowerPack here to try many other scenarios not discussed in this blog along with 70+ other components.
References
Finally, you can use the following links for more information:
- Azure Queue Source
- Azure Queue Destination
- Microsoft Azure Queues
- Help File: Azure Queue Source, Azure Queue Destination, Trash Destination