SSIS Azure Queue Storage Destination
PreviousNext

Azure Queue Storage Destination can be used to write/delete/update data from Azure Queue Storage using SSIS.

Download SSIS PowerPack

Content

Video Tutorial

Step-By-Step

In this section you will learn how to use Azure Queue Storage destination to push messages to Azure Queue..
  1. In order to connect to Azure Storage Service from SSIS you will need Storage Account Name and Access Key. Ask your SysAdmin or responsible person to provide that information to you. Here is sample Account Name and Access Key(this is just example key which may differ in your case)
    Account Name: mystorageaccount
    Access Key: Eby8vdM02xNOcqFlqUwJPLlmEtlCDXJ1OUzFT50uSRZ6IFsuFq2UVErCz4I6tq/K1SZFPTOtr/KBHBeksoGMGw==

    Microsoft also provides offline simulator to test Azure Storage functionality (Blob, Table, Queue). This is great way to try out Azure Storage functionality without worrying about Cost but we strongly recommend you to test everything with Azure Cloud Account before going to Production.
    Click here to read more how to get your Storage Account Name and Access Key


    If you don't have Azure Storage account then its easy to get Trial Azure Storage account or use your MSDN to get credit each month which will be more than enough for real testing. If you prefer to avoid all this hassle then Microsoft provides another great way to test Azure Storage functionality in totally offline mode on your local machine. You can just download Azure Storage Emulator and start testing. Click here to learn more how to configure Azure Storage Emulator for Testing and Development purpose.

  2. Once you have Account Name (its like UserID) and Access Key (its like password) you may proceed to create new SSIS package. In BIDS/SSDT create new SSIS package
  3. For this sample exercise we will need new Azure Storage Table. To create new Table perform following steps
  4. From the SSIS toolbox drag and drop Data Flow Task on the controlflow designer surface.
  5. Double click on the Data Flow task to see Data Flow designer surface.
  6. Right Click in Connection Manager Panel and select [New Connection...] menu item. Pick ZA-AZURE-STORAGE connection type. Enter AccessKey, SecrentKey or Use Developer Account if you using local emulator. Click Test connection to verify credentials.
    Create SSIS Azure Queue Storage Connection - Choose Type
    Create SSIS Azure Queue Storage Connection - Choose Type
    Configure SSIS Azure Queue Storage Destination Connection
  7. Click OK to save connection information.
  8. From the SSIS toolbox drag and drop Dummy Data Source on the dataflow designer surface.
  9. Double click Dummy Data Source to configure it.
  10. From Template pick JsonDocuments and enter row count=100 to generate 100 json documents and click OK to save
    Generate fake JSON documents
  11. From the SSIS toolbox drag and drop Azure Queue Storage Destination on the dataflow designer surface.
  12. Now single click on the Dummy Data Source, once you see blue arrow from source ... connect it to Azure Queue Destination.
  13. Now double click Azure Queue Storage Destination to configure it.
  14. On [Connection Manager] tab select Azure Queue connection manager.
    Configure SSIS Azure Queue Destination Adapter - Connection Tab
  15. Click on [Component Properties] tab and select Target Queue from dropdown list.
    Configure SSIS Azure Queue Destination Adapter - Component Tab
  16. Click on [Mappings] tab and verify mapping. Map Document column from upstream to MessageText target column.
    Configure SSIS Azure Queue Destination Adapter - Mapping Tab
  17. Click OK to save settings.
  18. Execute the package and verify target data by going to your Azure Queue (We used FREE tool called Microsoft Azure Storage Explorer ).
    Execute SSIS Azure Queue Destination Adapter - Load Messages
    SSIS Load Test - View Azure Queue Messages using Microsoft Azure Storage Explorer (FREE)

Component Properties

Property Name Description
LoggingMode LoggingMode determines how much information is logged during Package Execution. Set Logging mode to Debugging for maximum log.

Available Options (Use numeric value listed in bracket if you have to define expression on this property (for dynamic behavior).

Option Description
Normal [0] Normal
Medium [1] Medium
Detailed [2] Detailed
Debugging [3] Debugging
PrefixTimestamp When you enable this property it will prefix timestamp before Log messages.
QueueName Queue name for this action
VisibilityTimeout This is message visibility timeout in seconds. Set -1 to use default timeout (default queue level setting). During visibility timeout period message becomes unavailable after you read it so adjust this timeout as per your need. Set timeout to 0 if you want to allow read operation for same message without any wait time. If you set this timout too small then same message might appear back in read operation and it will throw duplicate message error.
Operation Action you like to perform

Available Options (Use numeric value listed in bracket if you have to define expression on this property (for dynamic behavior).

Option Description
Insert [0] Insert
Update [1] Update
Delete [2] Delete
Reload [3] Reload

Error handling

  • This component supports error output.
  • Any bad value will cause Error or Truncation (e.g. If your sample value is 5 character long but output column length is set to 3 chars). If you have error output attached with RedirectRow option on Error, Truncation then you can capture bad rows along with exact reason of error.
  • Use error handling tab to set option for error handling. By default component fails on any data error or truncation issue

Settings UI

Azure Storage Connection UI

Configure SSIS Azure Queue Storage Destination Connection

Azure Queue Storage Destination - Select Connection

Configure SSIS Azure Queue Destination Adapter - Connection Tab

Azure Queue Storage Destination - Component Properties

Configure SSIS Azure Queue Destination Adapter - Component Tab

Azure Queue Storage Destination - Mappings

Configure SSIS Azure Queue Destination Adapter - Mapping Tab

Write Messages to Azure Queue Storage

Execute SSIS Azure Queue Destination Adapter - Load Messages

View Messages in Azure Queue Storage

SSIS Load Test - View Azure Queue Messages using Microsoft Azure Storage Explorer (FREE)

See Also

Articles / Tutorials

Click here to see all articles for [SSIS Azure Queue Storage Destination] category
How to Read/Write Azure Queue Storage data in SSIS

How to Read/Write Azure Queue Storage data in SSIS

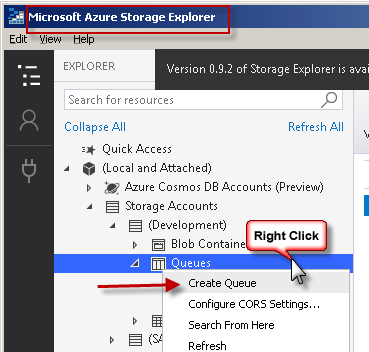
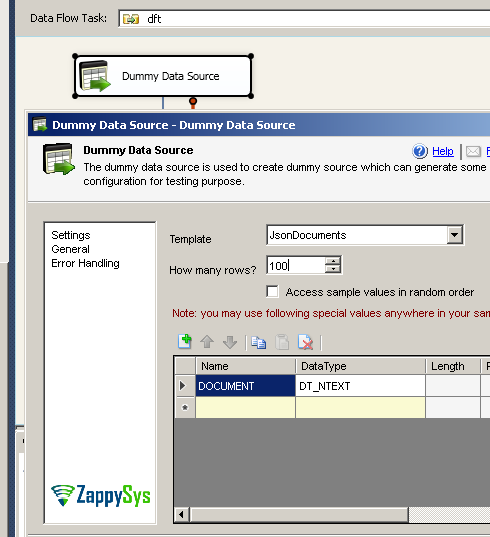
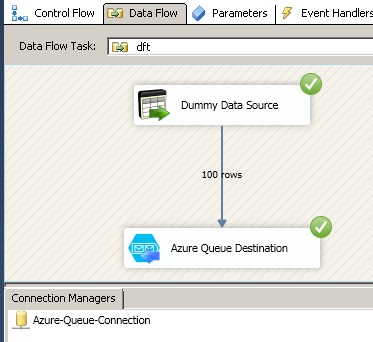
Introduction In our previous blog, we saw you how to read/write Azure Table Storage data. Now in this blog, we will see How to Read/Write Azure Queue Storage data in SSIS. To illustrate, we will use ZappySys SSIS PowerPack, which includes several tasks to import/export data from multiples sources to multiple destinations like flat files, Azure, AWS, databases, […]
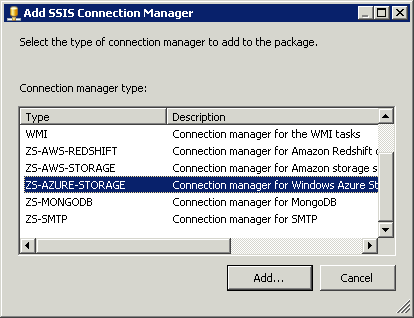
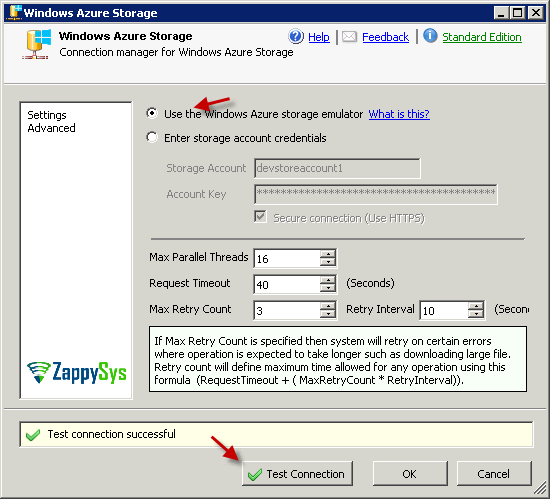
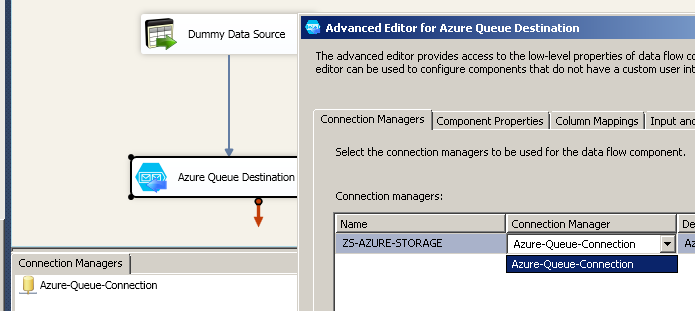
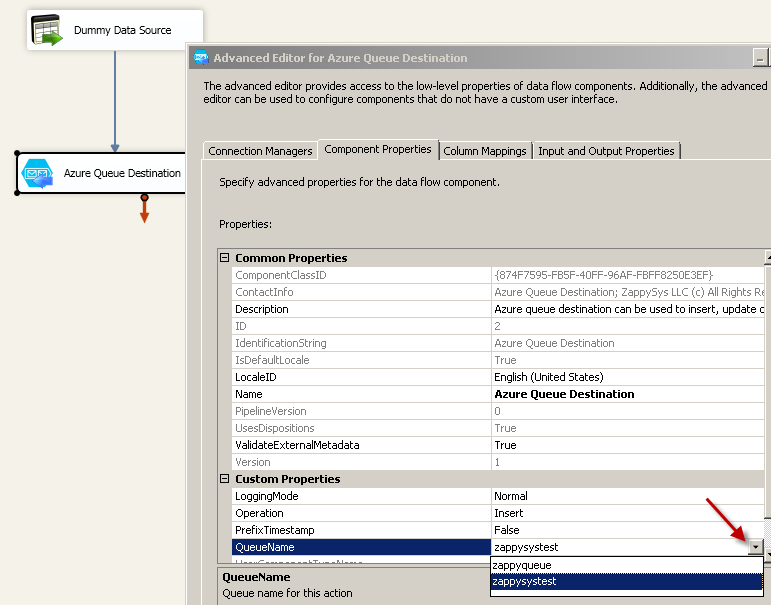
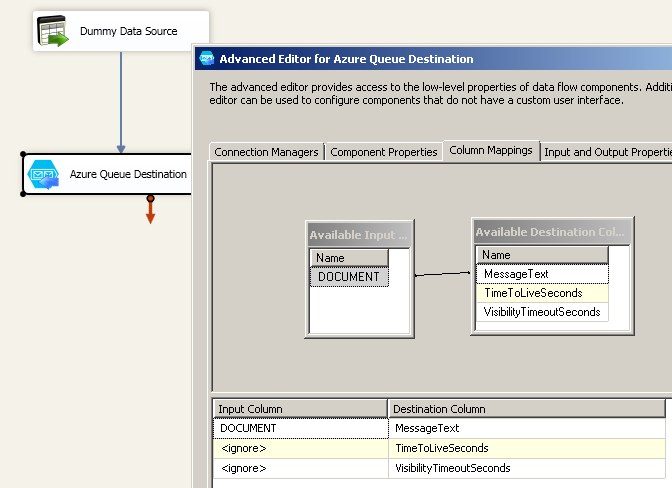

Read and Write in Azure Queue Storage in SSIS

Read and Write in Azure Queue Storage in SSIS

Introduction In our previous blog we saw How to load data into Azure Blob Storage. Now in this blog, we will How to Read and Write in Azure Queue Storage in SSIS. To illustrate, we will use ZappySys SSIS PowerPack, Which includes several tasks to import/export data from multiples sources to multiple destinations like flat files, Azure, […]


Copyrights reserved. ZappySys LLC.