Introduction
 In this article, we will see how to read How to write data into CSV file in SSIS from SQL Server. We will also explain how to compress (gzip) and split CSV files into multiple files. To illustrate, we will use ZappySys SSIS PowerPack, which includes several tasks to import/export data from multiples sources to multiple destinations like flat files, Azure, AWS, databases, Office files and more. They are Coding free, drag and drop high-performance suite of Custom SSIS Components and SSIS Tasks. We will use the ZS CSV File Destination component for this article.
What is CSV File Destination?
CSV File Destination can be used to write data in CSV / TSV file format. You can also split large files by row count or size at runtime. It also supports writing files directly in a compressed format such as GZip (*.gz).
Prerequisites
Before we perform the steps listed in this article, you will need to make sure the following prerequisites are met:
- SSIS designer installed. Sometimes it is referred to as BIDS or SSDT (download it from Microsoft site).
- Basic knowledge of SSIS package development using Microsoft SQL Server Integration Services.
- Make sure ZappySys SSIS PowerPack is installed (download it).
Component Mentioned in this article
How to Extract Data from SQL Server Table to CSV File Destination.
In this tutorial, we are going to load data from SQL Server Table using OLE DB Source and ZS CSV File Destination. You can use ZS DummyData Source too for practice it.
- Firstly, you need to Download and Install SSIS ZappySys PowerPack.
- Once you finished the first step, Open Visual Studio and Create New SSIS Package Project.
- Now, Drag and Drop SSIS Data Flow Task from SSIS Toolbox.

Drag and Drop SSIS Data Flow Task from SSIS Toolbox
- Double click on the Data Flow task to see the Data Flow designer surface.
- Here, In Visual Studio, drag and drop the OLE DB Source and CSV File Destination in the design surface and join the tasks with the blue arrow.
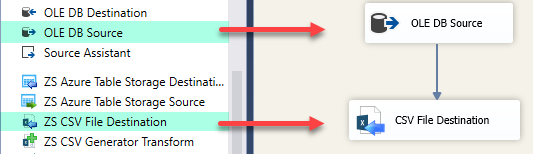
SSIS OLE DB Source and CSV File Destination – Drag and Drop
- Here, you can use our ZS Data Source too.
- But, we are going through OLE DB Source so need OLE DB Connection and File Connection for CSV File Destination.
How to create OLE DB Connection.
- Lets, create the first OLE DB Connection.
- Let’s, Right-click on Connection Managers Panel to Create OLE DB Connection, so you can use Source and Context Menu will appear, Select New OLE DB Connection from the Context Menu.
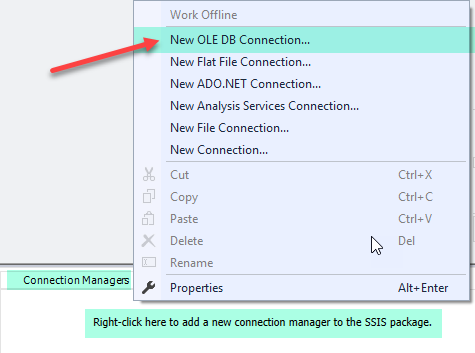
Create OLE DB Connection
- Now, click on New Button to create Connection.
Create New OLE DB Connection
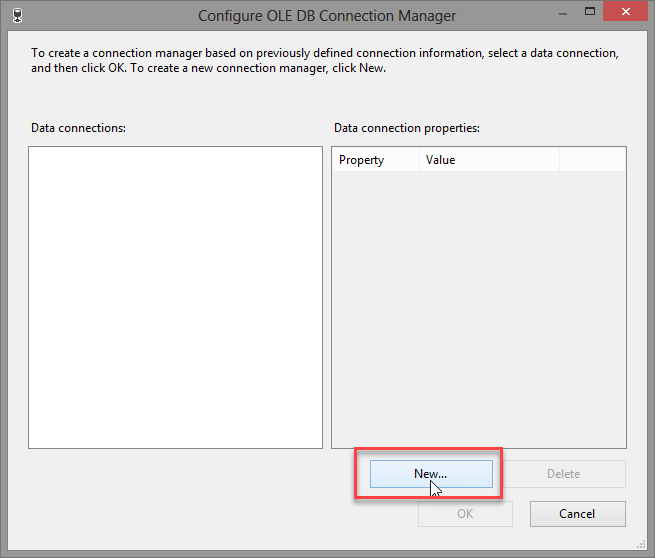
- Let’s Configure Connection Manager, just Follow steps one by one as we have created.
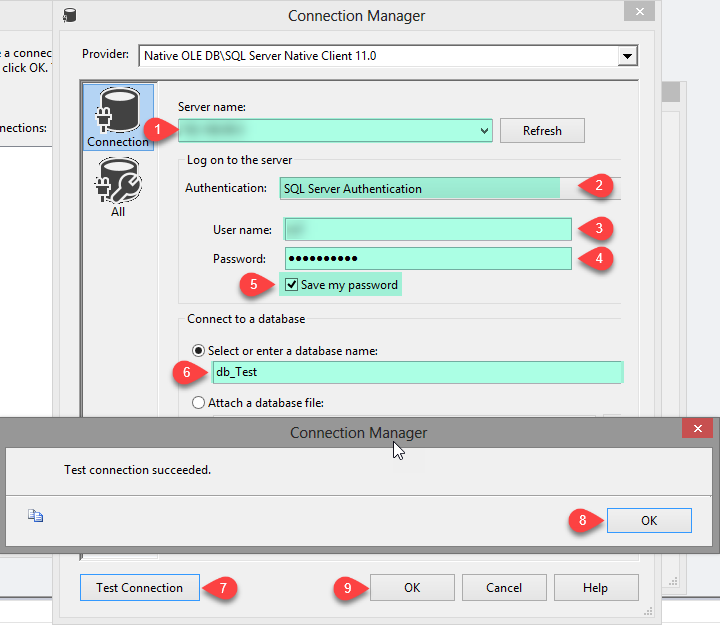
Configure OLE DB Connection Manager
- Click on Test Connection to see correct configure it.
- Click on OK button to save connection configure setting UI.
How to Create a File Connection.
- Let’s, Right-click on Connection Managers Panel to Create File Connection, so you can use Destination Path, and Context Menu will appear, Select New Connection from the Context Menu. In the File Connection Manager, select the Usage type and specify the path of the CSV file.
CSV File: You can download good one CSV file from here for practice.
123https://zappysys.com/downloads/files/test/invoices.csvhttps://zappysys.com/downloads/files/test/invoices.csv.gzhttps://zappysys.com/downloads/files/test/invoices.csv.zip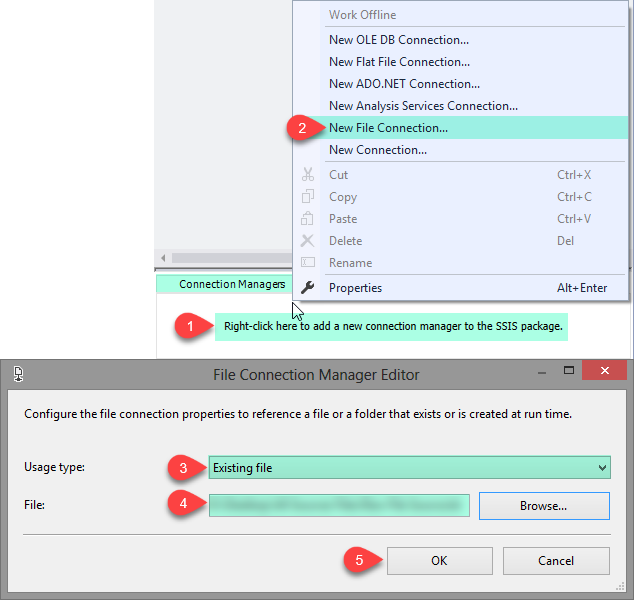
Create a New File Connection
- Click on OK button to save connection configure setting UI.
Let’s see how to write data from SQL Server Table to CSV File.
- Double click on OLE DB Source for configure it.
- Let’s Configure in Connection Manager, just follow below image steps.
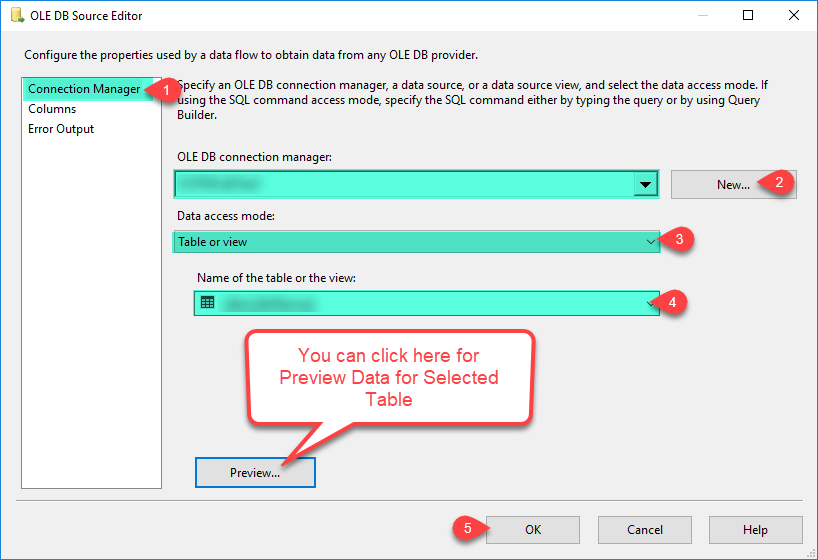
Configure OLE DB Source Editor
- Click OK to Save OLE DB Source Editor UI Settings.
- Let’s configure CSV File Destination, Double click on it, In the File Connection Manager, select the file connection created before.
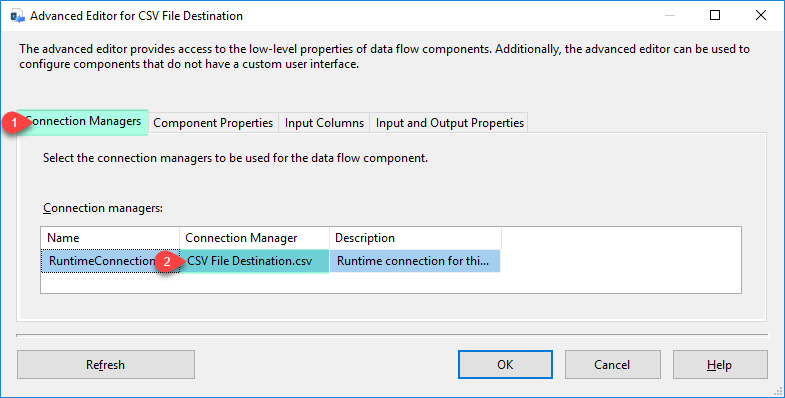
SSIS ZS CSV File Destination – Configure Connection Manager Tab
- In the Component Properties, set the Append property to False, enter the File Path and set the Overwrite file if exists to True.

SSIS ZS CSV File Destination – Configure Component Properties Tab
- In the Input Columns Tab, check the columns that you want as load data.
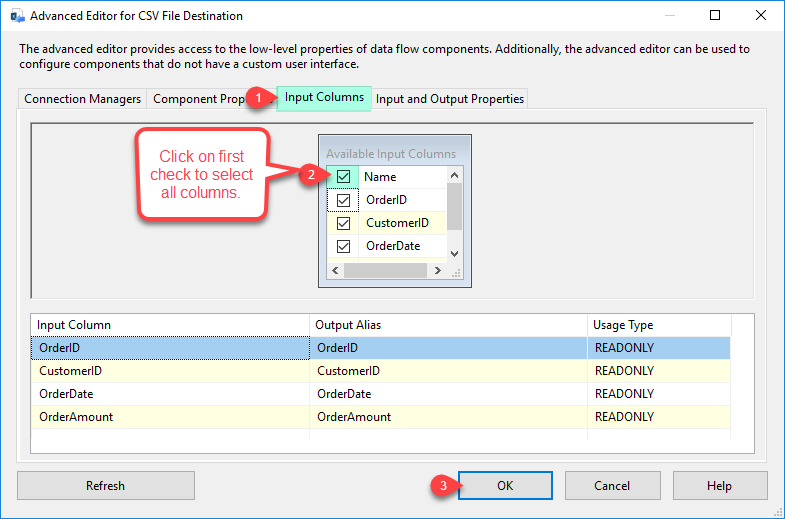
SSIS ZS CSV File Destination – Configure Input column Tab
- Click on OK button to save configure setting UI.
- Finally, run the package and the data will be exported from source to destination immediately.

SSIS ZS CSV FIle Destination – Execute the Package
How to do file split using CSV File Destination.
- Double click on CSV File Destination to configure it.
- In the Component Properties set Enable File Split to True and File Split Mode BySize.
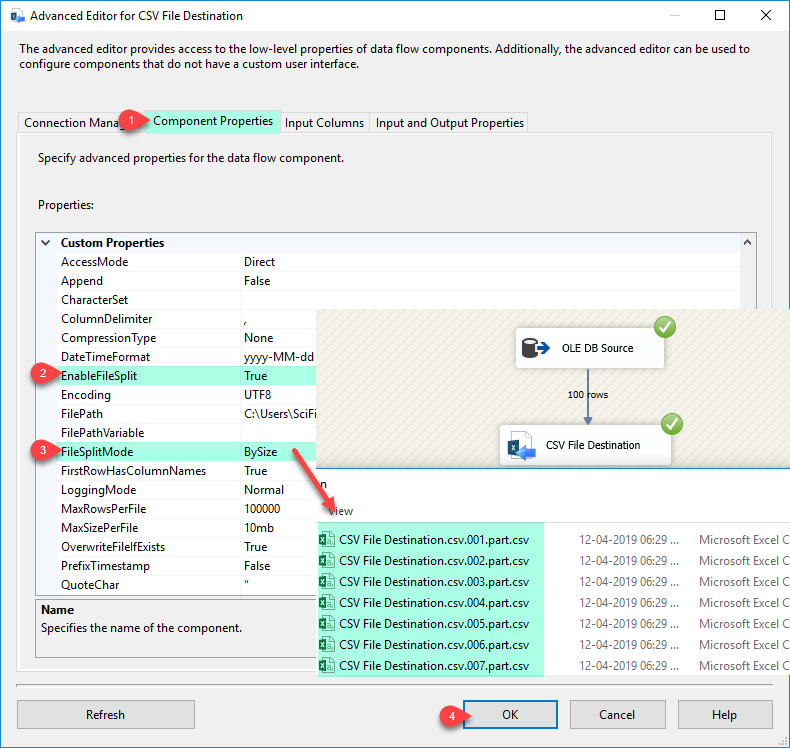
SSIS ZS CSV File Destination – File Split
- Click OK button to save configure setting UI.
- That’s all, Now you can run or execute the package and you will see numbers of CSV file in Destination Folder.
How to do file compression using CSV File Destination.
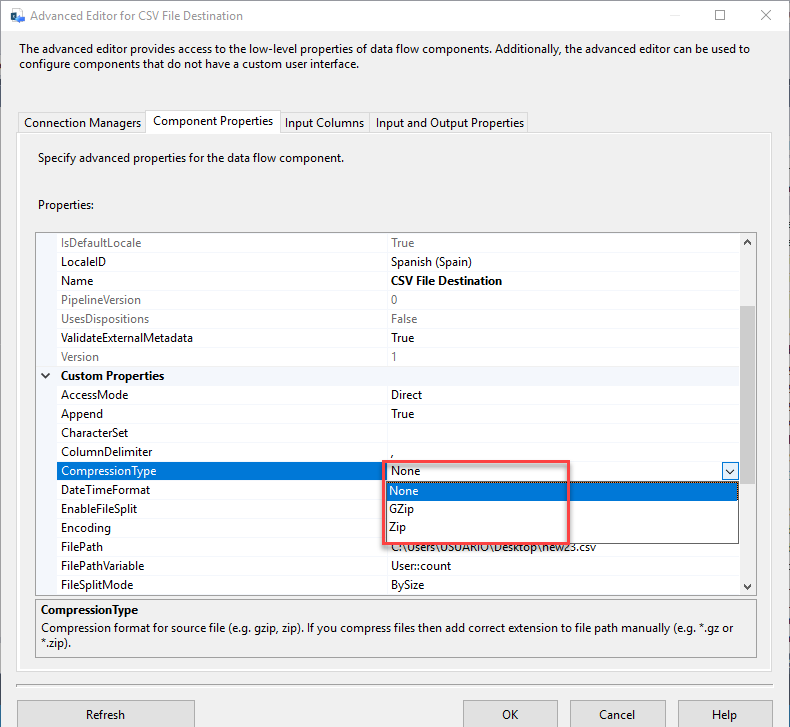
- Double click on CSV File Destination to configure it.
- In the Component Properties set Compression Type to GZip or Zip and File Split Mode BySize.
SSIS ZS CSV File Destination – Compression Type
- Click OK button to save configure setting UI. and You can Run or Execute.
How to do the maximum number of rows per file using CSV File Destination.
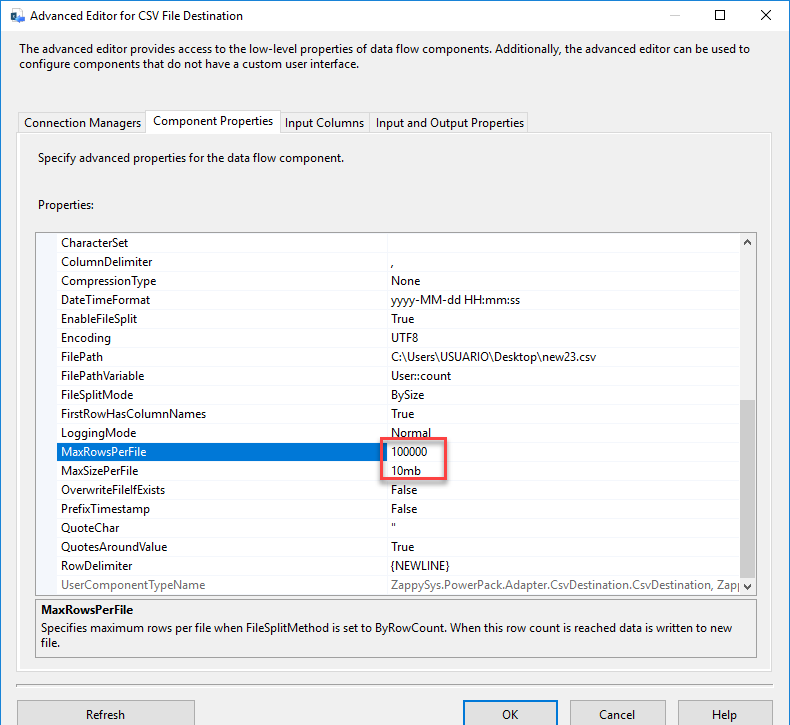
- Double click on CSV File Destination to configure it.
- In the Component Properties, you can set Max Rows Per File and Max Size Per File as per your need.
SSIS ZS CSV File Destination – Max Rows Per File
- Click OK button to save configure setting UI. and You can Run or Execute.
Conclusion
After all, we saw you how to write data into CSV File from SQL Server Table using OLE DB Connection, File Connection, and load into CSV File. We also learned, how to do various things like split CSV File, Compression File and the maximum number of rows per file of data. To explore many other scenarios not discussed in this article download SSIS PowerPack from here (includes 70+ Components).
References
Finally, you can use the following URL for more information.
- Help File: CSV File Destination