Introduction
In this article you will learn how to Setup Amazon Redshift Cluster in few clicks. You will also learn how to set Inbound and Outbound Firewall Rules so you can access Redshift Cluster from outside of AWS Network (e.g. from your corporate network or your home). By default Redshift Cluster cannot be access from outside of your AWS Virtual Network (referred as VPC – Virtual Private Cloud)
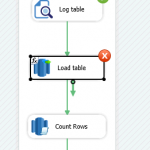
Once Redshift Cluster is setup you can follow these steps to Load data into Redshift (Using SSIS Redshift Data Transfer Task or Command line for Redshift)
What is Amazon Redshift
Amazon Redshift is a fully managed, petabyte-scale data warehouse service in the cloud. You can start with just a few hundred gigabytes of data and scale to a petabyte or more. This enables you to use your data to acquire new insights for your business and customers.
The first step to create a data warehouse is to launch a set of nodes, called an Amazon Redshift cluster. After you provision your cluster, you can upload your data set and then perform data analysis queries. Regardless of the size of the data set, Amazon Redshift offers fast query performance using the same SQL-based tools and business intelligence applications that you use today.
Setup Amazon Redshift Cluster
NOTE: Skip this step if you already setup you Redshift Cluster
- Login to your AWS Console and Click on Redshift icon. Or click here to land directly to redshift
- Click on Launch Cluster
- On Cluster Detail Page specify Cluster Identifier, Database Name, Port, Master User and Password. Click Continue to go to next page

Configure Redshift Cluster Identifier, Database Name, Port , UserID and Password
- On Node Configuration Page specify Node Type (This is VM Type), Cluster Type and Number of Node. If you are trying under Free Tire then select smallest Node possible (in this case it was dw2.large). Click Continue to go to next page

Configure Redshift Node Type and Cluster Type
- On Additional Configuration Page you can pick VPC (virtual private connection), Security group for Cluster and other options for Encryption. For demo purpose select as below screenshot . Click Continue to review your settings and click Create Cluster

Configure Redshift Cluster Encryption, VPC and Additional Detail
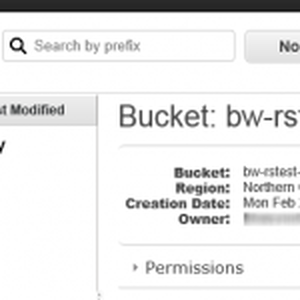
- Give it few mins while your cluster is being created. After few minutes (5-10 mins) you can go back to same page and review cluster Status and other properties as below. Copy Cluster Endpoint to somewhere because we will need it later.

Check Redshift Cluster Status , Endpoint and Other Properties
Add inbound rule for Redshift Cluster
By default you cannot connect to Amazon Redshift cluster from outside AWS Network (e.g. from your On-Premises Machine). If you wish to connect then you must add inbound exception rule to allow your request to redshift cluster on specific port.
To add create new inbound rule perform following steps
- Under Redshift home page click [Security] tab. You may see following Notice depending on which region you are. Click on [Go to the EC2 Console] link or you can direct go to EC2 by clicking Services -> EC2 menu at the top

Configure Security Group and Inbound Filter Firewall Rule to allow Local Connection
- On EC2 Security Groups Page select Security group attached with your Redshift Cluster and then in the bottom pane click on Inbound Tab

Security Group Screen – Add or Edit Inbound Firewall Rule to allow Local Connection
- On Inbound Tab click Edit option to modify default entry or you can add new Rule. Notice how IP Range is specified.. 0.0.0.0/0 means all IP. If you wish to add range then you have to set something like this… 50.34.234.10/250 .. this will cover 50.34.234.10 to 50.34.234.250 IP range. Make sure your port range covers Port you specified for Redshift cluster.
- Click on Add rule if you wish to add new entry else edit as below and click save
Automate Redshift Cluster Creation
If you have need to automate Redshift Cluster Creation or any of the following things automatically then check Redshift Cluster management Task
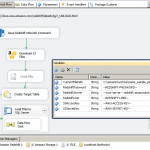
- Automate Amazon Redshift Cluster Create Action in few clicks. You can also add Access Security Rule.
- Automate Amazon Redshift Cluster Delete Action
- Fetch Amazon Redshift Cluster Property to SSIS Variable (e.g. Fetch Cluster Status)
- Fetch all cluster and their properties as DataTable (Use ForEach Loop and iterate through all clusters)
- Automate Redshift Cluster Snapshot Creation
- Automate Redshift Cluster Snapshot Delete Action
- Support for Wait until Cluster operation is done