Introduction
![]() In today’s data-driven world, the ability to seamlessly integrate and transfer files between different platforms is crucial for efficient business operations. If you’re a user of SQL Server Integration Services (SSIS) and looking to integrate SharePoint Online into your data workflow, you’re in luck. ZappySys SSIS PowerPack offers a powerful SharePoint Online Connector that makes downloading files from SharePoint Online a breeze. In this guide, we’ll walk you through the process of downloading files from SharePoint Online using SSIS and the ZappySys SSIS PowerPack SharePoint Online Connector.
In today’s data-driven world, the ability to seamlessly integrate and transfer files between different platforms is crucial for efficient business operations. If you’re a user of SQL Server Integration Services (SSIS) and looking to integrate SharePoint Online into your data workflow, you’re in luck. ZappySys SSIS PowerPack offers a powerful SharePoint Online Connector that makes downloading files from SharePoint Online a breeze. In this guide, we’ll walk you through the process of downloading files from SharePoint Online using SSIS and the ZappySys SSIS PowerPack SharePoint Online Connector.
Prerequisites
Before we perform the steps listed in this article, you will need to make sure the following prerequisites are met:- SSIS designer installed. Sometimes it is referred to as BIDS or SSDT (download it from the Microsoft site).
- Basic knowledge of SSIS package development using Microsoft SQL Server Integration Services.
- Make sure ZappySys SSIS PowerPack is installed (download it, if you haven't already).
- (Optional step). Read this article, if you are planning to deploy packages to a server and schedule their execution later.
In this section, we will learn how to configure and use SharePoint Online Connector in the API Source & API Destination to download files from SharePoint Online.
- Begin with opening Visual Studio and Creating a New Project.
- Select Integration Service Project and in the new project window set the appropriate name and location for the project. Click OK.
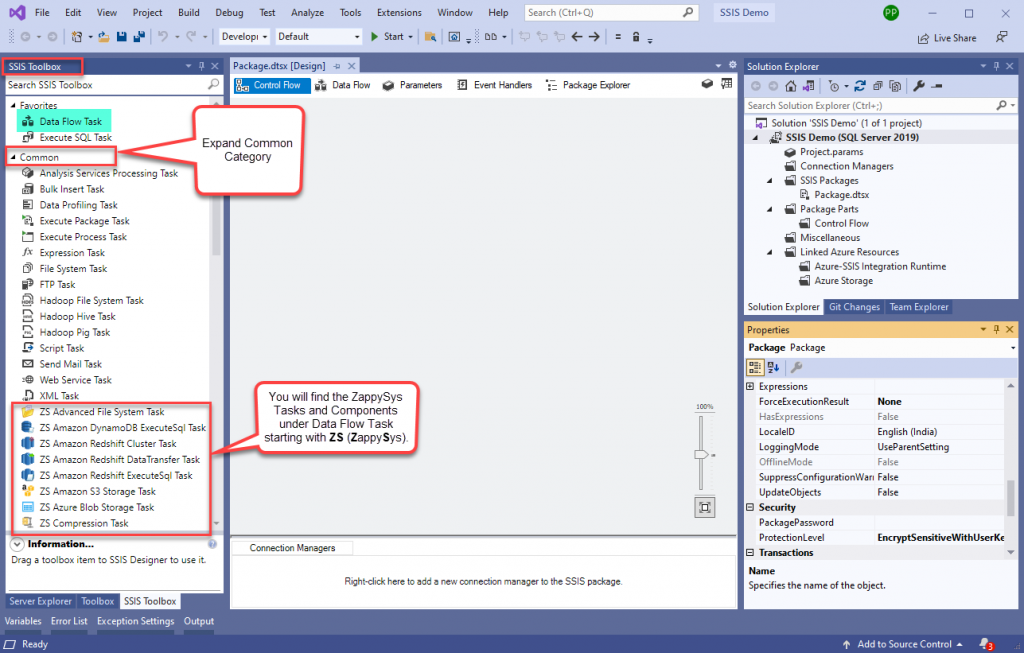
- In the new SSIS project screen you will find the following:
- SSIS ToolBox on the left sidebar
- Solution Explorer and Property Window on the right bar
- Control flow, data flow, event Handlers, Package Explorer in tab windows
- Connection Manager Window at the bottom
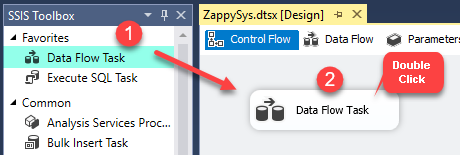
NOTE: If you don’t see ZappySys SSIS PowerPack Task or Components in the SSIS Toolbox, please refer to this help link. - Now, Drag and Drop the SSIS Data Flow Task from the SSIS Toolbox. Double-click on the Data Flow Task to see the Data Flow Designer.
- From the SSIS toolbox drag and drop API Source (Predefined Templates) on the data flow designer surface, and double-click on it to edit it:

- Select New Connection to create a new connection:

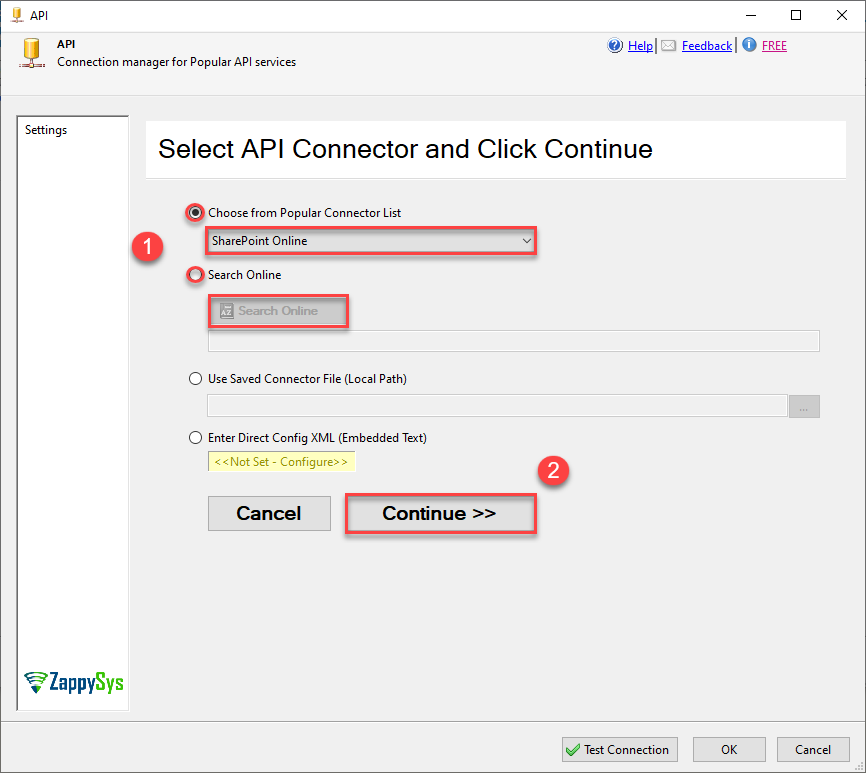
- Use a preinstalled SharePoint Online Connector from the Popular Connector List or press the Search Online radio button to download SharePoint Online Connector. Once downloaded simply use it in the configuration:
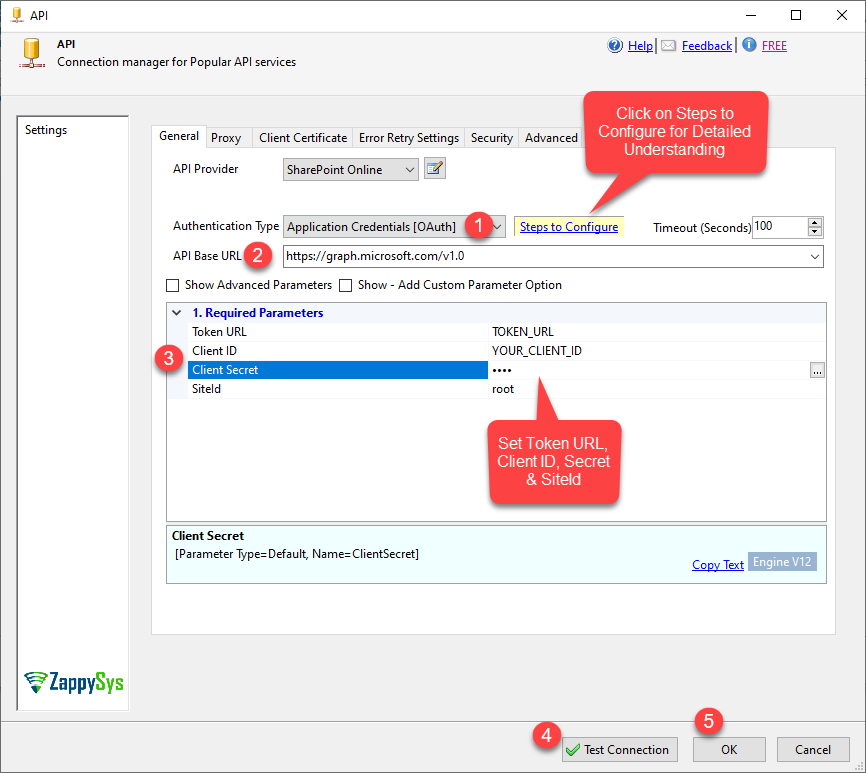
- Proceed with selecting the desired Authentication Type. Then select API Base URL (in most cases default one is the right one). Finally, fill in all the required parameters and set optional parameters if needed.
- After configuring all the required properties in the API Connection Manager, please click on the “Test Connection” button to confirm that the connection is established successfully.
You may press a link Steps to Configure which will help set certain parameters.
You may press a link Steps to Configure which will help set certain parameters.
In the API Source Component, we’ve chosen the API Connection Manager. Next, we need to configure the remaining properties of the component to download the single file from SharePoint Online.
- Choose the Download file endpoint from the “Select Table/Endpoint” dropdown menu.
- Please choose DriveId from the drop-down menu.
- Please set the FileId that indicates which file you wish to download. This is an essential parameter for the download process.
- Please set the local folder’s physical path which indicates the desired file being downloaded by setting the TargetFilePath parameter.
- If you intend to replace the local file with the one being downloaded, please select the ‘AlwaysOverwrite‘ option from the dropdown menu labeled ‘FileOverwriteMode‘. Alternatively, you can choose ‘FileIfExists’ or ‘SkipIfExists’ based on your specific needs.
Please refer to the sample screenshot below.
Once you have configured all the mentioned properties above, please click on the “Preview Data” button to initiate the API call. With just a few clicks, we have successfully configured the call to SharePoint Online using the ZappySys SharePoint Online Connector for downloading a Single file from SharePoint Online.
In the API Destination Component, we have chosen the API Connection Manager. Now, we must proceed to configure the remaining properties of the component to facilitate the download of multiple files from SharePoint Online. Additionally, we should make use of an OLE DB Source and Derived Column component to map the files for the download process.
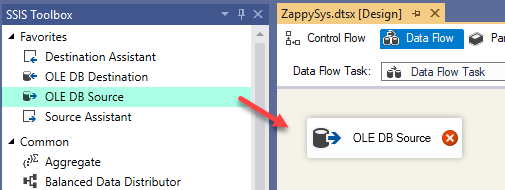
- Drag and drop the OLE DB Source Component from the SSIS Toolbox. Double-click on the OLE D B Source Component to initiate its configuration.
- Create a new OLE DB Connection Manager and configure your SQL Server settings for the connection. Next, select the Data access mode, specify the name of the table or view, or write an SQL Command. Afterward, click on the ‘Preview’ button to view a preview and check the ‘Columns’ tab for the source columns.
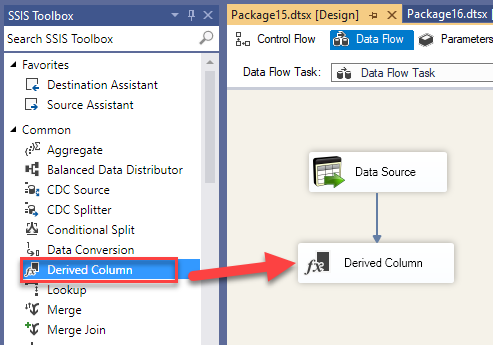
- Next, drag and drop the Derived Column Component from the SSIS Toolbox. Double-click on the Derived Column Component to begin its configuration.
- Now, add a new Derived Column by setting the expression to concatenate FilePath and FileName. Click ‘OK’ to save the configuration.
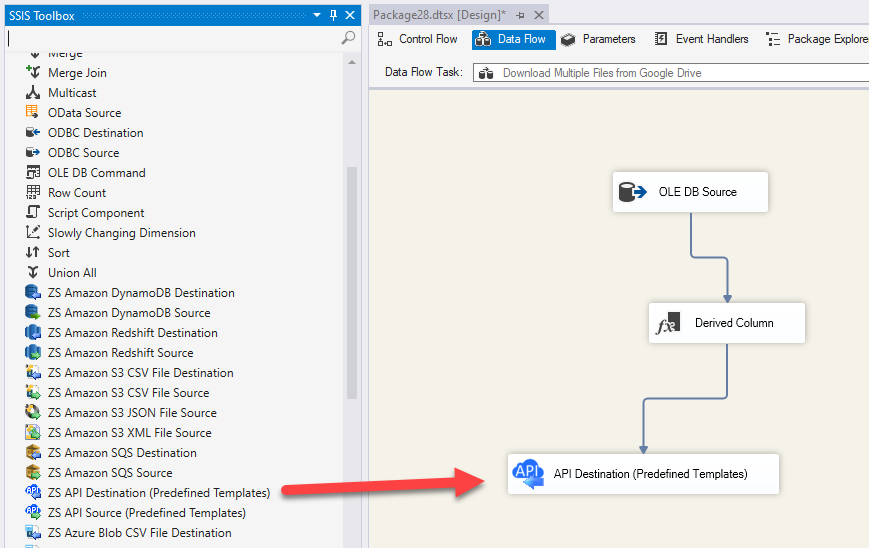
- Now, drag and drop the API Destination Component from the SSIS Toolbox. Double-click on the API Destination Component to begin its configuration.
- Double-click on the API Destination component to configure it for downloading multiple files from SharePoint Online.
- Choose the Download file endpoint from the “Select Table/Endpoint” dropdown menu.
- Please specify the ‘FileOverwriteMode’ option as ‘AlwaysOverwrite,’ or you can choose ‘FailIfExists’ or ‘SkipIfExists’ options based on your requirements.
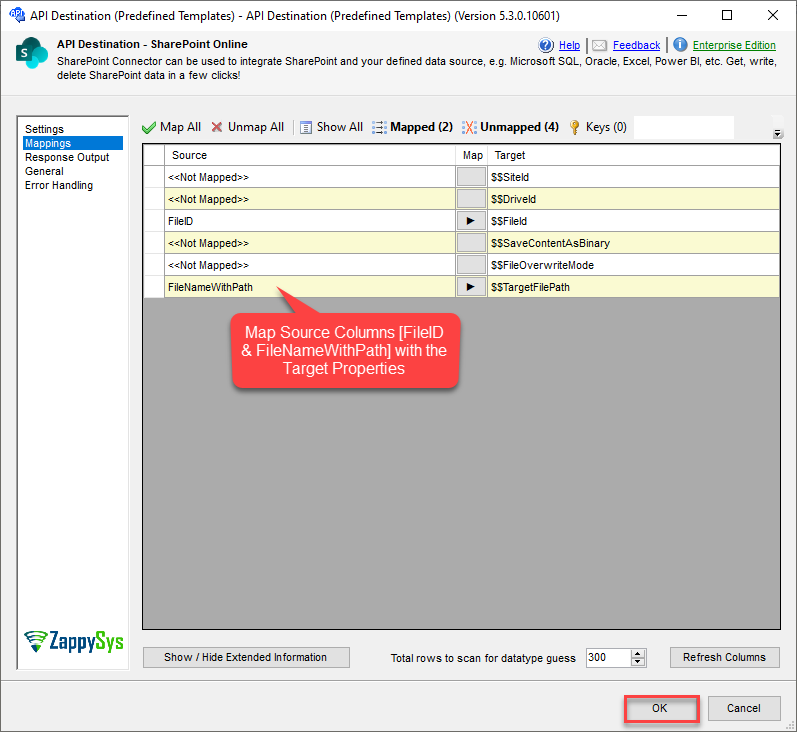
Please refer to the sample screenshot below. - Now, go to the Mappings tab and specify the source columns with the corresponding target properties.
Note: Here We’re mapping FileID with $$Id and FileNameWithPath with $$ResponseDataFile. You can create mappings based on your Source columns
Please refer to the sample screenshot below
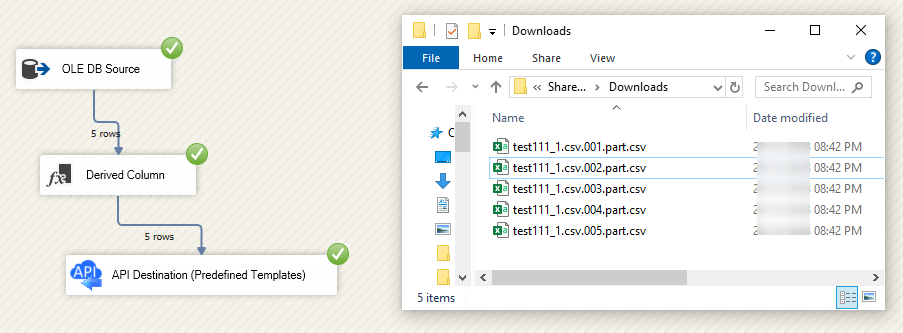
- Once you have configured all the mentioned properties above, please click on the “Preview Data” button from the Settings tab to initiate the API call. With just a few clicks, we have successfully configured the call to SharePoint Online using the ZappySys SharePoint Online Connector for downloading multiple files from SharePoint Online.
Please refer to the sample screenshot below.
Conclusion
In this blog, we learned how to connect with SharePoint Online using SSIS API Connection Manager and download single or multiple files from SharePoint Online using a combination of SSIS components, including the SSIS API Source component, SSIS API Destination component, OLE DB Source component, and Derived Column component.

