Introduction
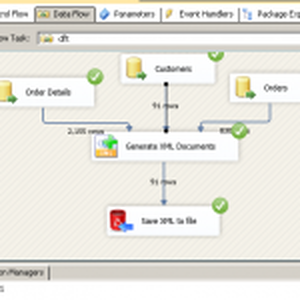
![]() In this post you will see how to generate XML which has namespace and prefix for elements. We will use SSIS XML Generator Transform for this purpose. Common pattern would be generate XML SOAP message using XML Generator Transform and send to Web service using SSIS Web API Destination. For full tutorial on how to export XML using SSIS check this link.
In this post you will see how to generate XML which has namespace and prefix for elements. We will use SSIS XML Generator Transform for this purpose. Common pattern would be generate XML SOAP message using XML Generator Transform and send to Web service using SSIS Web API Destination. For full tutorial on how to export XML using SSIS check this link.
Understanding XML Namespace and Prefix
Just like how many programming languages offer concept called namespace to avoid similar name conflict for classes, XML also has namespace concept.
Sample XML with namespace and prefix
|
1 2 3 4 5 6 7 |
<?xml version="1.0"?> <soapenv:Envelope xmlns:p1="http://someurl-1" xmlns:soapenv="http://schemas.xmlsoap.org/soap/envelope/"> <soapenv:Body> <p1:CustomerID>CID1</p1:CustomerID> <p1:CompanyName>some company name</p1:CompanyName> </soapenv:Body> </soapenv:Envelope> |
If you notice in above XML there are two important things. Under <soapenv:Envelope> element you have xmlns:p1 and xmlns:soapenv attributes. Basically these are two namespace declarations and they both use different prefix (i.e. p1 and soapenv). Once you define namespace prefix you can use in the declaring element or any child element under that node.
Syntax for XML Namespace declaration:
|
1 |
xmlns:yourprefix="url or unique identifier" |
Example – Using SSIS XML Generator Transform
Now lets look at how to generate XML using SSIS XML Generator Transform. This same technique can be used by SSIS Export XML Task.
- Download and Install SSIS PowerPack from here (Skip this if you already did)
- Open Visual Studio and create new SSIS Package
- Drag Data Flow Task from Control Flow Toolbox
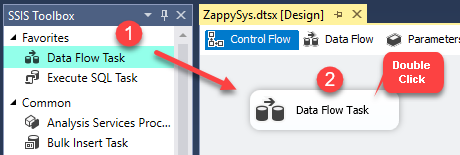
Dragging and dropping Data Flow Task into Control Flow
- Drag ZS Dummy Data Source (You can use any source you like. e.g. OLEDB Source)
- Change Template to Customer to create fake customer data. Click OK to save.
- Now drag and drop ZS XML Generator Transform
- Connect Source to XML Generator
- Double click XML Generator to configure.
- Go to Options tab and change following setting
- under Namespaces define two namespaces as below (Change p1 to desired prefix)
p1=http://someurl, soapenv=http://schemas.xmlsoap.org/soap/envelope/ - Change Root element name to Envelope
- Change Root Element Prefix to soapenv
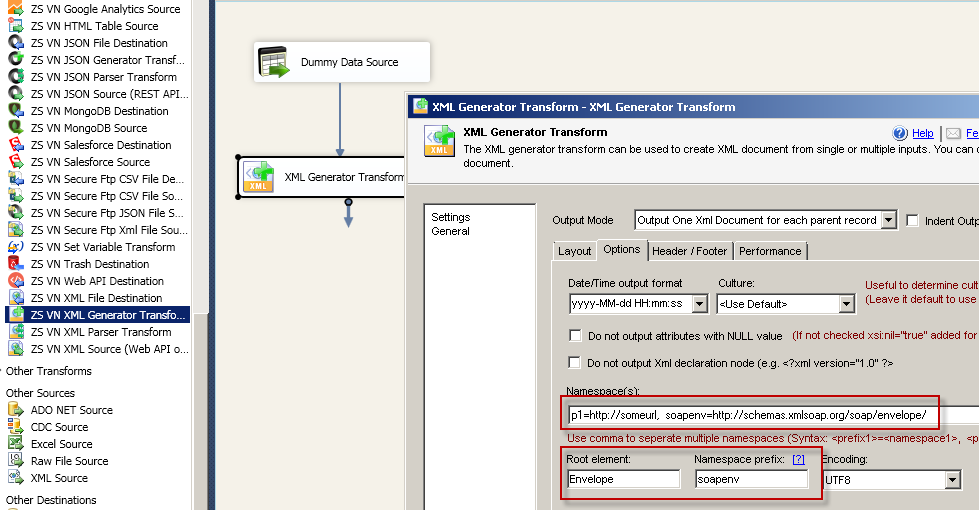
Configure SSIS XML Generator Transform – Define namespace and prefix , root element
- under Namespaces define two namespaces as below (Change p1 to desired prefix)
- Now go to layout tab and select dataset and click Edit
- Change default Row element name to Body and prefix to soapenv as below. Click OK to save
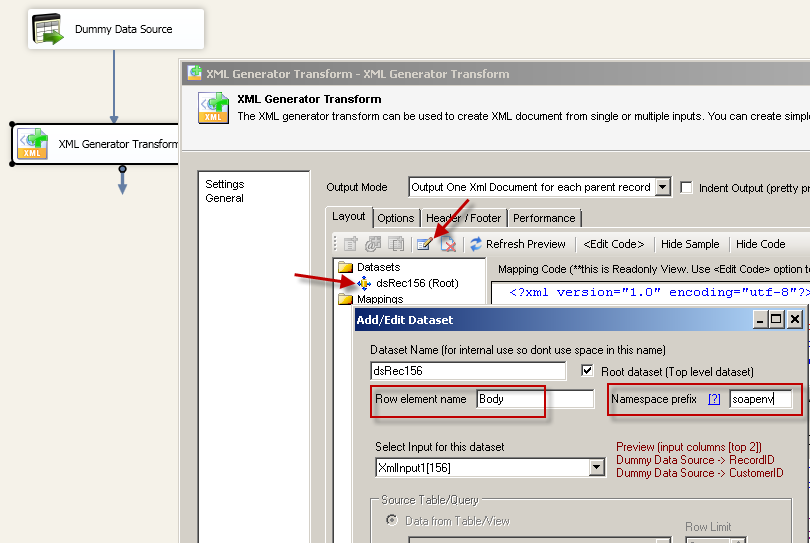
Configure SSIS XML Generator Transform – Change Row element name and prefix
- Now right click on Mappings folder and Click “Add Elements” or click in the toolbar icon.
- On the Add Elements dialog
- select Add multiple option.
- Change Prefix to p1 (or whatever you entered before on Options tab)
- Select columns you want to output in XML
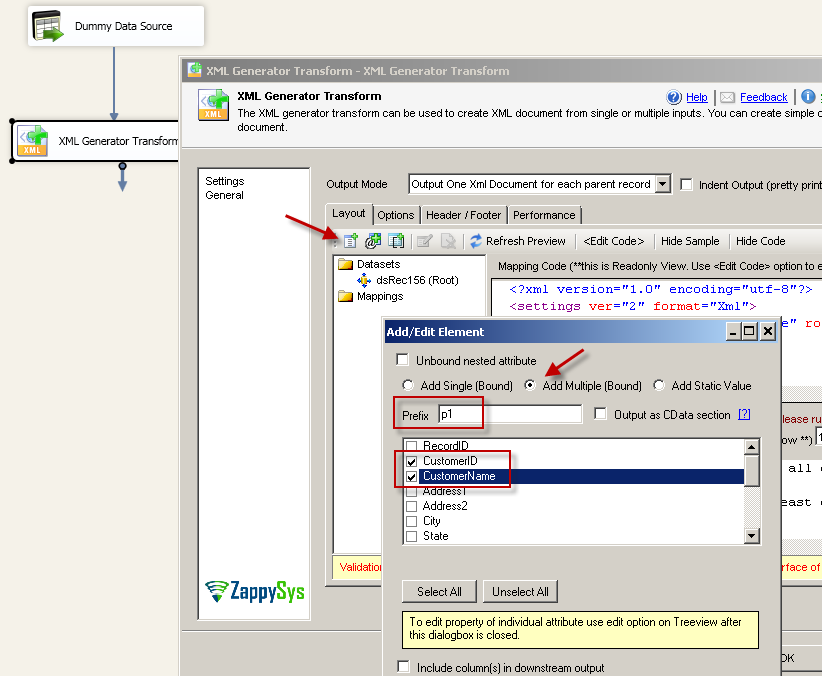
Configure SSIS XML Generator Transform – Add elements with prefix
- Now you will see preview update for your XML layout as below
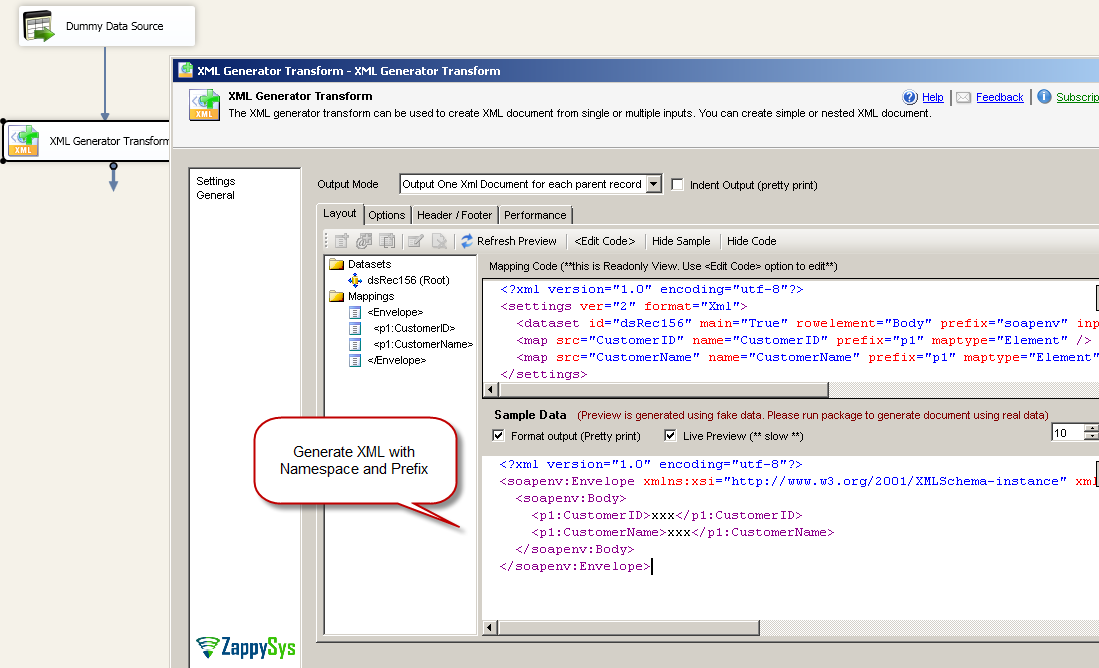
SSIS XML Generator Transform – Preview of complex XML using namespace and prefix
- Now attach your XML Generator Transform to some downstream component such as ZS Trash Destination and run the package
Conclusion
Using SSIS PowerPack you can generate complex XML in few clicks. Download SSIS PowerPack for FREE Trial and discover many more features.