Please visit this page to see all Pre-Configured ready to use API connectors which you can use in SSIS API Source / SSIS API Destination OR API ODBC Driver (for non-SSIS Apps such as Excel, Power BI, Informatica).
![]() Using REST API with SharePoint in SSIS is a common requirement to Administer SharePoint. SharePoint 365 is a nice Microsoft application in the Cloud used to share documents and collaborate with the company. You can have schedules, projects, documents and more shared using a Web platform.
Using REST API with SharePoint in SSIS is a common requirement to Administer SharePoint. SharePoint 365 is a nice Microsoft application in the Cloud used to share documents and collaborate with the company. You can have schedules, projects, documents and more shared using a Web platform.
In addition, it is a very useful tool that your company may need. It is also possible to automate, administer task using Rest API.
This article, we will learn how to create REST API queries to SharePoint 365 using the Microsoft Graph API using SSIS. To learn about other Office 365 REST API in SSIS check this article (Outlook, Onedrive, mail, Excel API).
Also, we will show our ZappySys SSIS PowerPack that includes very powerful tools to export SharePoint data from REST API to any other source.
 |
SSIS REST API Web Service Task |
 |
SSIS JSON Source (File, REST API, OData Connector) |
 |
SSIS JSON File Destination (Create JSON File) |
- First, you will need SSDT installed.
- Second, SSIS PowerPack installed.
- An Office 365 Account with SharePoint 365
Getting started
Microsoft included the Microsoft Graph to easily create API queries to different Microsoft components like OneDrive, Excel, Insights, Microsoft Team, Planner and more.
The Microsoft Graph is a gateway to access to 365 Data in an integrated platform. Let’s start with the Microsoft Graph Explorer and do some REST API queries to understand how to use REST API in SharePoint.
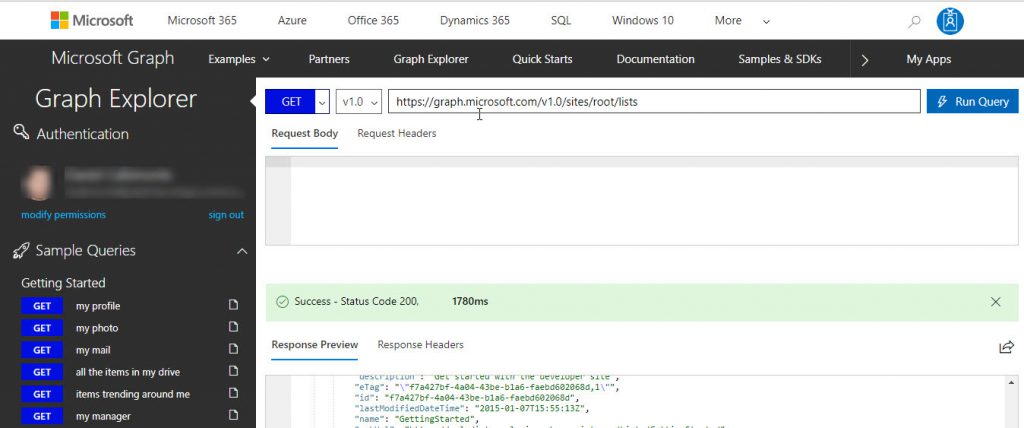
The best way to learn REST API with SharePoint 365 is to use the Graph Explorer. You can run API queries using the Graph Explorer and get your data. Here we will show how.
- First, we will go to the Graph Explorer and sign-in with your Office 365 Account.
- Secondly, in Run Query, you can specify your query, which will show SharePoint information.
- Let start with this link:
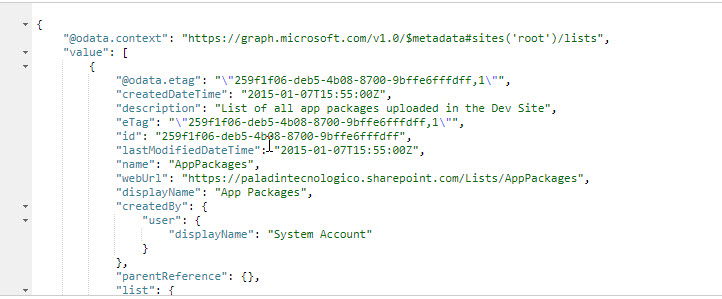
1https://graph.microsoft.com/v1.0/sites/root/lists - This shows properties about site resources. The response of the query is in JSON format:
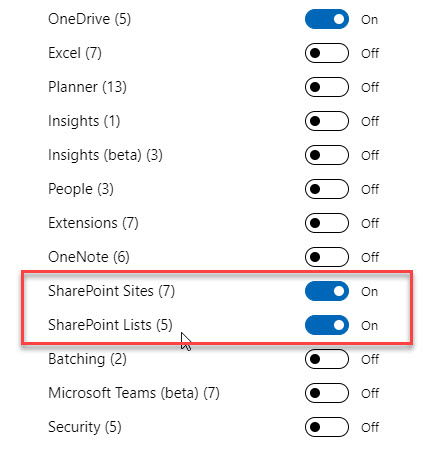
- Also, it is possible to enable examples for SharePoint Sites, SharePoint Lists, and other Microsoft technologies:
-
- First, to get the Data from the Microsoft Graph, we will sign in to create an application in the Azure Portal app registration.
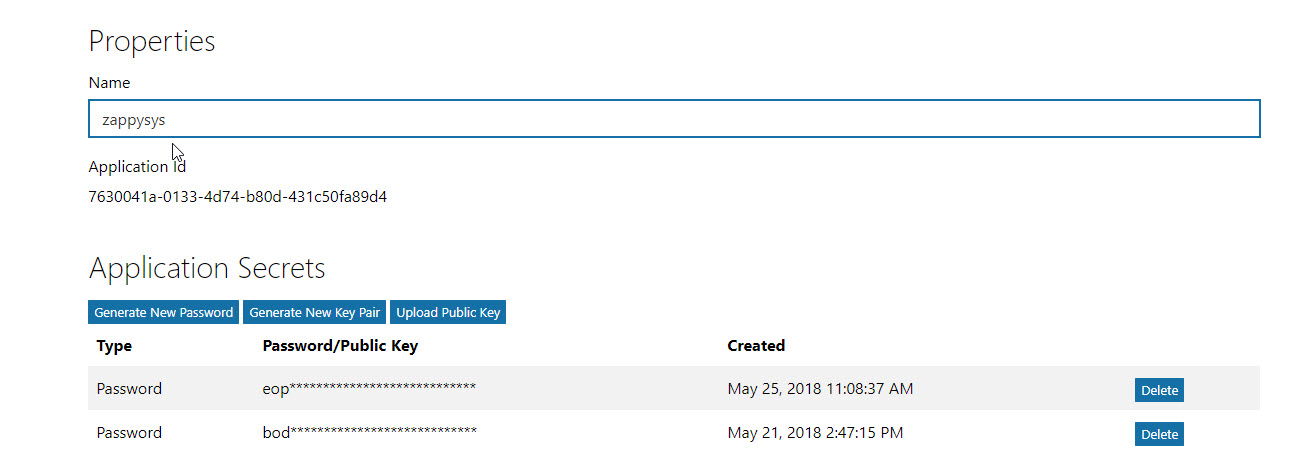
- Secondly, create a Microsoft Application. It will provide you an Application ID and a Password. For detailed steps about how to create a Microsoft Application, check our article related.
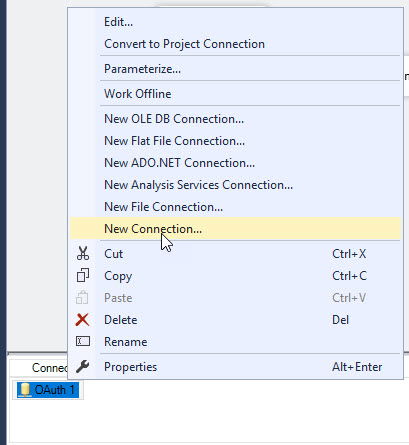
- Once that the application is created, go to SSDT or Visual Studio and create a new connection.
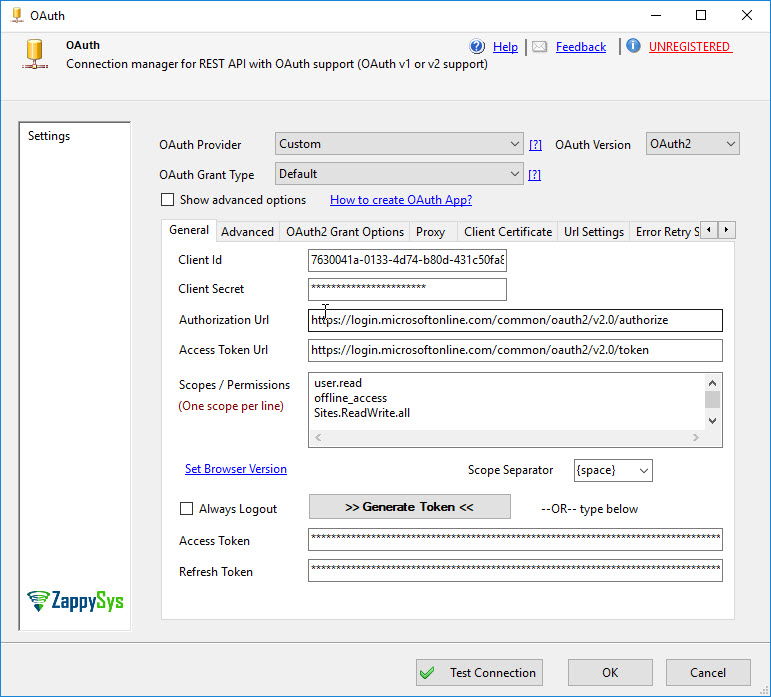
- Select the ZS-OAuth connection. Once selected, enter the Client ID (the Microsoft Graph Application ID), the client secret (application password).
- Add the Authorization URL is the following:
1https://login.microsoftonline.com/common/oauth2/v2.0/authorize - Also, include the Access token URL is the following:
1https://login.microsoftonline.com/common/oauth2/v2.0/token - The following permissions were applied in the example: User.Read
1234offline_accessSites.ReadWrite.allSites.Manage.AllSites.FullControl.AllNOTE: It is advised to include offline_access scope in order to get a Refresh Token and to be free of any token restrictions. - Once that the properties are entered, press the Generate token button:
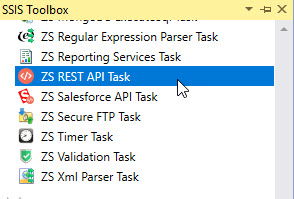
- Once that your OAuth Connection is created, we can use it in a REST API task. This task is included with the ZappySys SSIS PowerPack:
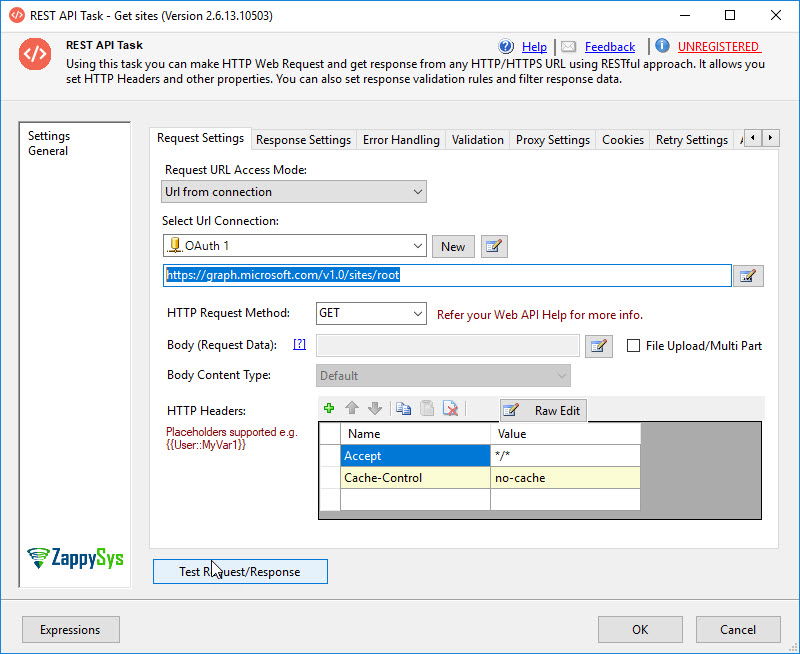
- Secondly, in the REST API Task, select the option URL from connection and select the OAuth connection created before. We will first use the following URL to see the list of site properties:
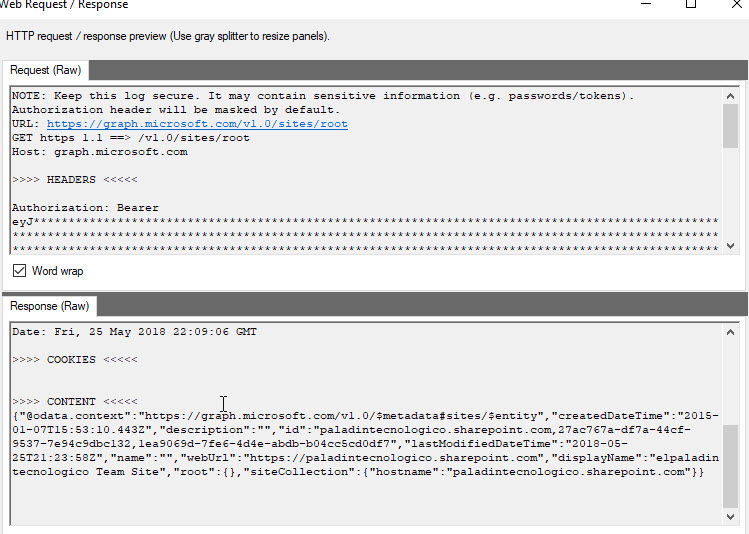
1https://graph.microsoft.com/v1.0/sites/root/lists - Also, press Test request/Response button to get the results of the query:
- The response will be in JSON format:
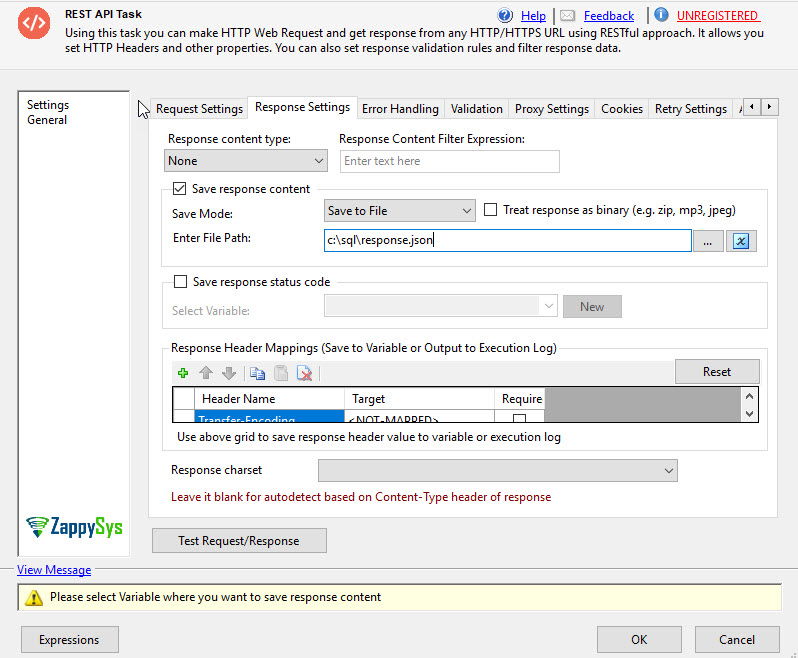
- Also, it is possible to store the results in a file or a variable:
- In Addition, you can run the following query to enumerate all the sites:
1https://graph.microsoft.com/beta/sites?select=siteCollection,webUrl&filter=siteCollection/root%20ne%20null - Also, to show the information on a specific site, the following query will be used:
1https://graph.microsoft.com/v1.0/sites/site-id - For example, if you site id is zappysys.sharepoint.com the URL would be the following:
1https://graph.microsoft.com/v1.0/sites/zappysys.sharepoint.com - To enumerate sites, the following example can be useful:
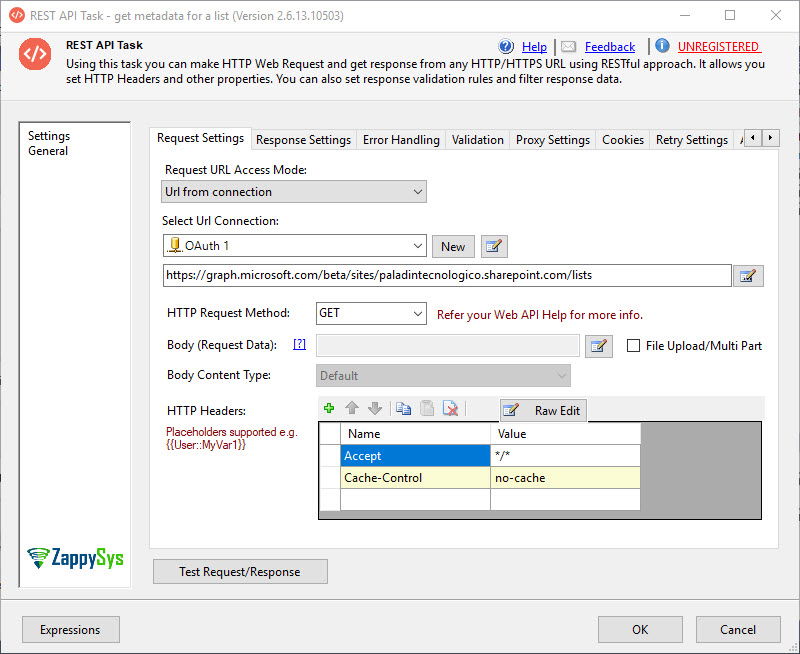
1https://graph.microsoft.com/beta/sites?select=siteCollection,webUrl&filter=siteCollection/root%20ne%20null - Also, to enumerate lists, you can use the following URL:
1https://graph.microsoft.com/beta/sites/zappysys.sharepoint.com/lists
We will learn how to show SharePoint lists using rest API.
In addition, you can get the list ids using this query:
|
1 |
https://graph.microsoft.com/beta/sites/zappysys.sharepoint.com/list |
- To get the list of ithems form a list use the following query:
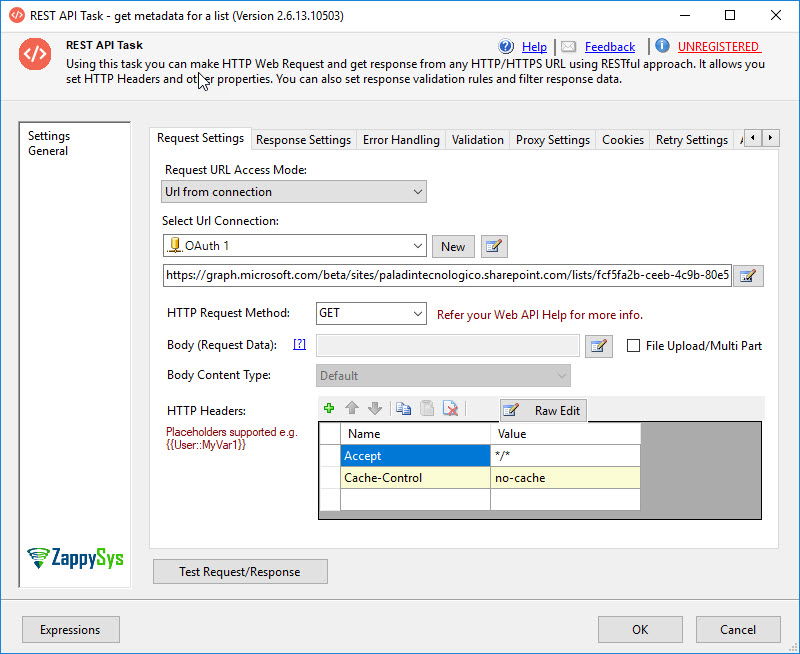
1https://graph.microsoft.com/beta/sites/zappysys.sharepoint.com/lists/mylist/items/ - Finally, to get metadata from a list, you can use the following query. To learn more how to import Sharepoint List into SQL Server use JSON / REST API Source.
|
1 |
https://graph.microsoft.com/beta/sites/zappysys.sharepoint.com/lists/fcf5fa2b-ceeb-4c9b-80e5-7bedd455fc9b |
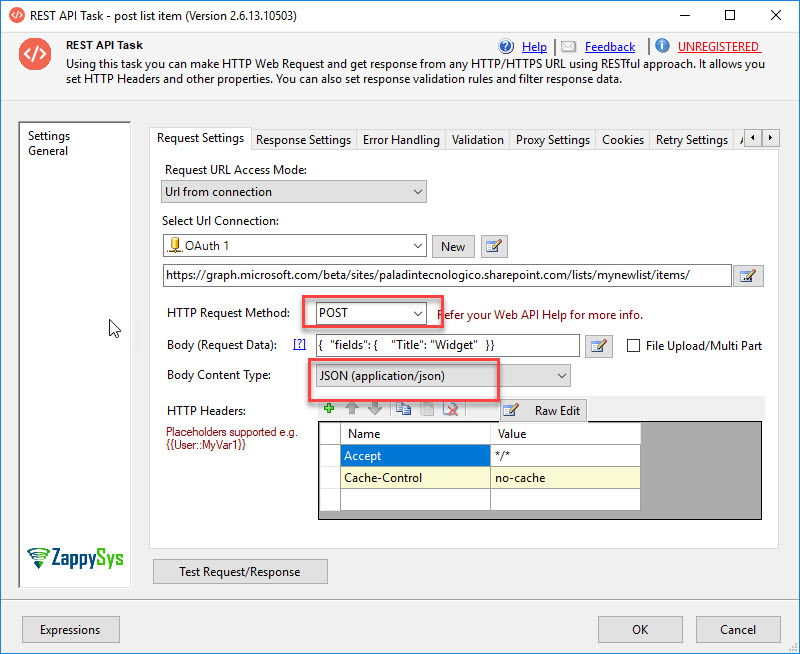
It is also possible to POST data using REST API. In the next example, we will create a new list in SharePoint 365 using REST API.
- First, in SSDT, use the REST API Task used previously and specify the following URL:
Where zappys.sharepoint.com is the site id and mynewlist is a new list created. Also, in the HTTP Request Method, use the POST method.1https://graph.microsoft.com/beta/sites/zappysys.sharepoint.com/lists/mynewlist/items/ - In addition, go to the Body Request, we will create a widget. We will use the following JSON data and make sure to select JSON (application/json) in the body:
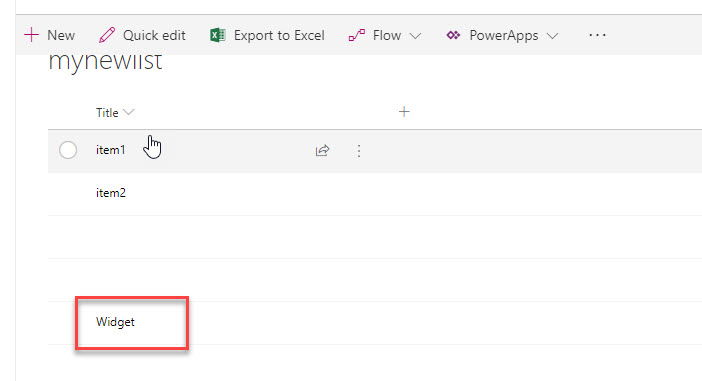
12345{"fields": {"Title": "Widget"}} - Finally, if everything is successful, you will be able to see the new item created:
We have a nice task named JSON Source used to get data from REST API or a JSON file and export to any source the results like SQL Server, Excel, a flat file, etc.
In this example, we will export data from the JSON Source to a JSON file using the JSON Destination Task.
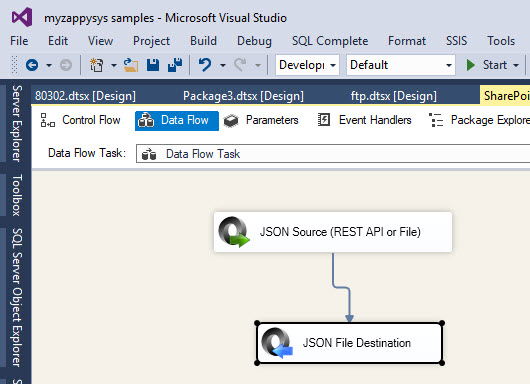
- First of all, we will use the Data Flow. Drag and drop the data flow to the design pane and double click to go to the Data Flow tab:
- Secondly, in the Data Flow tab, drag and drop the JSON Source, the JSON Destination and join them:
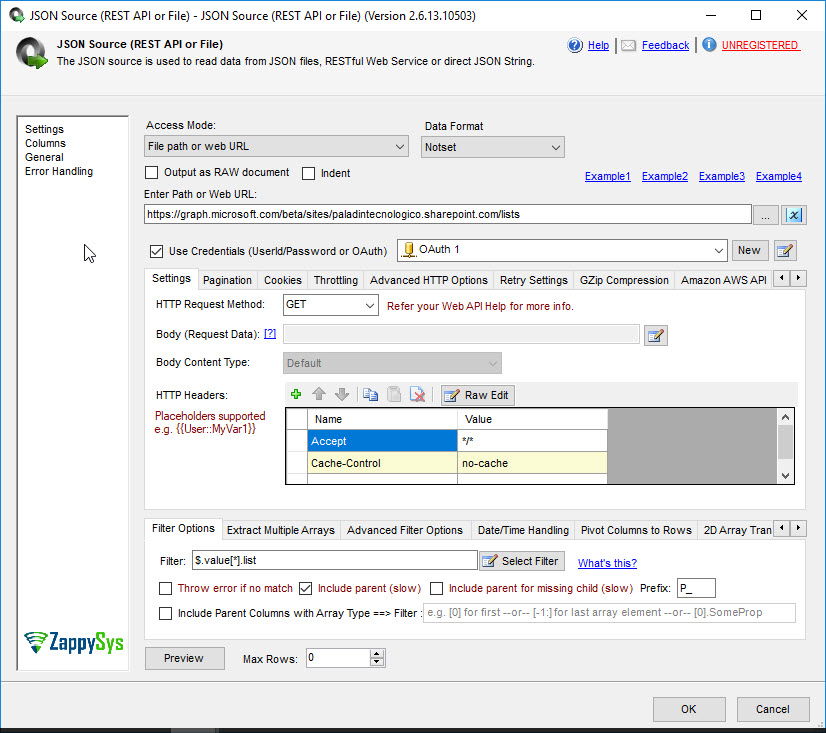
- In addition, in the JSON Source, we will check the option Use Credentials and select the OAuth connection created and used before.
- Enter Path or Web URL, we will use the following URL:
1https://graph.microsoft.com/beta/sites/zappysys.sharepoint.com/lists - Also, We will use the following filter:
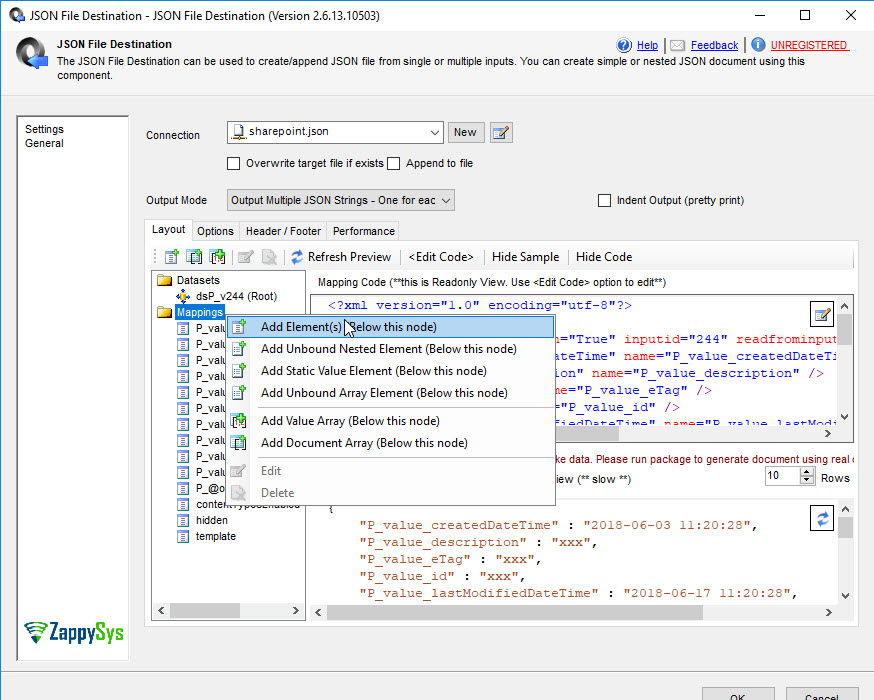
1$.value[*].list - In addition, go to JSON Destination task, select mappings and right click on add elements:
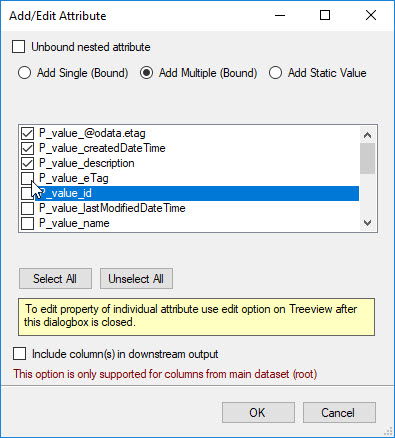
- Also, select the attributes:
- Finally, run the package to export the data.
To conclude, we can say that SharePoint 365 is a very popular application to share documents and information. With REST API it is possible to get data properties and administer SharePoint. We used the REST API, JSON Source to get and send information. If you want to try yourself, you can download our tools here.
References
- Get access on behalf of a user
- Working with SharePoint sites in Microsoft Graph
- About SSIS PowerPack

