Introduction to Sentiment Analysis in SSIS
 In this article, we will show how to do sentiment Analysis in SSIS of text using artificial intelligence. It is very important for a company to measure customer satisfaction. Today, it is possible to do sentiment and use artificial intelligence and detect if a customer liked or not our products based in on a comment?
Yes, it is. Now it is possible to analyze text and detect customer feelings. In this article, we will show how to detect the feelings of a comment, how to export the results in a Database and how to display some information based on the feelings.
In this article we will be using ZappySys SSIS PowerPack components and Microsoft Azure Service for Text Analytics (i.e. Cognitive Services) to make things work:
 |
SSIS REST API Web Service Task |
 |
SSIS JSON Source (File, REST API, OData Connector) |
 |
SSIS JSON File Destination (Create JSON File) |
 |
SSIS Export JSON File Task |
 |
SSIS Logging Task (FREE) |
Requirements
- In order to start, we will use SSDT with SQL Server Integration Services(SSIS). SSIS is a Microsoft Powerful tool to import, export data and automate tasks.
- Secondly, ZappySys SSIS PowerPack, which is a powerful tool to make REST API calls and other tools that we will use to get data and analyze data and export the data.
- Finally, an Azure Account will be required to access the Text Analytics Services.
Getting started
In order to start with the Sentiment Analysis in SSIS, we will show first how to analyze text and detect the customer feelings. If it is a positive feeling, the value will be 1 or close to 1. If the feeling is negative, the value will be 0 or close to 0. Let’s start with a simple example of 2 real customer reviews:
First review:
|
1 2 3 4 |
I looked everywhere for a product that could easily integrate to a specific web portal backend API via JSON, and after many attempts, the ZappySys product was the only solution that could give me all the options I needed in a quick & clean interface within SSIS. Coupled with some great tech support and customer support, I would definitely recommend ZappySys SSIS PowerPack... |
Second review
|
1 2 3 |
The responsiveness of your support staff during the evaluation period really has been excellent. I’ve contacted them a few times with queries specific to the scenario I am working with and they have answered straight away via chat and provide exactly the detailed technical input required to progress... |
In order to detect the feelings, we will use the Microsoft Cognitive Services. Microsoft included in Azure pretty nice services to Analyze text, translate text, detect sentiments, language understanding, and several other services. In this example, we will use the sentiment detector service.
Create a service for Sentiment Analysis in SSIS using Azure
- First, log in to the Azure Portal.
- Secondly, in the Portal, press the + green icon and select AI+ Machine Learning and select Text Analysis:
Also, enter a name, a location and select a resource group and a pricing Tier.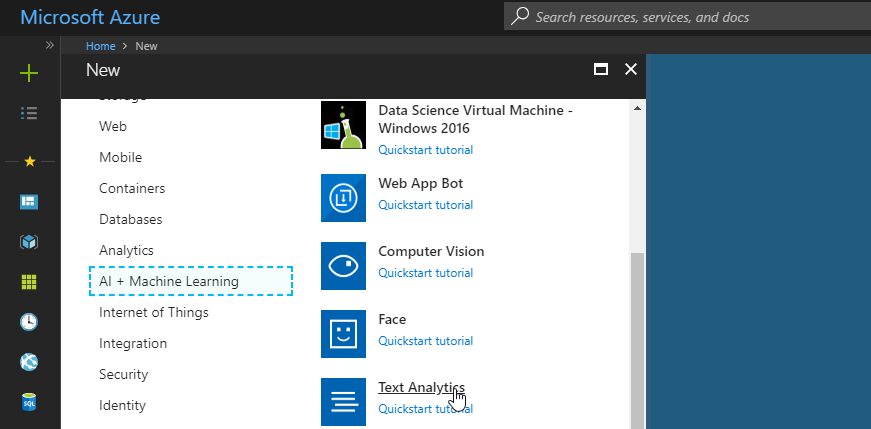
Add text Analytics
- Finally, check the endpoints and the keys. We will use that information to connect with REST API in SSIS.
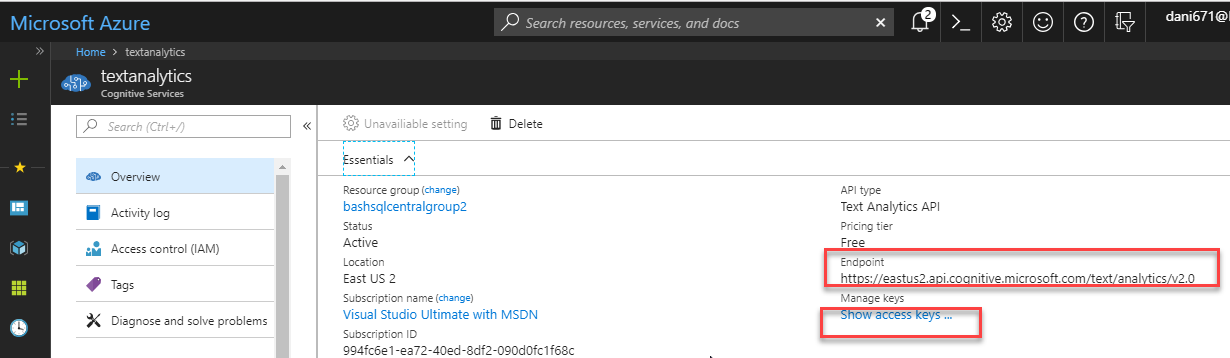
Endpoint in Azure
Using REST API for Sentiment Analysis in SSIS
- First, we want to detect the feelings. To do it, we will use the REST API task included with the ZappySys SSIS PowerPack.
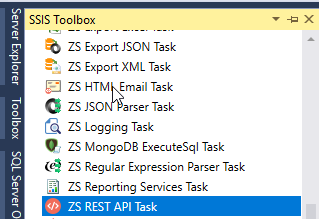
SSIS Rest API Task
- Secondly, we will specify the URL and in the Raw Edit we will add the key to enter. The URL is the Endpoint that we had in the Azure Portal. It should be something like this:
1https://eastus2.api.cognitive.microsoft.com/text/analytics/v2.0/sentiment - Also, enter the key that can be obtained in the Azure Portal. It will be something like this in the HTTP Header:
1Ocp-Apim-Subscription-Key: 0e99402669b54beaa2af705d6c - In addition, in the Body Request, we will create something like the following:
1234567891011121314{"documents": [{"language": "en","id": "1","text": "I looked everywhere for a product that could easily integrate to a specific web portal backend api via JSON, and after many attempts, the ZappySys product was the only solution that could give me all the options I needed in a quick & clean interface within SSIS."},{"language": " en ","id": " 2 ","text": "The responsiveness of your support staff during the evaluation period really has been excellent.I’ve contacted them a few times with queries specific to the scenario I am working with and they have answered straight away via chat and provide exactly the detailed technical input required to progress."}]} - In addition, the JSON text includes the ID (1 and 2), which is just an identifier. The language is to specify the language of the text. Currently it supports English (en), Spanish (es), Portuguese from Portugal (pt-PT) and other languages. For a complete list, you can check this link:
1https://docs.microsoft.com/en-us/azure/cognitive-services/text-analytics/text-analytics-supported-languages - The REST API tasks should look like this:
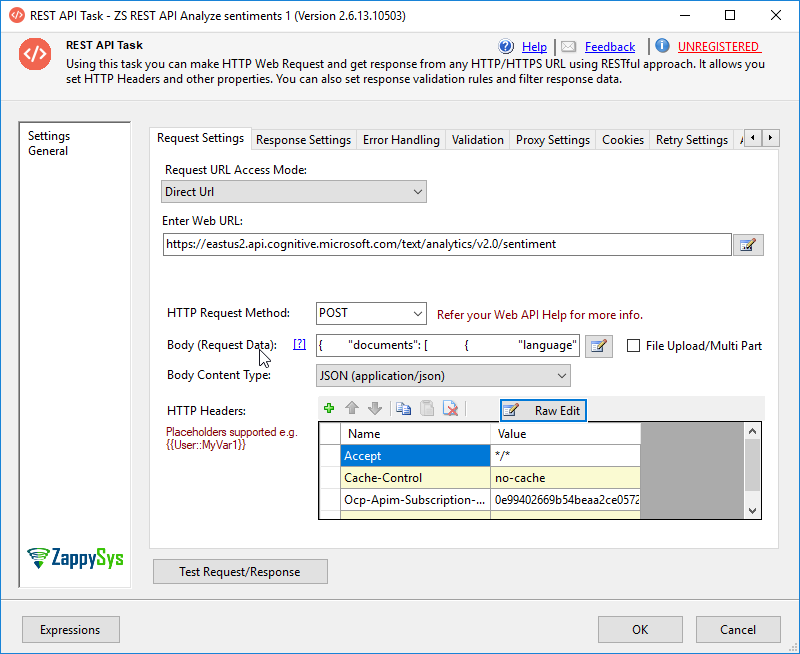
SSIS REST API connection to Azure Cognitive services
- Also, when we press the Test Request/Response button, we can see the score of the comments:

Score detecting feelings
- Finally, the scores are 0.84 and 0.789. They are closer to 1, so they are 2 positive comments. So, we could read comments and detect if the feelings are positive or negative. Also, it is possible to store the results in a file or in a variable:
SSIS save JSON result to a variable
How to detect Sentiment Analysis in SSIS using a database
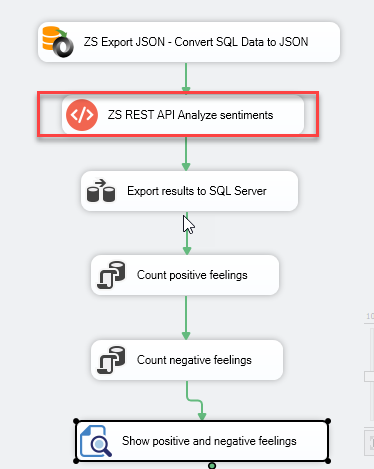
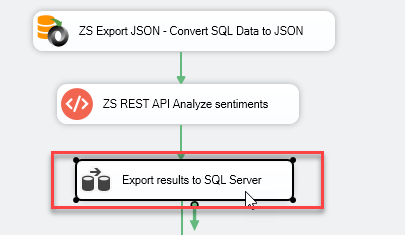
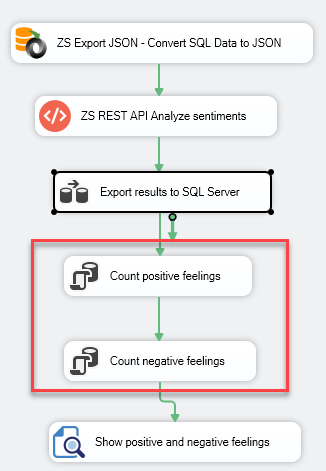
In the previous example, we show how to detect the sentiments of text. The text must be in JSON format, so it is necessary to convert the data from JSON. In this new example, we will show how to convert comments from an SQL Server database to JSON and then we will learn how to export the scores of the sentiments to SQL Server and count how many users are happy and unhappy. The package will have the following tasks:

SSIS package to count positive and negative sentiments using AI
We will first show how to export reviews stored in an SQL Server database to a JSON format necessary to be read by REST API.
Export SQL Server data to JSON format
- First of all, we will use a table named comments. The code to create the table with data is the following:
The table is this one:12345678910111213141516CREATE TABLE [dbo].[comment]([comments] [nchar](2000) NULL,[id] [smallint] IDENTITY(1,1) NOT NULL,CONSTRAINT [PK_comment] PRIMARY KEY CLUSTERED([id] ASC)WITH (PAD_INDEX = OFF, STATISTICS_NORECOMPUTE = OFF, IGNORE_DUP_KEY = OFF, ALLOW_ROW_LOCKS = ON, ALLOW_PAGE_LOCKS = ON) ON [PRIMARY]) ON [PRIMARY]GOSET IDENTITY_INSERT [dbo].[comment] ONINSERT [dbo].[comment] ([comments], [id]) VALUES (N'Great product. I love it. ', 1)INSERT [dbo].[comment] ([comments], [id]) VALUES (N'It is not bad. I will use it. ', 2)INSERT [dbo].[comment] ([comments], [id]) VALUES (N'The product is wonderful ', 3)INSERT [dbo].[comment] ([comments], [id]) VALUES (N'I hate this product. I do not know why is it online ', 4)SET IDENTITY_INSERT [dbo].[comment] OFF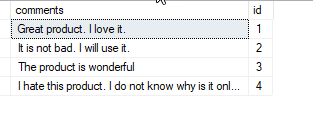
Sample table to detect feelings
- Secondly, we want to convert this SQL table to JSON like this to send the data to our Azure REST API text analytics service:
1234567891011121314151617181920{"documents": [{"id": 1,"text": "Great product. I love it. "},{"id": 2,"text": "It is not bad. I will use it. "},{"id": 3,"text": "The product is wonderful "},{"id": 4,"text": "I hate this product. I do not know why is it online "}]} - Also, will use the Export JSON Task include in the ZappySys SSIS PowerPack.
First, in Source, enter your server name, connection, and SQL Server Database and check the Use Custom Layout option: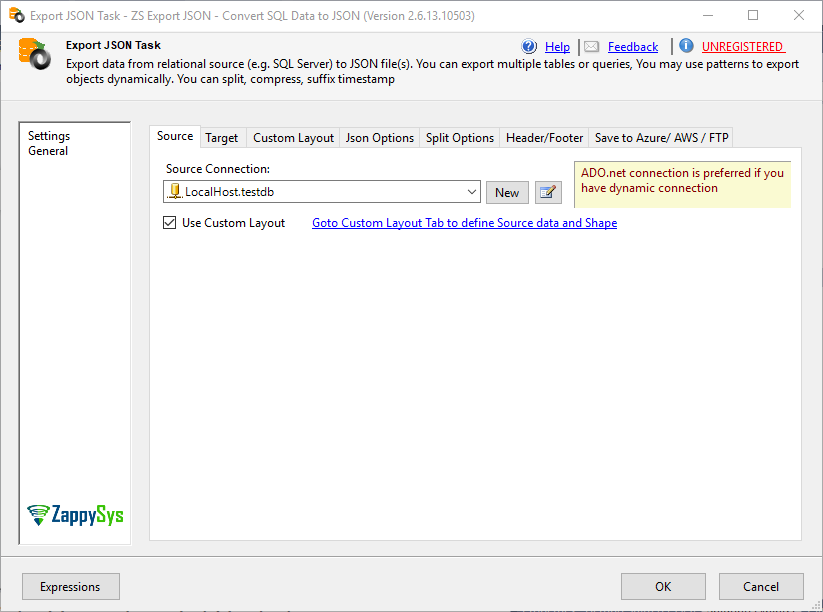
SSIS export to JSON task
- Check the Single Dataset Array option and on Dataset, right click and select Add Dataset:
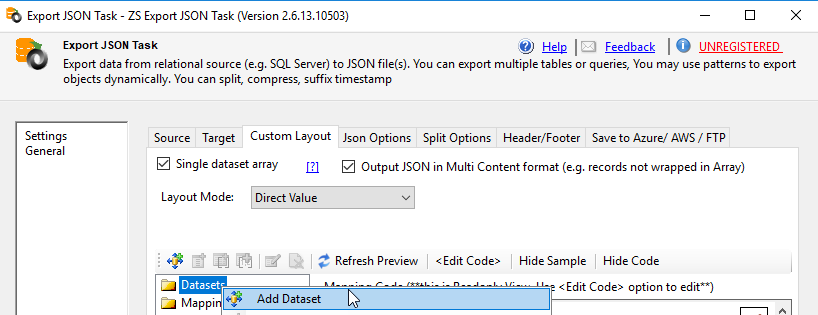
Add JSON data set
- Also, write a DataSet name, select the SQL Server database connection and select the table comment that contains the comments to export to JSON. You can export data from Tables, Views, queries and stored procedures with parameters using our Export JSON Task:
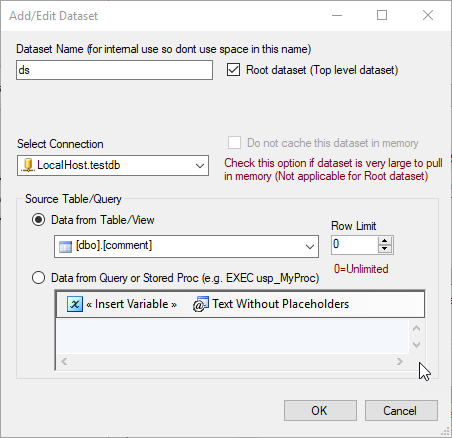
SSIS get tables views to convert to JSON
- In addition, right-click Mapping and select Add Document Array:
Next, add an Element name and press OK:
SSIS add array document
- Next, right-click documents and select Add Elements:
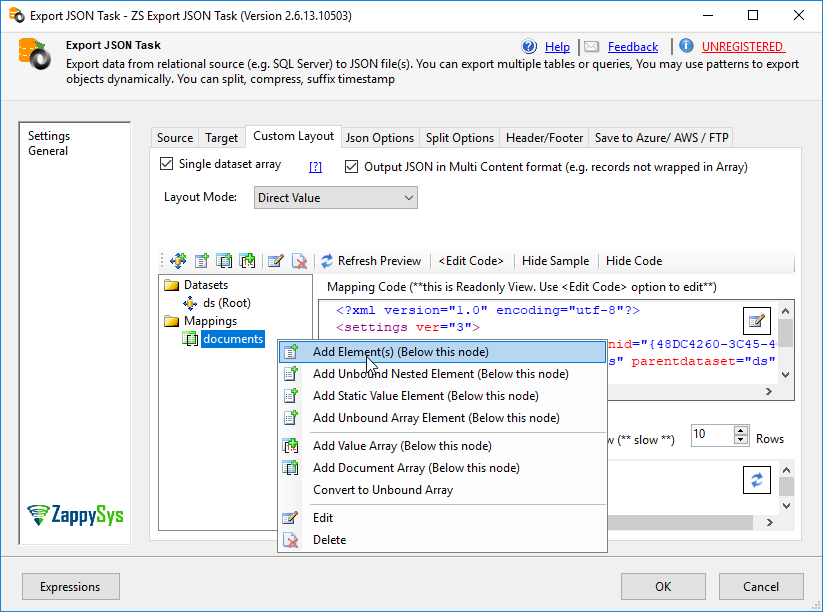
Add JSON element in SSIS
- Also, add the comments and the id:
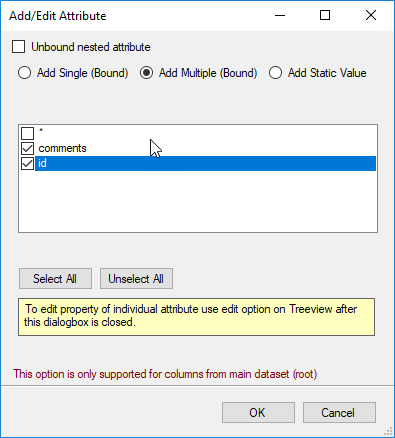
JSON elements added in SSIS
- The format displayed will be like this:
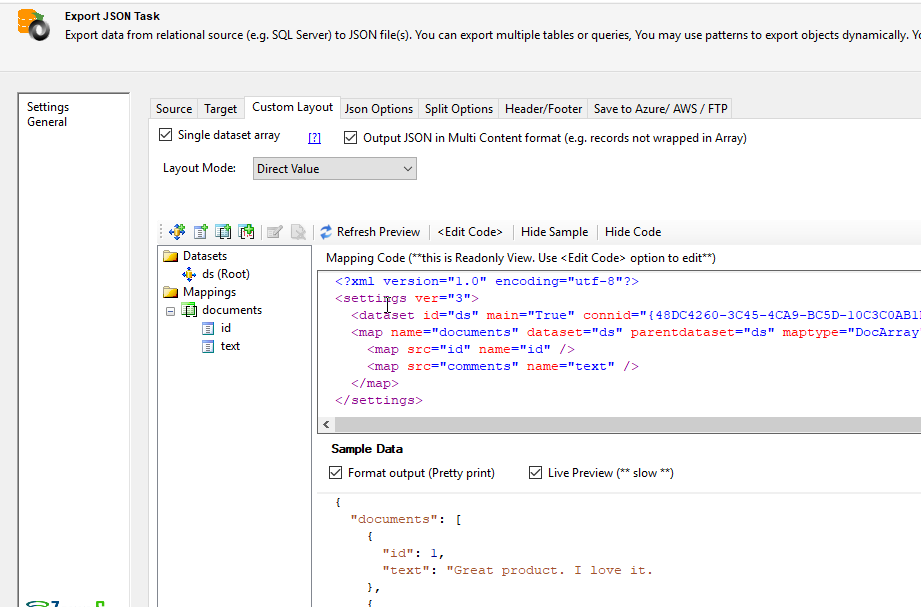
SSIS SQL Server data in JSON Format
- Another thing that you have to do is go to the Target tab, the target location will be a variable and we will store the JSON in a variable named jsonvar:
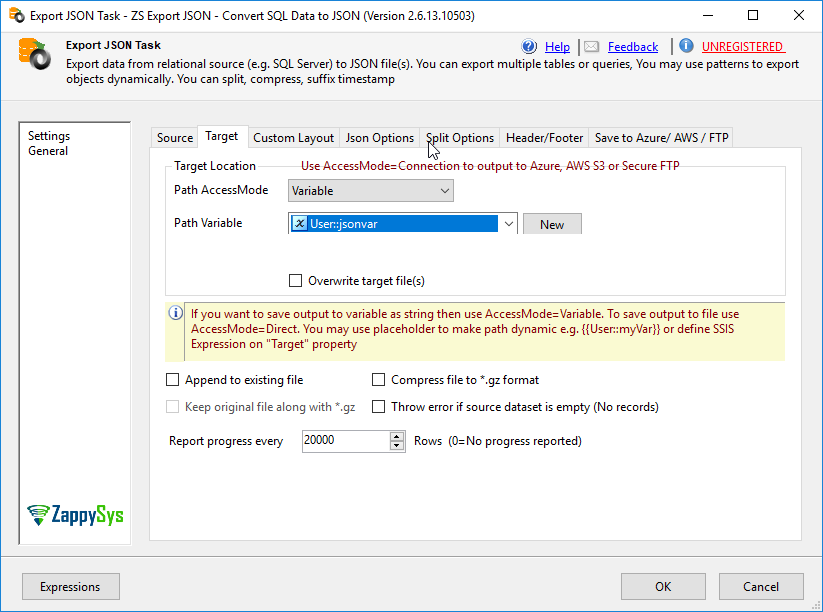
Save JSON into variable
How to get the feelings using REST API
In the previous section, we exported data from SQL Server to a JSON format and stored the data in an SSIS variable named jsonvar. In this new section, we will call the API to get Analyze the text and detect if the comments are positive or negative.
REST API detect feelings SSIS
- First, we will use the REST API to invoke the Azure Analytics Text services. We will use the Web URL of the Create a service to Analyze text using Azure section at the beginning of the article and in the HTTP Headers, go Raw Edit and specify the Ocp-Apim-Subscription key. You can also see this information in the Analyze test using Azure section.
- Secondly, in the body (Request Data), we will use the variable with JSON results generated by the Export to JSON task in the previous section:
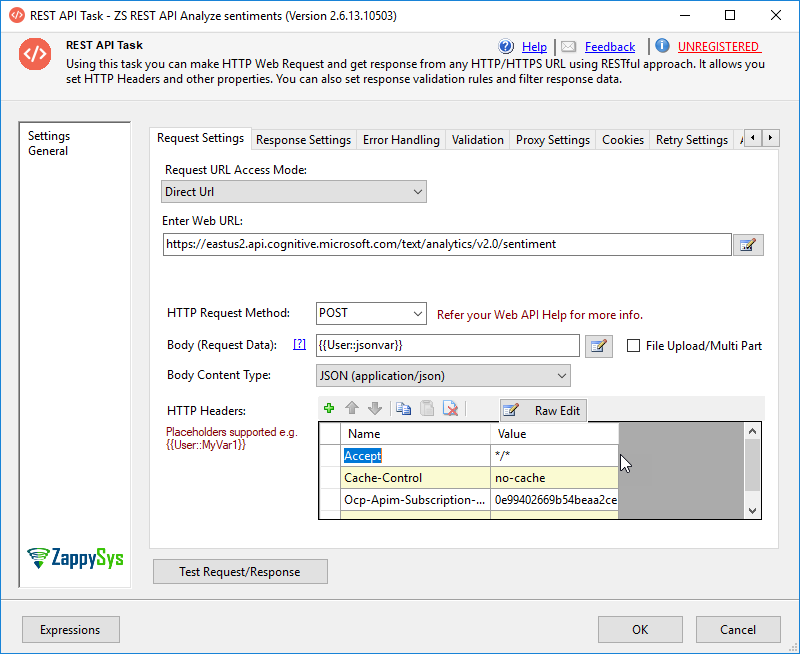
Header information REST API
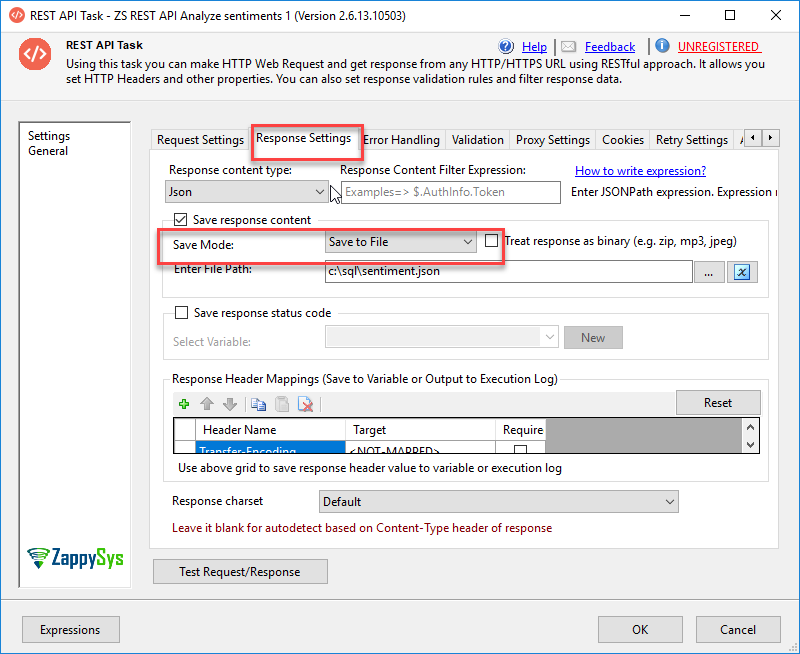
- Finally, you will store the results in a file named sentiment.json using the Response Settings tab:
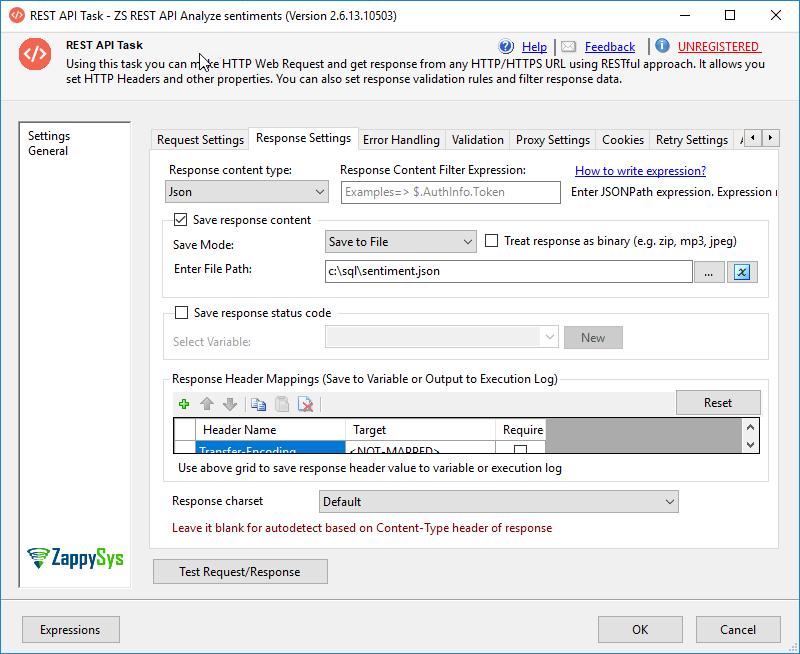
Save JSON results into a file in SSIS
Export JSON results to SQL Server
- We have a file with the Sentiments in a file names sentiments.json and we want to export the JSON file to SQL Server to count the values and do some queries. To do that, we will use the Data Flow task:
Export from JSON to SQL in SSIS
- In the Data Flow task, use the JSON Source and join to the OLE DB Destination. The JSON Source will read our JSON file and the OLE DB Destination will connect to SQL Server:
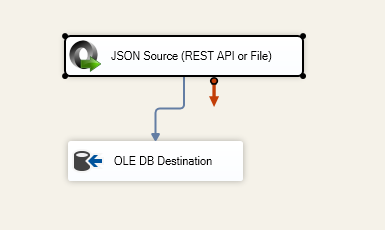
The JSON Source in SSIS
- Also, in JSON Source task, enter the path of the JSON file. In Filter write the following filter:
1$.documents[*]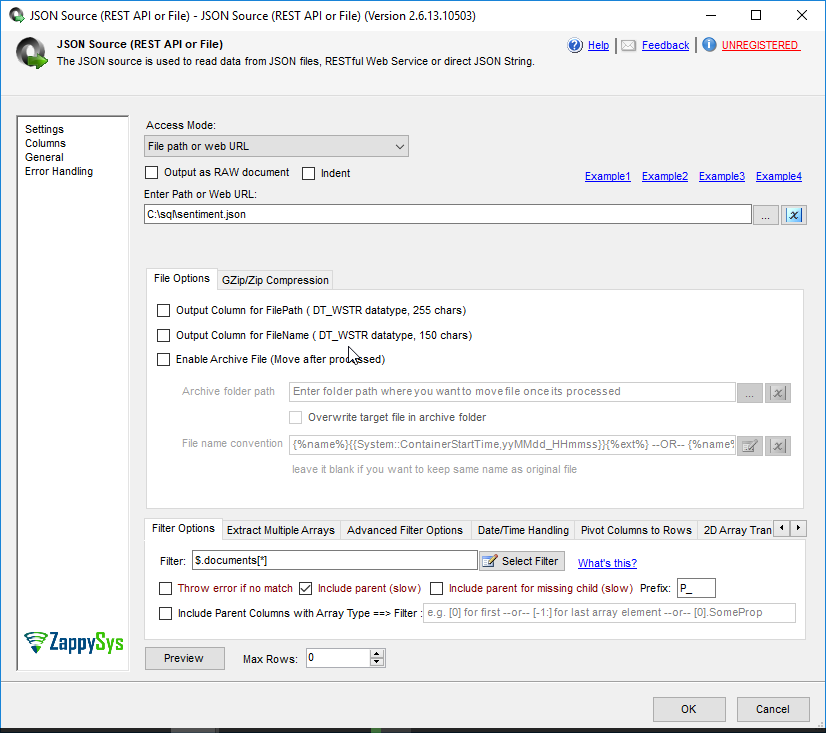
Add filters to JSON data
- Also, we will create the following table named feeling to store the JSON results to SQL Server and use the OLEDB Destination to store JSON values into the SQL table. In this example, the scores of the feelings:
1234CREATE TABLE [dbo].[Feeling]([score][float] NULL,[id] [int] NULL )ON [PRIMARY] GO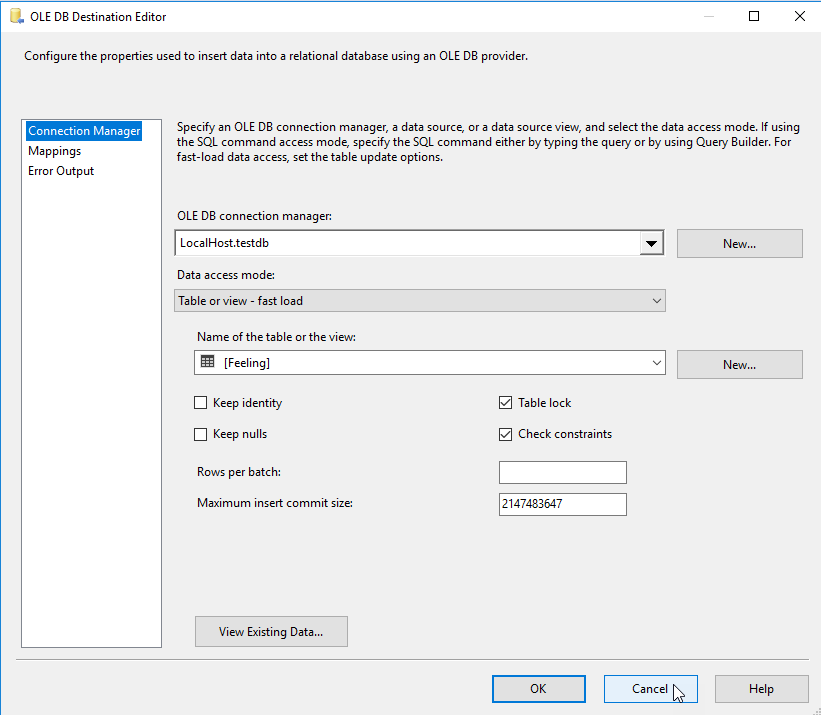
SQL Server SSIS Oledb
Count positive and negative feelings in SSIS
We stored the feelings in an SQL Server table. Now, we need to count them and then publish the values into variables.
Store T-SQL results into
- In order to start, we will create two SSIS variables. One named positive and another negative of type int16. We will store the positive feelings in one variable and negative feelings in another.
- Secondly, we will use the Execute SQL Task. In connection, you must provide your SQL Server name, database, credentials. Go to Result Set and select single row.
- In SQLStatement, write the following query to count the positive feelings:
123select count(score) as positivefrom dbo.feelingwhere score>0.5
Save T-SQL count result in a variable
- Also, in result set specify 0 in Result Name and select the Positive variable.
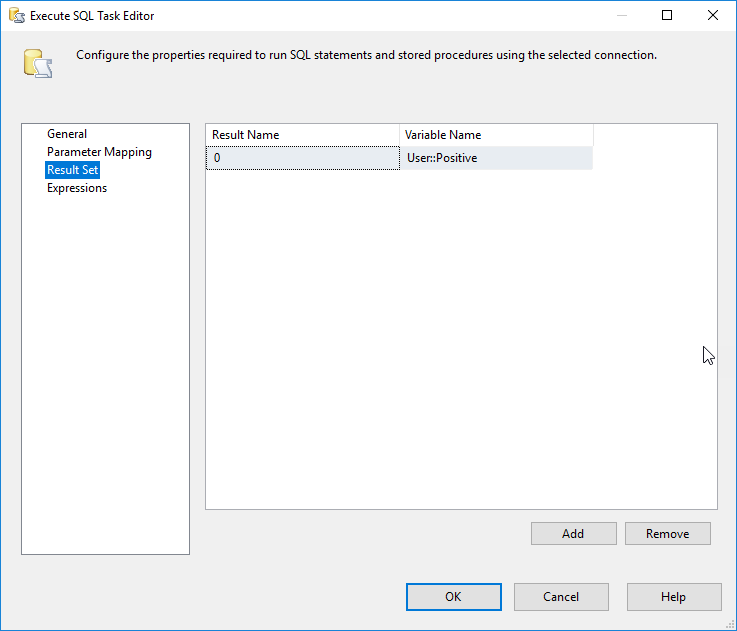
Handle SSIS Results Set
- In addition, to count the negative feeling we will use the same Execute SQL Task with the following query and store the results in the negative SSIS variable:
123select count(score) as negativefrom dbo.feelingwhere score<0.5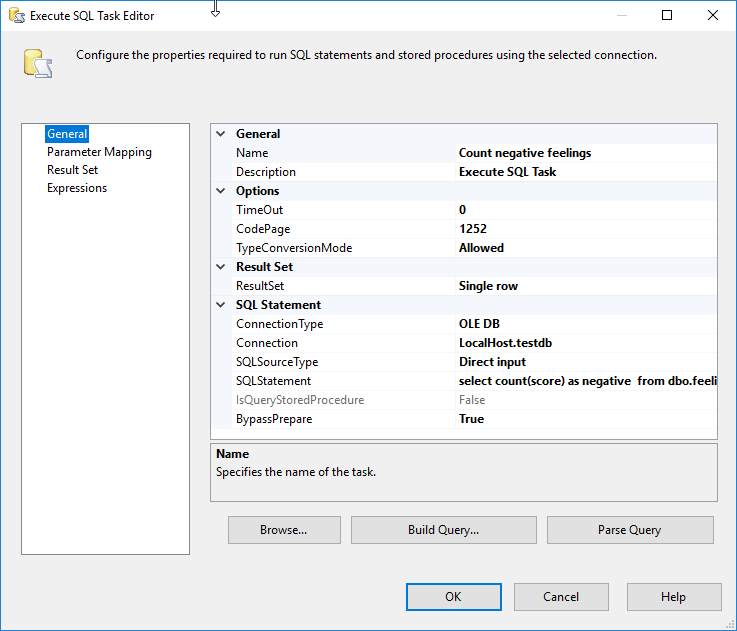
Store number of negative sentiments into SSIS variable
- Finally, in Result Set, Assign the values to the negative variable:
Show positive and negative feelings using an SSIS variable
Finally, we will show the number of positive and negative feelings using the ZS Logging Task. This task allows storing variable values in a File, the Log file a messagebox. The article will show the value in the Output log.
- In order to start, in the ZS Logging task use the ExecutionLog Log mode. We will send the following text to show the variables in the output:
12Positive feelings: {{User::Positive}}.Negative feelings: {{User::Negative}}
SSIS variables in output
- Finally, if you run the package in the Visual Studio output, you will be able to see the that the positive feelings are 3 and negative feelings 1:

Show variables in output
Conclusion about Sentiment Analysis in SSIS
In this article, we learned how to use text analytics using Microsoft Azure Services. Specifically, we use a sentiment detector to detect if sentiments are positive or negative using Artificial Intelligence.
Also, to detect that, we need to convert the text to JSON format. We learn how to convert data from an SQL Server database to JSON using our SSIS Export to JSON task. We also used our REST API to invoke the Microsoft Text Analytic services in Azure to detect the sentiments of our data.
Finally, we use the JSON Source to export the information to SQL Server and count the positive and negative sentiments.
To conclude, If you want to try yourself, you can download the ZappySys SSIS PowerPack here.
References to Sentiment Analysis in SSIS
Finally, for more information about Text Analytics, JSON conversion, refer to these links: