Introduction
Please visit this page to see all Pre-Configured ready to use API connectors which you can use in SSIS API Source / SSIS API Destination OR API ODBC Driver (for non-SSIS Apps such as Excel, Power BI, Informatica).
 In our previous blog we saw how to import rest api in Power BI. We recommend you go through that article first. In this article, we will learn how to Import JIRA data in Power BI. For that, we will create a successful HTML Connection then request for reading JIRA data and loading into Power BI
Power BI is a very popular Business Analytic tool used to get business information. It is very popular because it is easy to install, simple to learn and very intuitive. Also, REST API is very popular these days and we wanted to show you a way to integrate them in Power BI with the help of the ZappySys ODBC PowerPack. This software includes powerful drivers to query REST API URL, Local XML / JSON files and XML SOAP Web Service with simple SQL queries.
In nutshell, this post will focus on how to call JIRA API using Zappysys ODBC PowerPack. So let’s get started
Prerequisite
- First, you will need to have our ZappySys ODBC Power Pack.
- In the second place, you will need to have internet access.
- On third place, Power BI Desktop (FREE) installed.
- JIRA Atlassian account.
What is JIRA
JIRA is Atlassian’s popular project- and issue-tracking platform used by development and technical support teams to get more work done and faster.
It combines:
issue tracking – a software application that allows to record and follow the progress of every problem or “issue” that user identifies until the problem is resolved.
agile project management – an iterative approach to planning and guiding project processes. customizable workflow, and a pluggable integration – integrates with Freshdesk, GitHub, Zendesk, Zapbook, Asana and so on.
Getting Started
In order to start, we will show several examples. ZappySys ODBC PowerPack includes the ZappySys JSON Driver that will help you to call JIRA API, retrieve various data from JIRA and load that data in Power BI. To learn more about JIRA API check this help file.
Generate API Token
To access JIRA data using REST API call you need to generate an API Token in your Atlassian account. Follow the steps mentioned below to generate API Token:- you can directly login to the JIRA Atlassian Cloud site with your credentials, and redirect to the JIRA Atlassian Cloud Account's Profile Page for generating an API Token.
- Click API tokens, then Create API token.
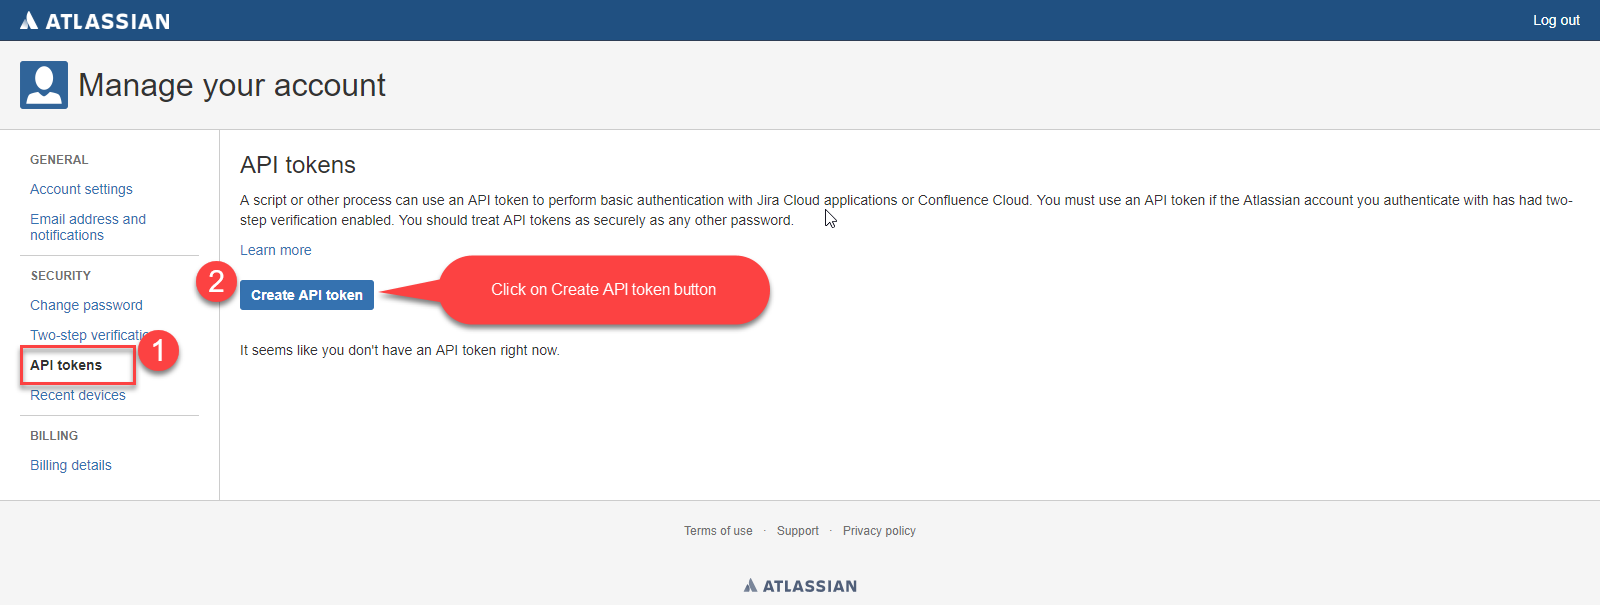
Generate API Token - Step - 1
- Create API Token - Give Label name to your API token which you are generating now
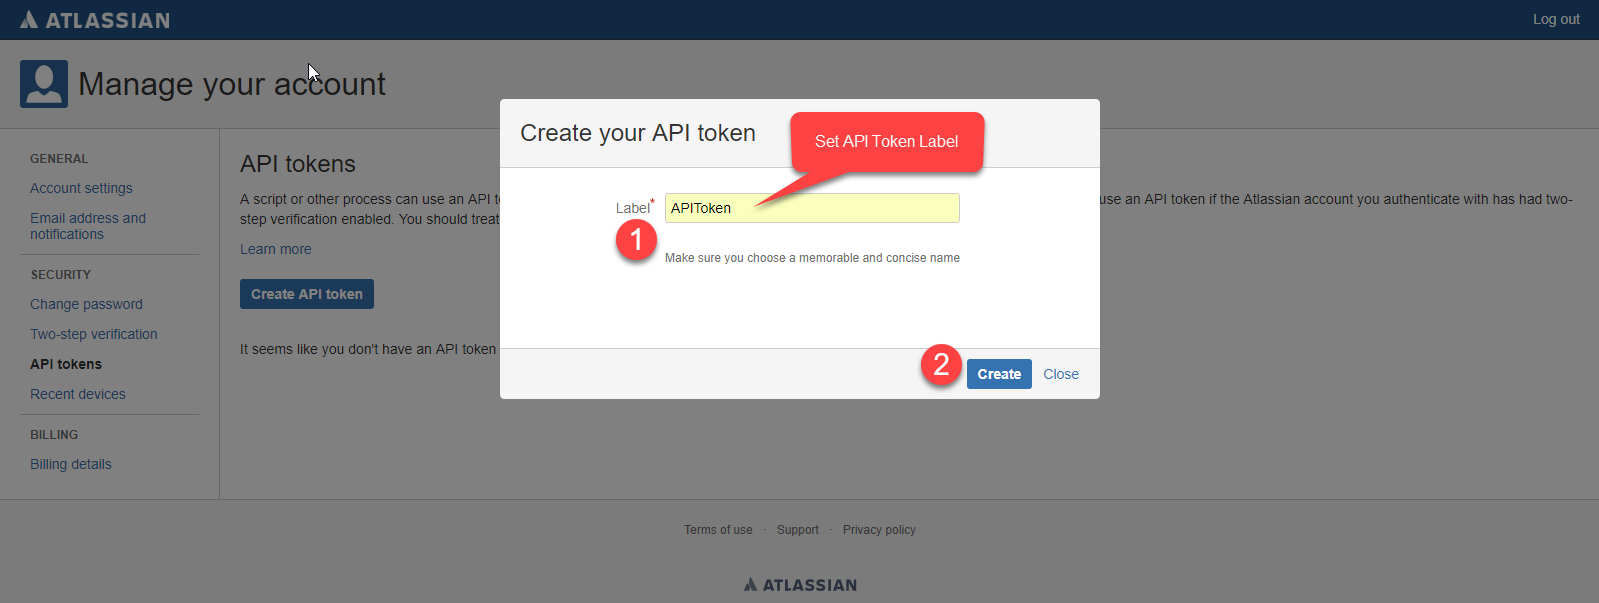
Generate API Token - Step - 2
- Use Copy to the clipboard, and paste the token into your or elsewhere:
Note: * For security reasons it isn't possible to view the token after closing the creation dialog; if necessary, create a new token. * You should store the token securely, just as for any password.

Generate API Token - Step - 3
- If you forgot API token, then you can Revoke your old API token and create new API token OR you can create multiple API tokens too.

Generate API token - Step - 4
About JIRA REST API
JIRA On-premises and Cloud Version both offers REST API. Here are some examples of JIRA REST API. For reading JIRA REST API data we will use JIRA REST API Search method which returns data in JSON format. Search API support use of JQL Syntax to filter issues. If you don't specify JQL parameters in /search endpoint then all issues will be returned. Check this link to learn how to build JQL for JIRA REST API Call. If you don't have JIRA hosted instance yet but still want to try REST API Examples on public JIRA Server then try below URL (Its official JIRA site which lists their own issues). For example, try to copy below URL in a browser and hit enter.https://jira.atlassian.com/rest/api/2/search?jql=project=JRASERVER
Step-by-Step: Import JIRA data using REST API
Now once you have API token in the JIRA Atlassian Cloud website we can move to ODBC JSON Driver Configuration Part. For this example purpose you can use the following URL:https://YOUR-DOMAIN.atlassian.net/rest/api/2/search?startAt=0&maxResults=100&jql=project=MYPROJECThence, your-domain is your Atlassian Cloud account’s domain name (we are using zappysys2.atlassian.net). Therefore startAt is the index of the first item returned in the page of results. And another maxResults is the maximum number of items that can be returned per page. Above all, each API endpoint may have a different limit for the number of items returned, and these limits may change without notice. (For more See this JIRA API Documentation for Pagination)
Create ODBC – Zappysys JSON Driver Data Source
- To do this, we will first open the ODBC Data Source : Select 64-Bit for 64bit apps and 32bit if your app / process doesnt support 64bit.
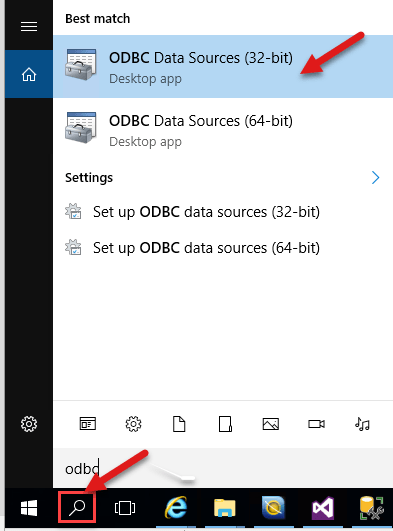 Windows ODBC Data Sources
- Click on Add button in User DSN Tab and then select JSON Driver from the driver list and click on Finish button to Create a new JSON Driver.
 ODBC User DSN Tab: Add new Driver Screen
- Now it's time to connect with JIRA. Let's use JSON Driver Data source with the following URL. Change domain with your own domain.
https://{yourdomain}.atlassian.net/rest/api/2/search?startAt=0&maxResults=100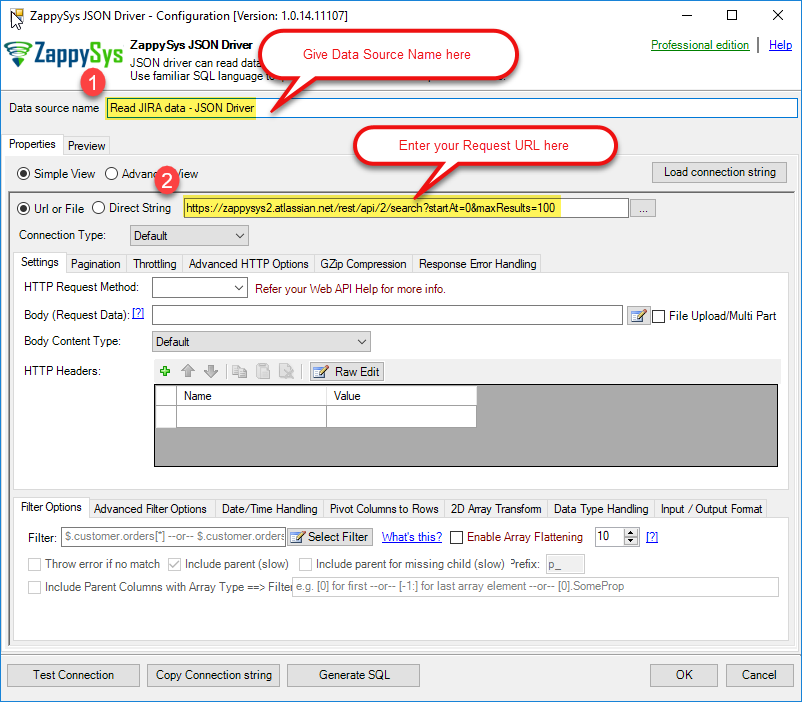 ODBC JSON Driver: Enter Request URL
- It is time to configure the Other Settings. Select HTTP Connection Type from the Connection Type drop-down and Click on Click to Configure Link to Configure the Connection Manager.
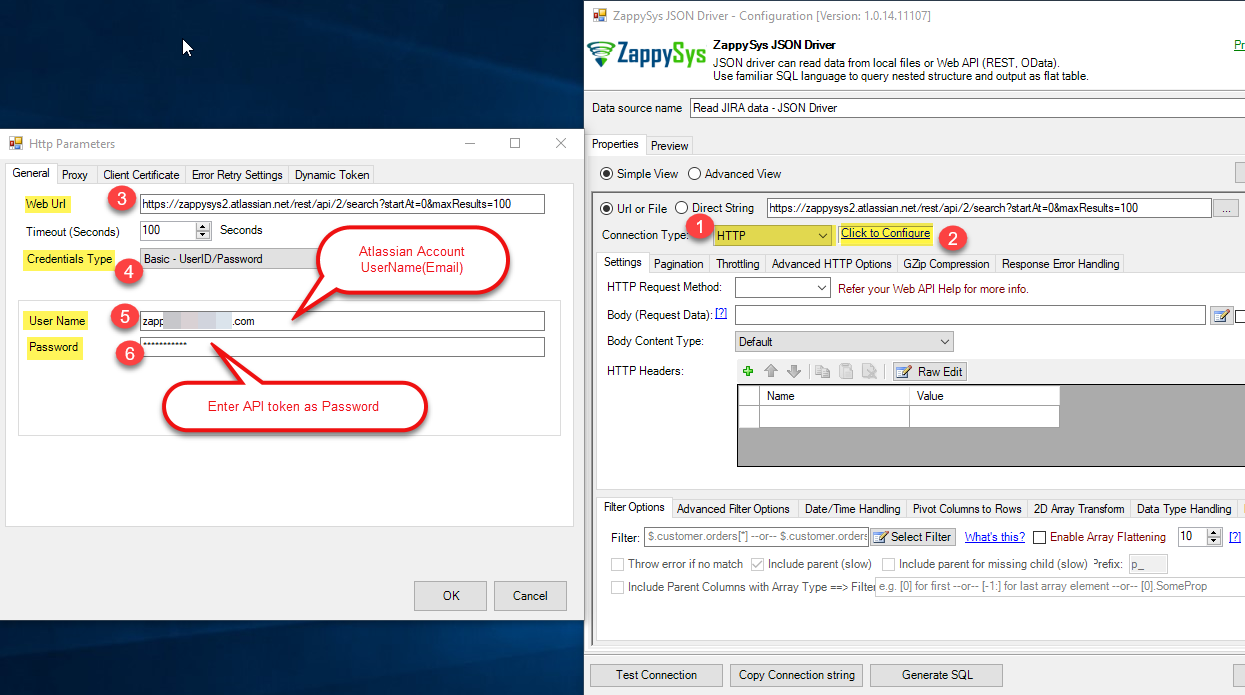 JIRA REST API Connection - Use ZappySys JSON Driver HTTP Connection
 - Now, we are going to set Pagination related configurations for JIRA Search request. Page number indicator must be startAt and maxResults value in URL must match with Increment By (i.e. 50)
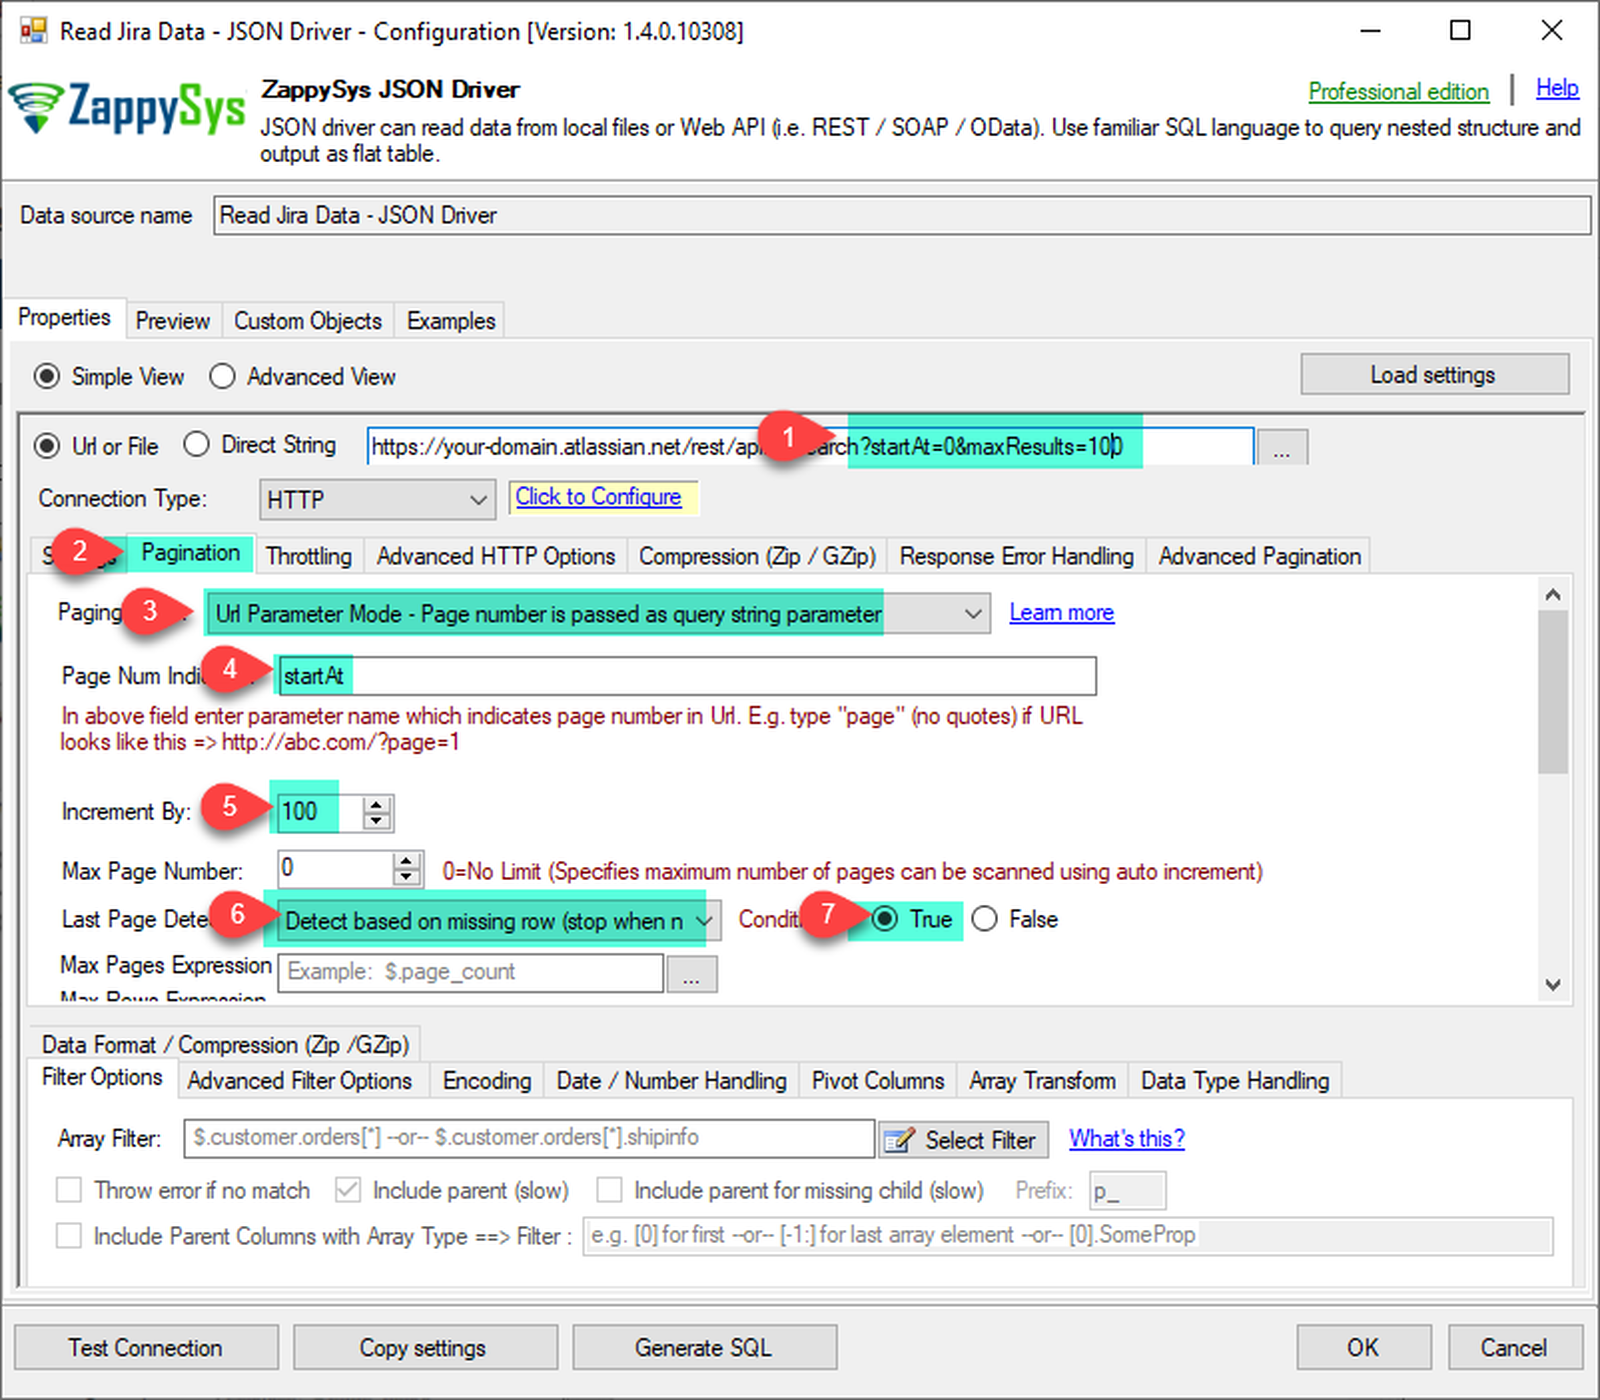 ODBC JSON Driver - JIRA request Pagination Configurations Settings
- After adding pagination parameters let's add JQL= search parameter to get specific data. Here we are searching the data by Project name and status. You can find more information about JQL on this link: Search JIRA like a boss with JQL
Here is example JQL search query for Public JIRA site. Replace jira.atlassian.com and project JRASERVER with your own values.
https://jira.atlassian.com/rest/api/2/search?jql=project=JRASERVER
https://jira.atlassian.com/rest/api/2/search?jql=project=JRASERVER AND status=Open
https://jira.atlassian.com/rest/api/2/search?jql=project=JRASERVER AND status in (Open,Done)
https://jira.atlassian.com/rest/api/2/search?jql=project=JRASERVER AND status=Open order by lastViewed DESC
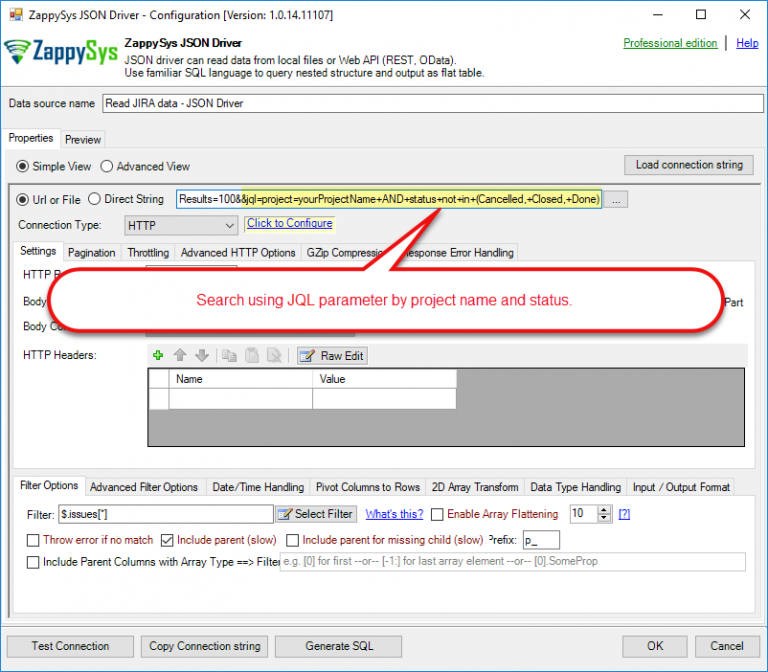 Search using JQL parameter
- Click on Select Filter to set the Filter.
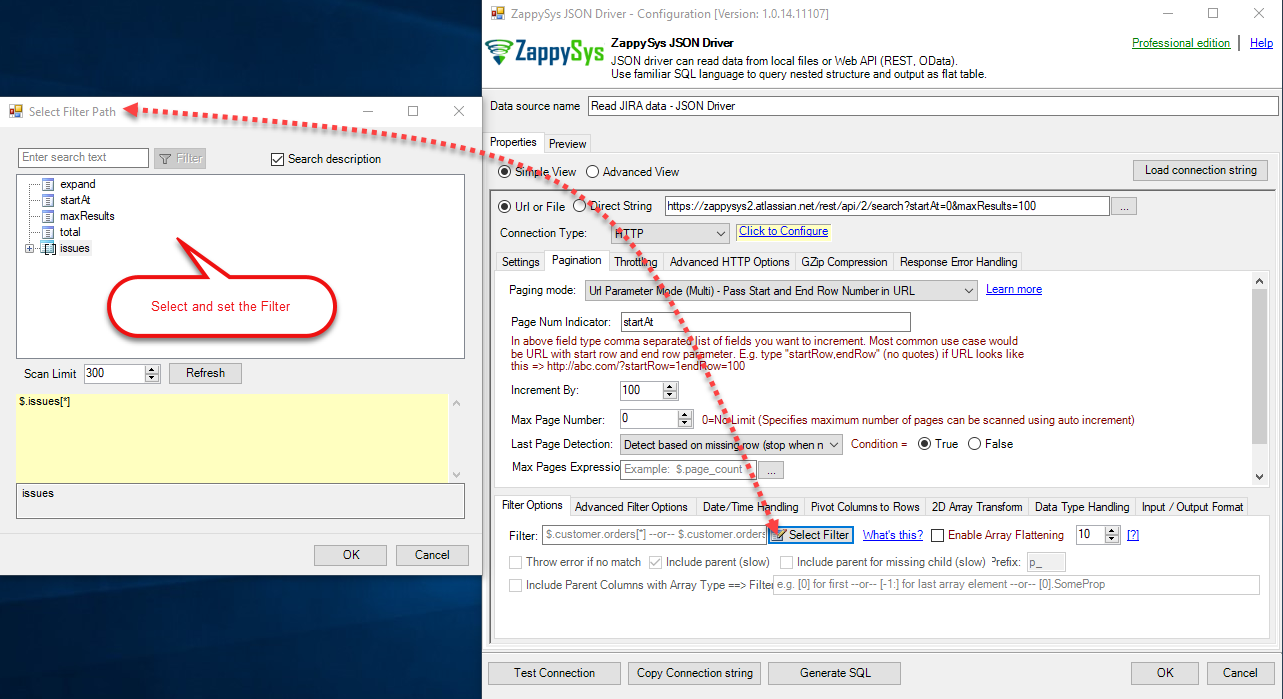 ODBC JSON Driver for JIRA API: Select Filter
- You are done with the Configurations, Click on Test Connection to test the Connection.
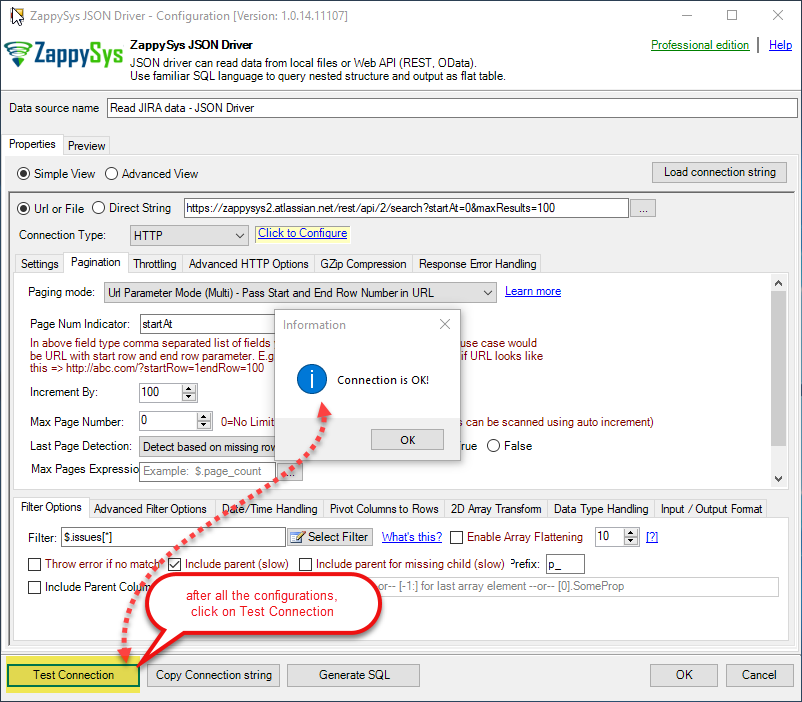 ODBC JSON Driver - Test Connection
- After that select the table from where you want to get data.
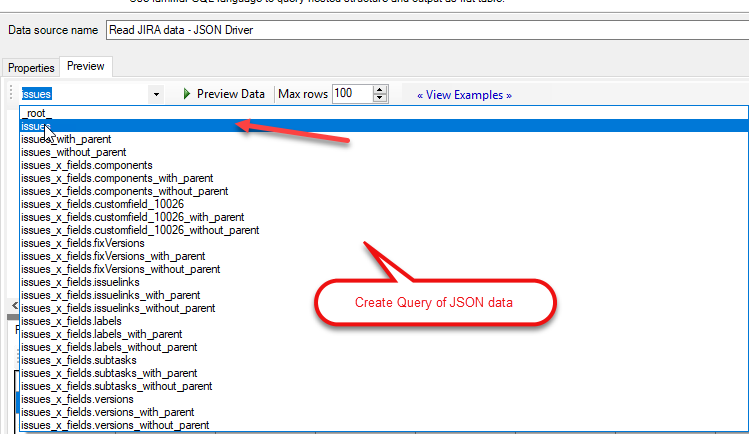 JSON Driver: Create Query of JSON data
- Click on the Preview Data button to preview the data.
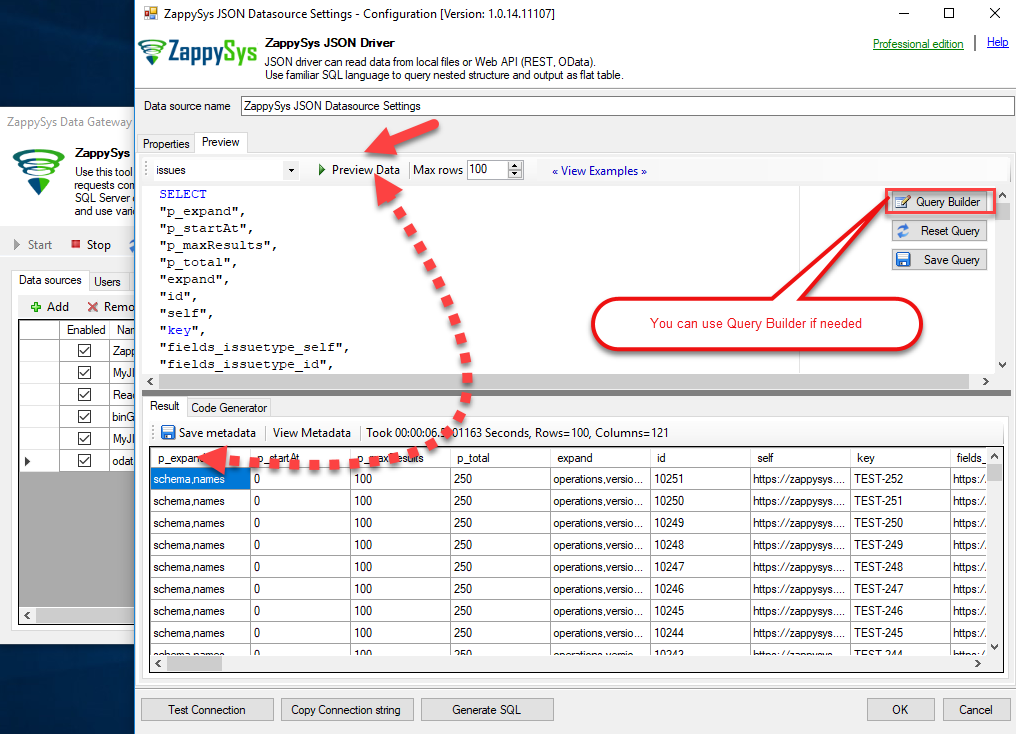 Preview issues table data
- And that’s it, Now we will move forward to the next Phase.

Build your Own JQL Search queries for JIRA Issue
In previous sections we saw some basic JQL queries to search JIRA Issues using API call. Now lets look at how to build such queries using online UI (Think like a query builder). from JIRA.- JIRA has its own public Issue repository which you can browse any time by going here https://jira.atlassian.com/issues/
- Now try to change filter settings for search criteria (E.g. change Project, Status etc)
- You will notice when you make change your URL keeps changing too. From that URL you can extract ?jql=xxxxxxx part and use it as template for your own JIRA API search queries.
Load JIRA data into Power BI (Connect JIRA REST API)
- Open Power BI Desktop and select the Get data option.
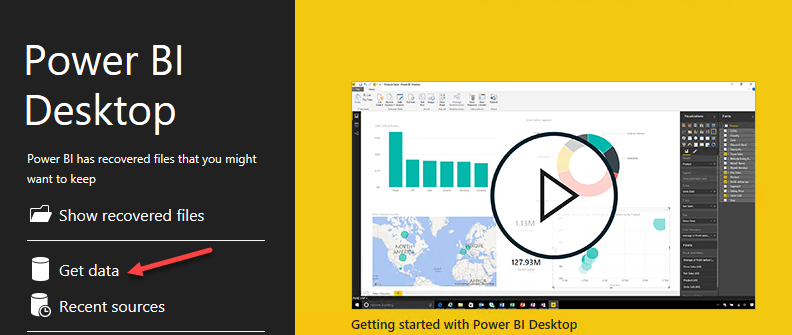
Get data using Power BI
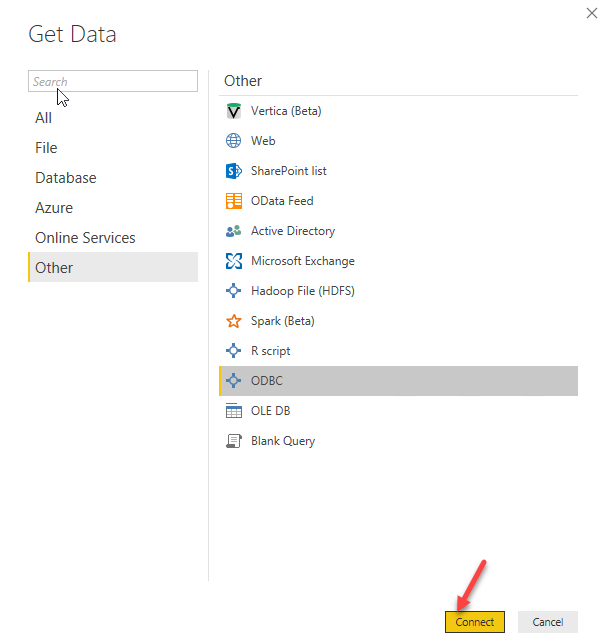
- Once Get data is clicked, Go to Other and select ODBC.
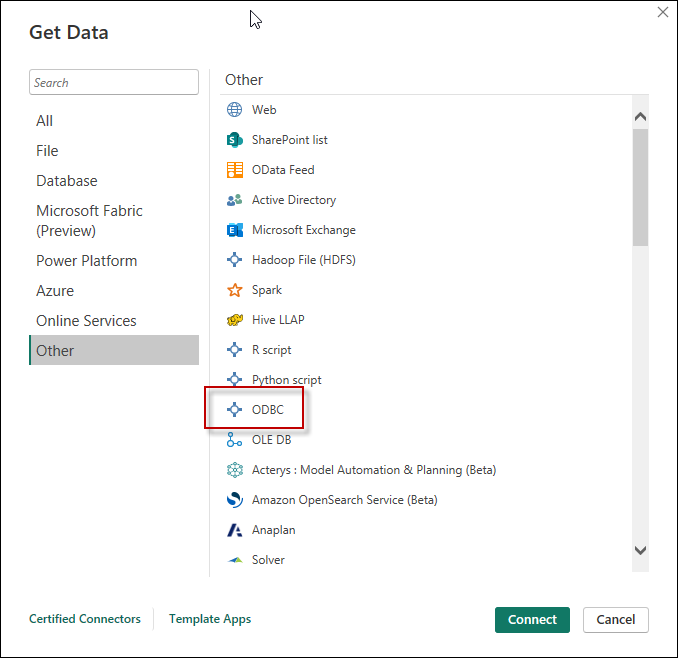
Import ODBC data source in Power BI
- After that select ODBC DSN name from the DSN dropdown
- Now it's time to import data. Basically, there are two modes to import data. Table Mode and Query Mode. Query mode is the most common but we will show you both ways.
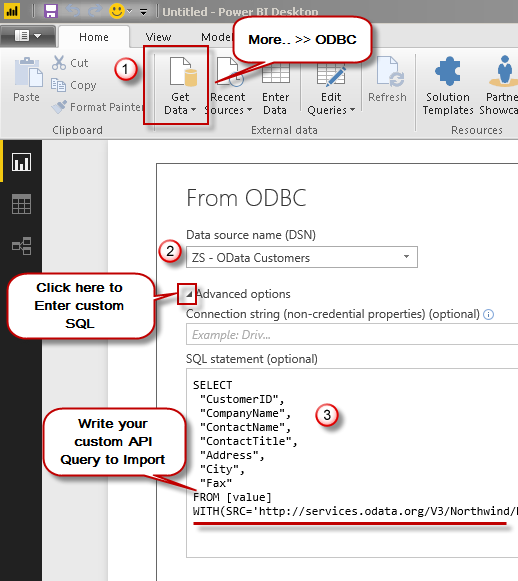
- Import using Power BI Query Mode: Select your DSN and click Advanced Option to enter custom SQL Query to Import your REST API data. You can use ODBC DSN Data sources Preview tool to generate SQL Query. For example you can enter query like below. If you are not sure use Query builder (Found on Driver Preview Window)
SELECT * FROM $
WITH(SRC='https://my-api-url')
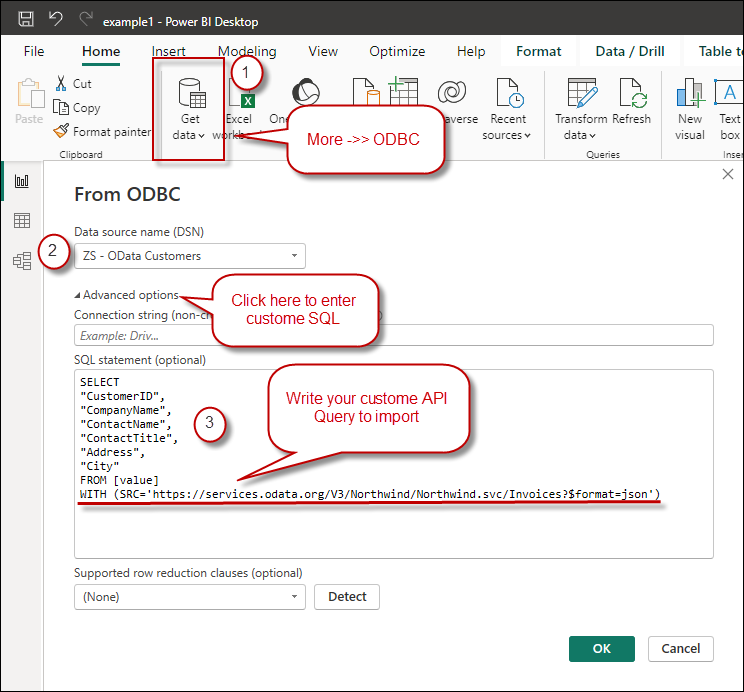
Import JSON / REST API data in Power BI using SQL Query Mode
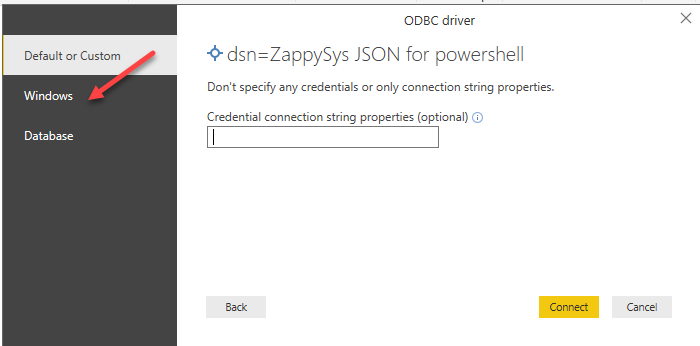
- Import using Power BI Table Mode: If you don't specify SQL query under advanced options then you may get a chance to select Table name to import and Credentials. If Power BI asks for credentials then select Windows and connect.
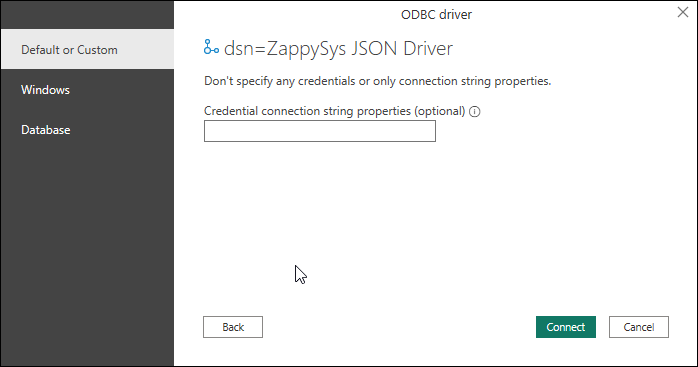
Select credentials for ODBC Source
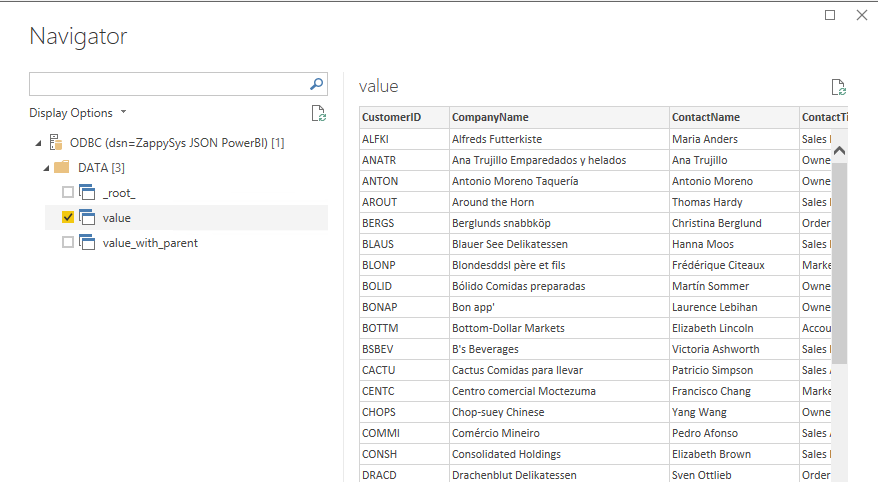
- Once you enter select table, you can choose Select data to import and click OK (Below screeenshot is for the Table mode import when no SQL specified. You can pick desired table to import)
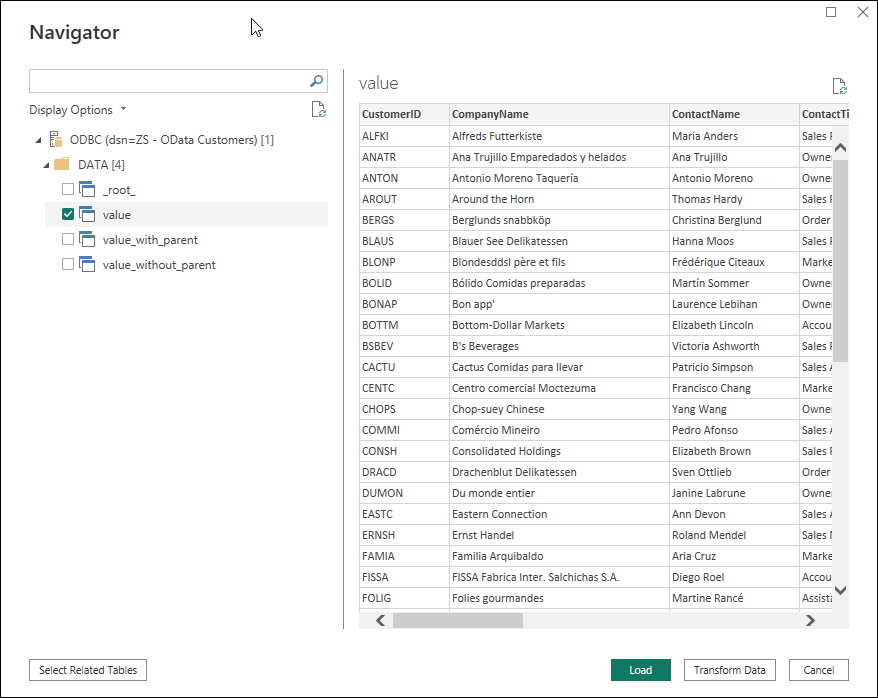
Select Table to import in Power BI
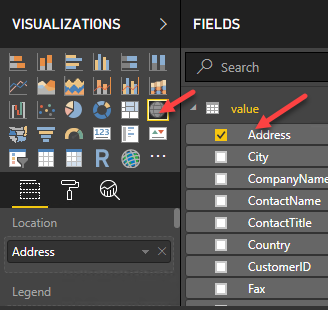
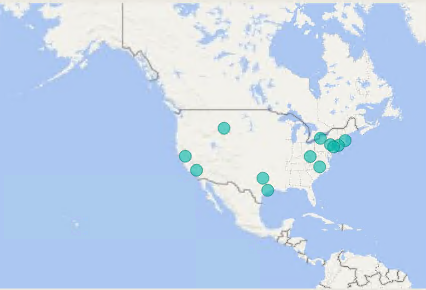
- You can also display data in map using Map visualization like below. Press the map and check Address this option will display the addresses in a map.
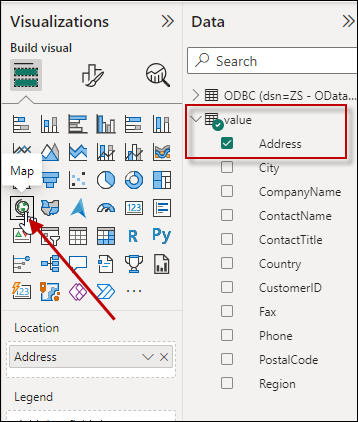
See Address data in power bi map
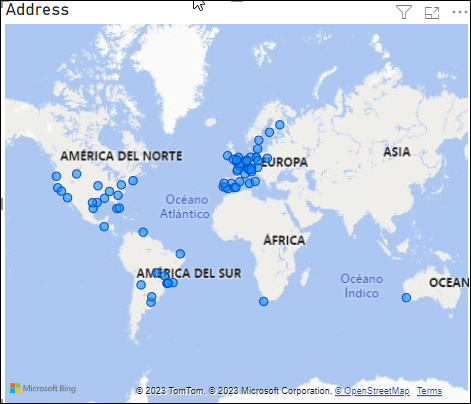
Map visualization in Power BI
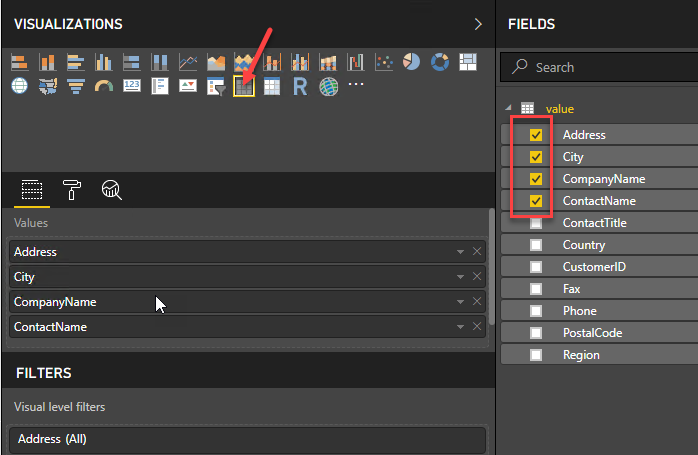
- Now, let's display data in Table Format. Select in values more columns and select the data grid to visualize the data.
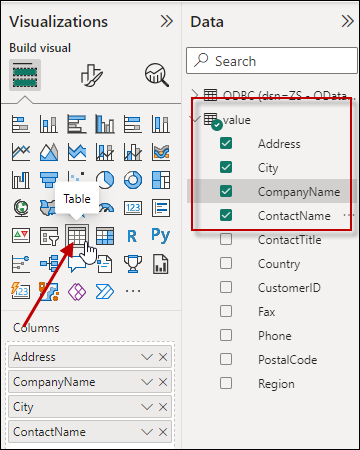
Select columns in Power BI
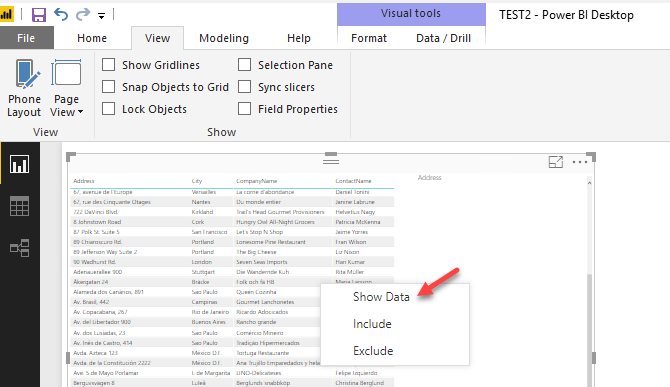
- Once data is displayed, Right click on the data and select Show Data.
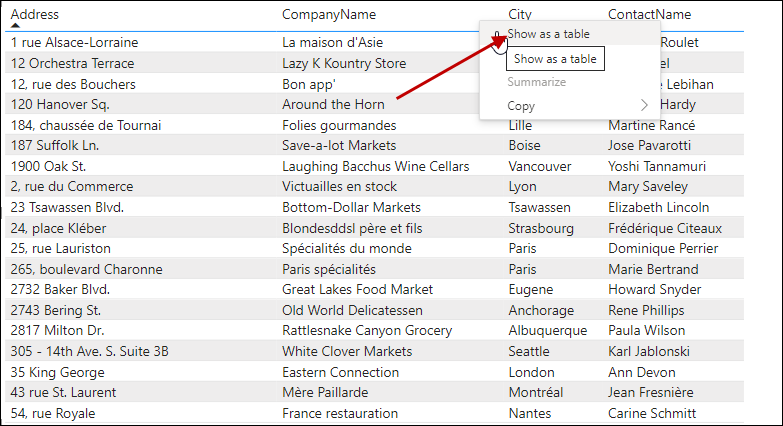
Show data in Power BI
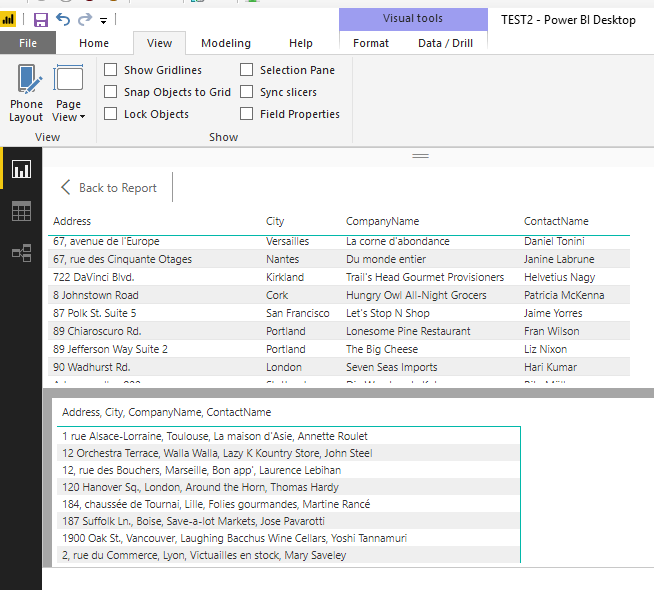
- The data will be displayed
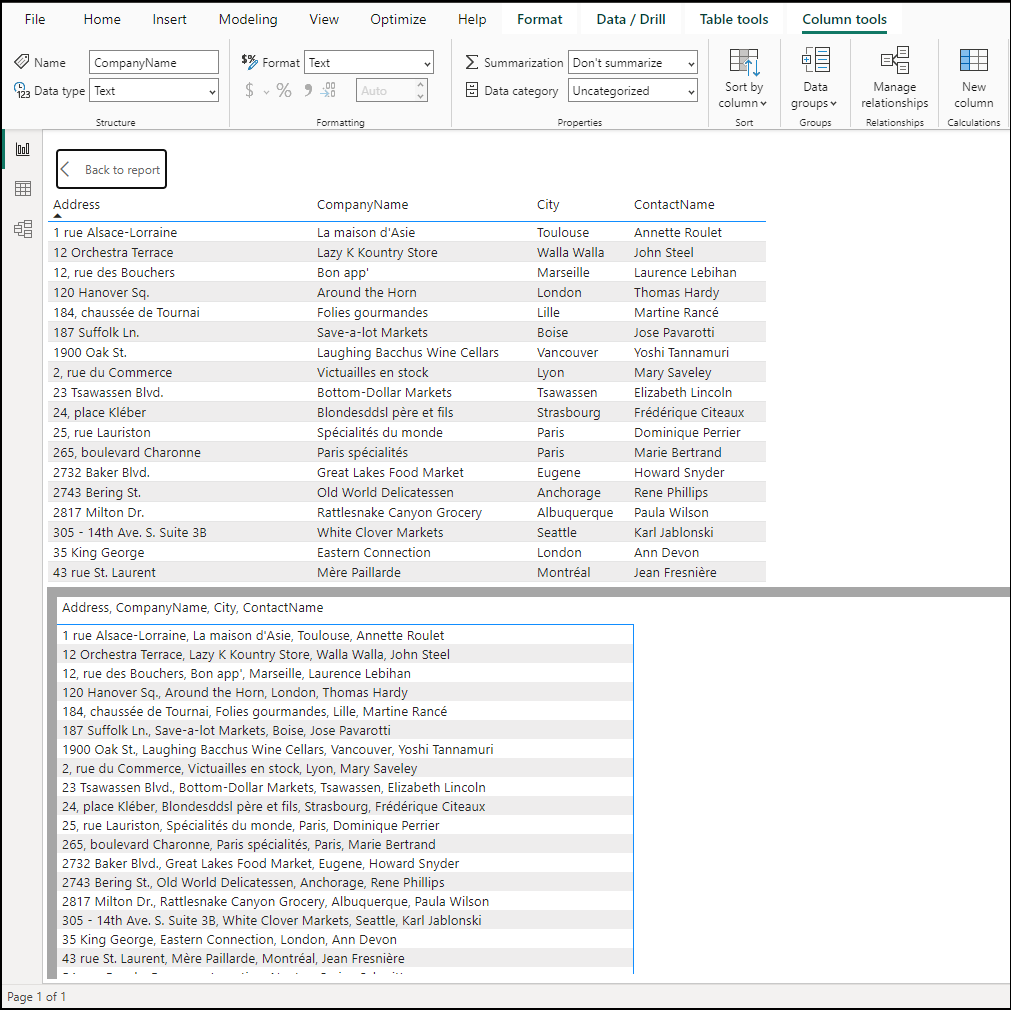
read json information data
Conclusion
In this blog, we have learned how to retrieve the data from JIRA using ODBC JSON Driver and then Load those data in Power BI with ODBC DSN in a very simple way. You can achieve many more functionalities with the use of ODBC PowerPack.
References
Finally, you can use the following links for more information about the use of JIRA API with our tools:
- JIRA Documentation for API
- Landing Page for ODBC JSON / REST API Driver, you can also find Tutorial Video here.
- Help File: Documentation of JSON Driver.
- Blog/articles link: https://zappysys.com/blog/category/odbc-powerpack/odbc-drivers/json-rest-api-driver/