Introduction
 In this article, you will learn Using SSIS Trash Destination and Dummy Data Source (FREE). You can write data into the file using Trash Destination, You can use Trash Destination to write data into a raw file from any source. We will use FREE Dummy Data Source to generate random data for testing purpose. Trash Destination can be used to terminate your dataflow pipeline without doing any expensive processing on incoming data. This component is very useful during testing where you want to focus on the source and transforms but don’t really care about the destination.
Prerequisites
Before we perform the steps listed in this article, you will need to make sure the following prerequisites are met:
- SSIS designer installed. Sometimes it is referred to as BIDS or SSDT (download it from Microsoft site).
- Basic knowledge of SSIS package development using Microsoft SQL Server Integration Services.
- Make sure ZappySys SSIS PowerPack is installed (download it).
Components mention in this article
Getting Started
SSIS ZS Trash Destination and Dummy Data Source are free. If you check save Data to file then by default all input columns are logged to file. If you wish to log the selected input column then use Advanced Editor. This component does not support an error output. Any bad random value ill cause error or Truncation (e.g. If your sample value is 5 characters long but output column length is set to 3 chars). If you have error output attached with RedirectRow option on error, Truncation then you can capture bad rows along with an exact reason of error.
Write data into the file using Trash Destination
Overview
In this tutorial, you will learn how to Using SSIS Trash Destination and Dummy Data Source. Let’s use ZS DummyData Source to write data into ZS Trash Destination. Here you can select our, any of suitable Source Adapter.
Method 1 – Using ZS DummyData Source
- Open Visual Studio and Create New SSIS Package Project.
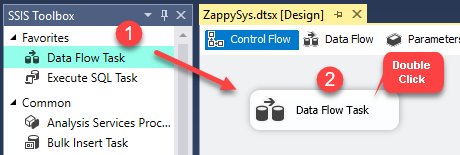
- Now, Drag and Drop SSIS Data Flow Task from SSIS Toolbox.
- Double click on the Data Flow task to see the Data Flow designer surface.
- From the SSIS toolbox drag and drop ZS DummyData Source on the data flow designer surface.
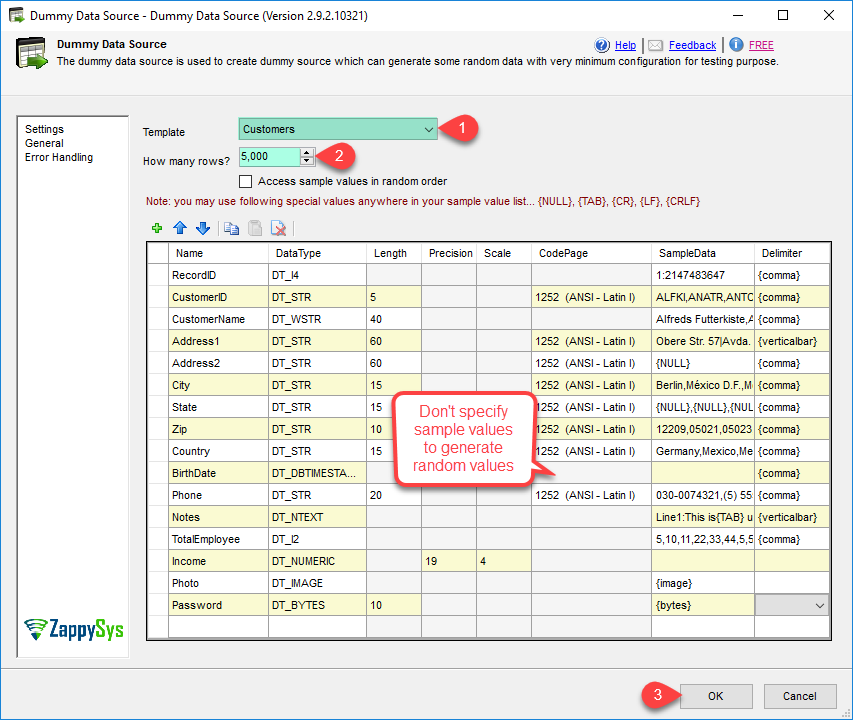
- Double click DummyData Source and select Customer profile from Template dropdown.
- Once you change Template you will notice that a lot of columns automatically added. Notice how sample values are set for many columns along with their value delimiter. You may use many inbuilt placeholders in your sample values such as ({NULL} for a null value, {TAB} for the tab character, {CRLF} for new line).
- Change [How many rows] setting to 5000.
- Click OK to save settings.
- We can use DummyData Source like this, click here.
- Here, you can insert data into SQL Server Table, Check Here.
- Now, Just Drag and Drop Our Free ZS Trash Destination on the data flow designer surface from SSIS Toolbox.
- Now single click on ZS DummyData Source once you see the blue arrow from the source … connect it to ZS Trash Destination.
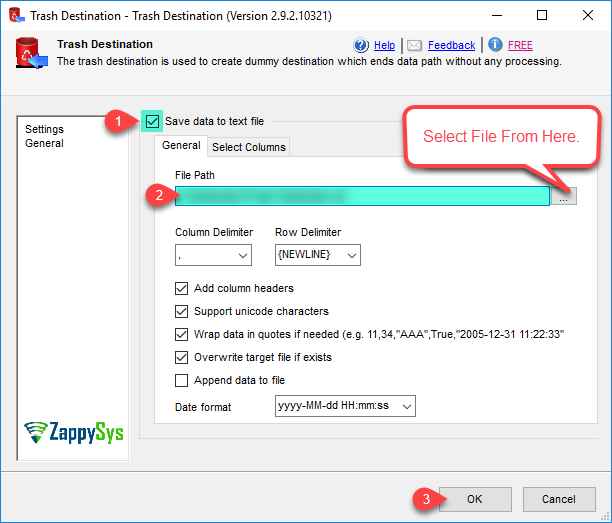
- Double click on ZS Trash Destination to configure it.
- Click OK to save configure setting UI.
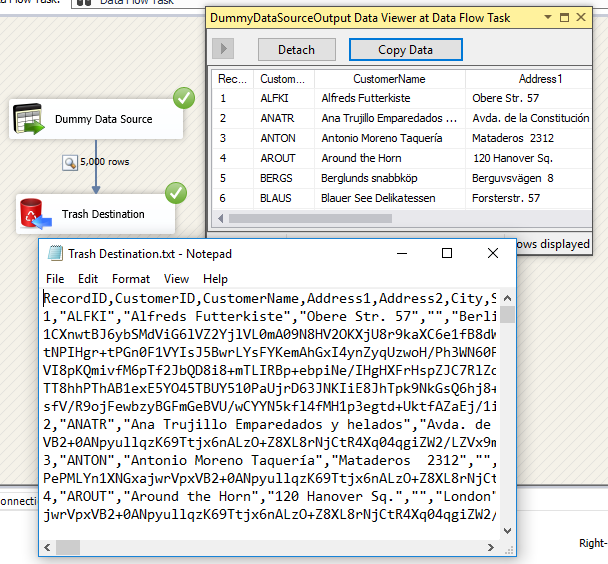
- Right-click on the path and Add Data Viewer.
- Execute the package and verify source data in the data viewer.
Method 2 – Using OLE DB Source
Let’s use ZS OLE DB Source to write data into ZS Trash Destination.
- Open Visual Studio and Create New SSIS Package Project.
- Now, Drag and Drop SSIS Data Flow Task from SSIS Toolbox.
- We are going through SQL Server Database, need OLE DB Connection for Data Source.
How to create OLE DB Connection.
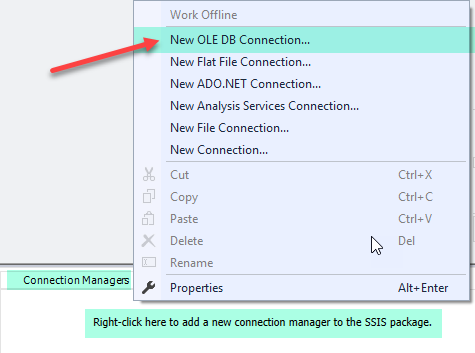
- Let’s, Right-click on Connection Managers Panel to Create OLEDB Connection, so you can use Source and Context Menu will appear, Select New OLEDB Connection from the Context Menu.
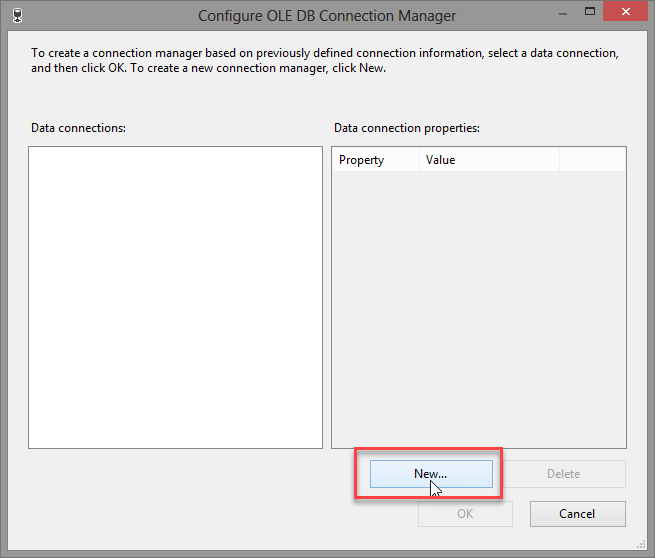
- Now, click on New button for create Connection.
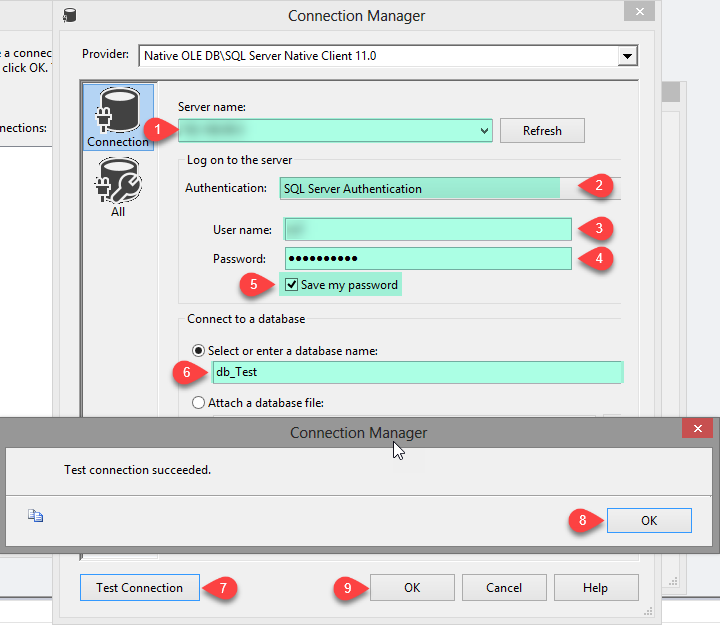
- In the Connection Manager, just follow the steps in the following image we have created.
- Click on OK button to save connection configure setting UI.
How to write into Trash Destination from OLE DB Source
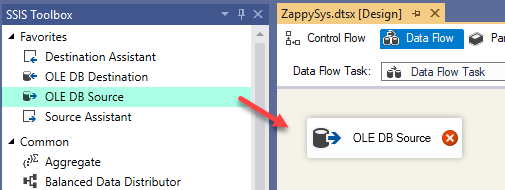
- Drag and Drop OLE DB Source from SSIS toolbox.
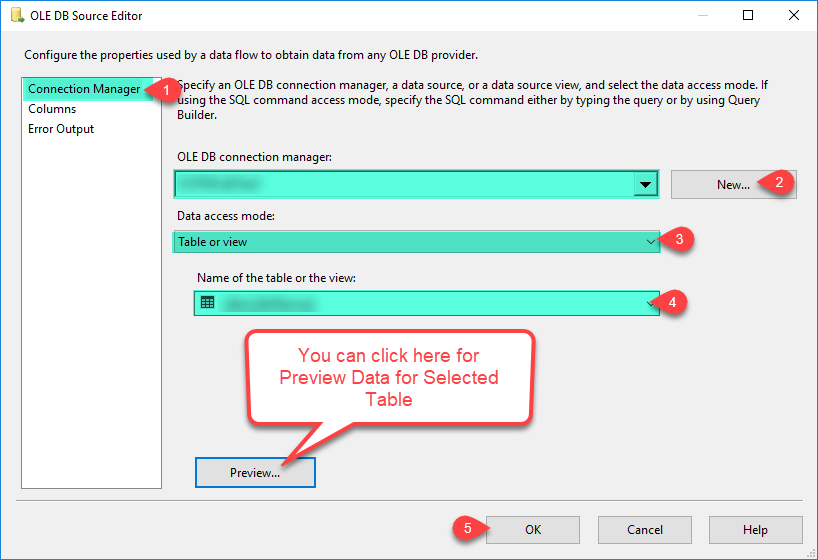
- Double click on OLE DB Source for configure it.
- In the Connection Manager, just follow the steps in the following image we have created.
- Click on OK button to save OLE DB Source Editor setting UI.
- Now, Just Drag and Drop Our Free ZS Trash Destination on the data flow designer surface from SSIS Toolbox.
- Now, single click on OLE DB Source once you see the blue arrow from the source … connect it to ZS Trash Destination.
- Double click on ZS Trash Destination to configure it.
- Click OK to save configure setting UI.
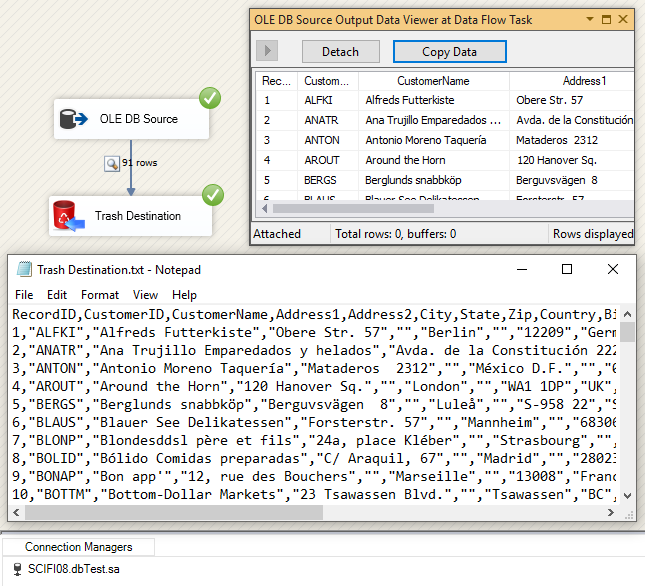
- Right-click on the path and Add data viewer.
- Execute the package and verify source data in the data viewer.
Conclusion
In this blog, we learned how to write data into a raw file and read data in SSIS. We used the Trash Destination for write data and Dummy Data Source to read data. You can download SSIS PowerPack from here to try many other scenarios not discussed in this blog. SSIS PowerPack is a collection of 70+ high performance, just drag and drop connector/task for SSIS(i.e. Microsoft SQL Server Integration Service). After you install SSIS PowerPack you will see many new Custom Tasks and Components in your Visual Studio SSIS Toolbox.
References
Finally, you can use the following links for more information:
- ZS Trash Destination
- ZS Dummy Data Source
- Help File:

