Introduction
Register Salesforce App (OAuth)
- Login into your account and go to Setup as shown below (click on gear icon at the top right corner):

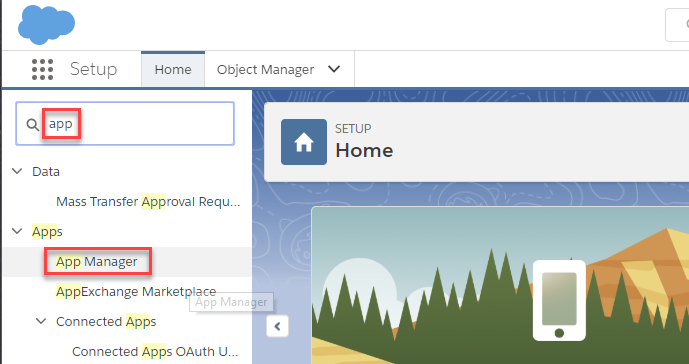
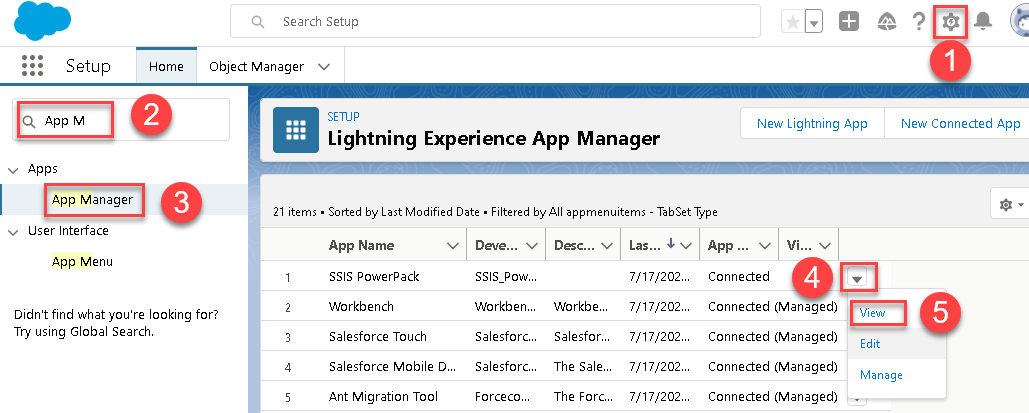
- Then in the search bar input "app" and open App Manager:
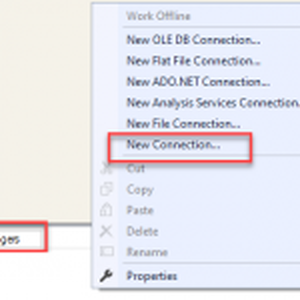
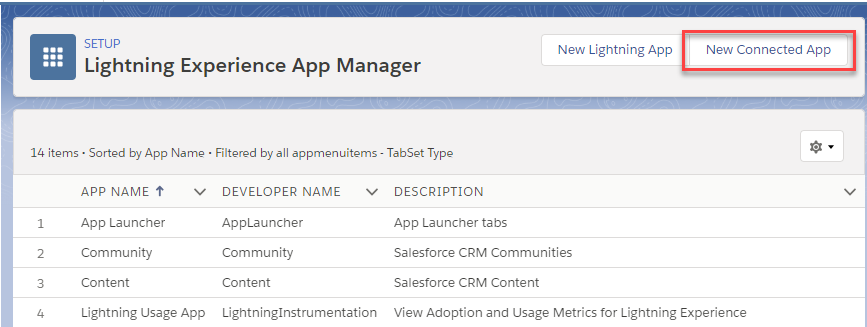
- Then click New Connected App to create a new OAuth App:
NOTE: In some version, it may say New External Client App
Look for one of the following buttons:
-
New Connected App (Classic name)
-
New External Client App (Lightning name)
-
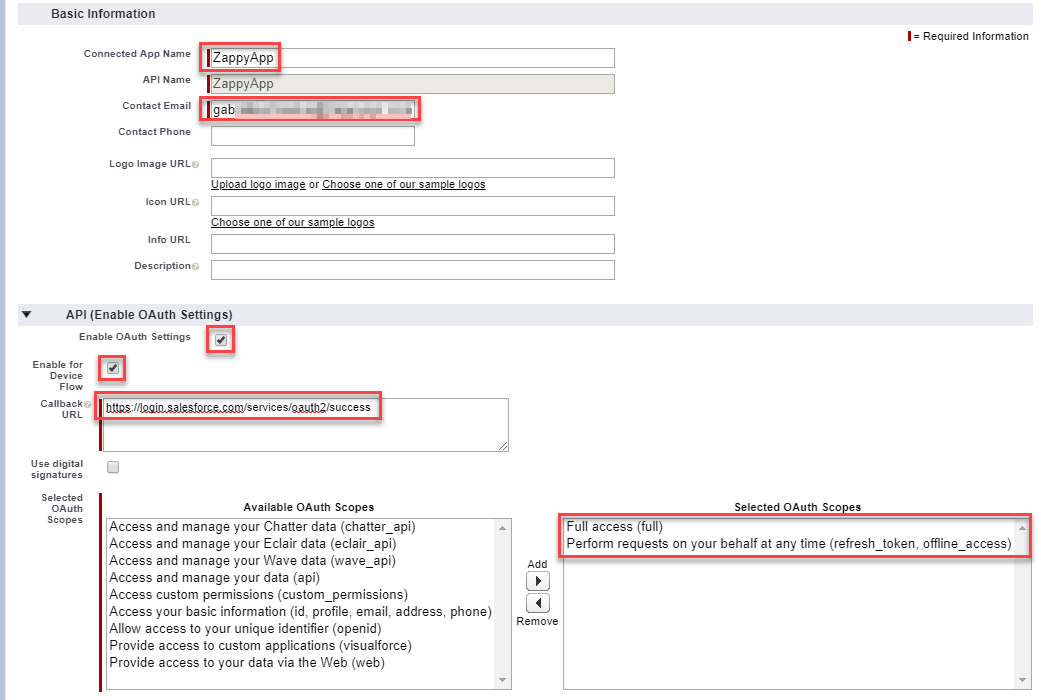
- Give your App a name and:
- Enable OAuth Settings
- Set callback URL to following two URLs (one in each line)
https://login.salesforce.com/services/oauth2/success
https://zappysys.com/oauth
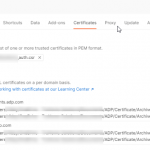
- Add an OAuth scope you want or simply add "Full access".
- Add "Perform requests on your behalf at any time (offline_token)" scope to get a refresh token so that you don't have to re-authenticate each time requesting an access token:
 IMPORTANT: You can use "Access and manage your data (api)" if you do not like to grant full permission to this app but make sure you request same permission from the caller app too (Example on ZappySys Salesforce Connection UI -> Advanced Tab -> Set scope as "api offline_access" rather than "full offline_access"
 - Click "Save".
Get Client Id and Client Secret for Salesforce Connected App
Once the App is created, we need to find out the App Id / Secret so we can use it for API calls.- Go to App Manager
- Find out the recently created App and click View (click on the small arrow to the right)
- Once App page is loaded you can Copy Consumer Key and Consumer Secret (click on reveal to see). Also copy anyone Call back URL (We will need this for OAuth Connection > Advanced Tab > Call Back URL or Redirect URL property depending on which ZappySys Product / Driver you are using)
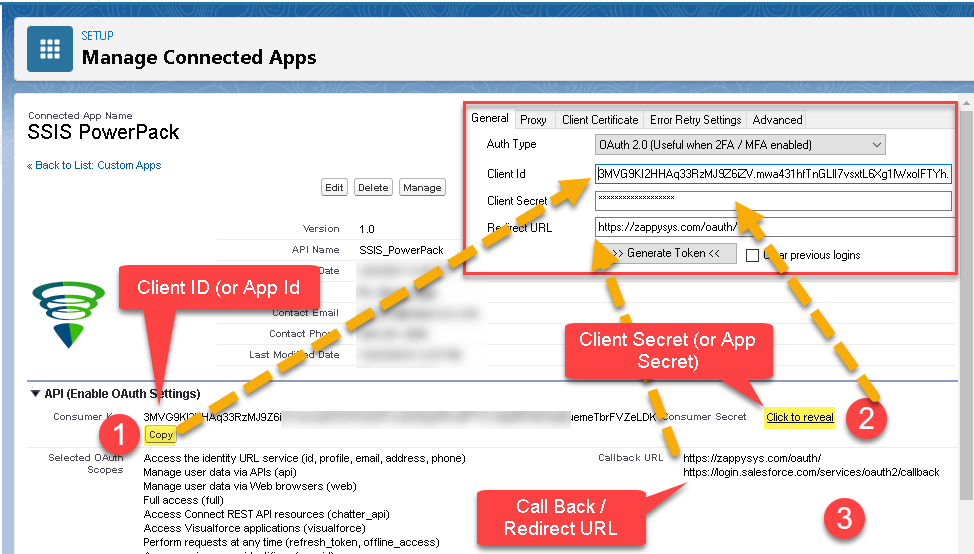
- That's it, you can now use these 3 pieces to ZappySys OAuth connection UI or on Salesforce Connection UI (new version with OAuth support). The above screenshot shows where to enter these 3 pieces in the New Salesforce Connection. For the OAuth Connection, the redirect URL goes to the Advanced Tab > Callback URL textbox.
Get Client Id and Secret for Salesforce External Client App
If you created a new App by clicking on the New External Client App button, then your App may not be visible in the App Manager Screen. In that case, find it below way. [caption id="attachment_11637" align="alignnone" width="1222"]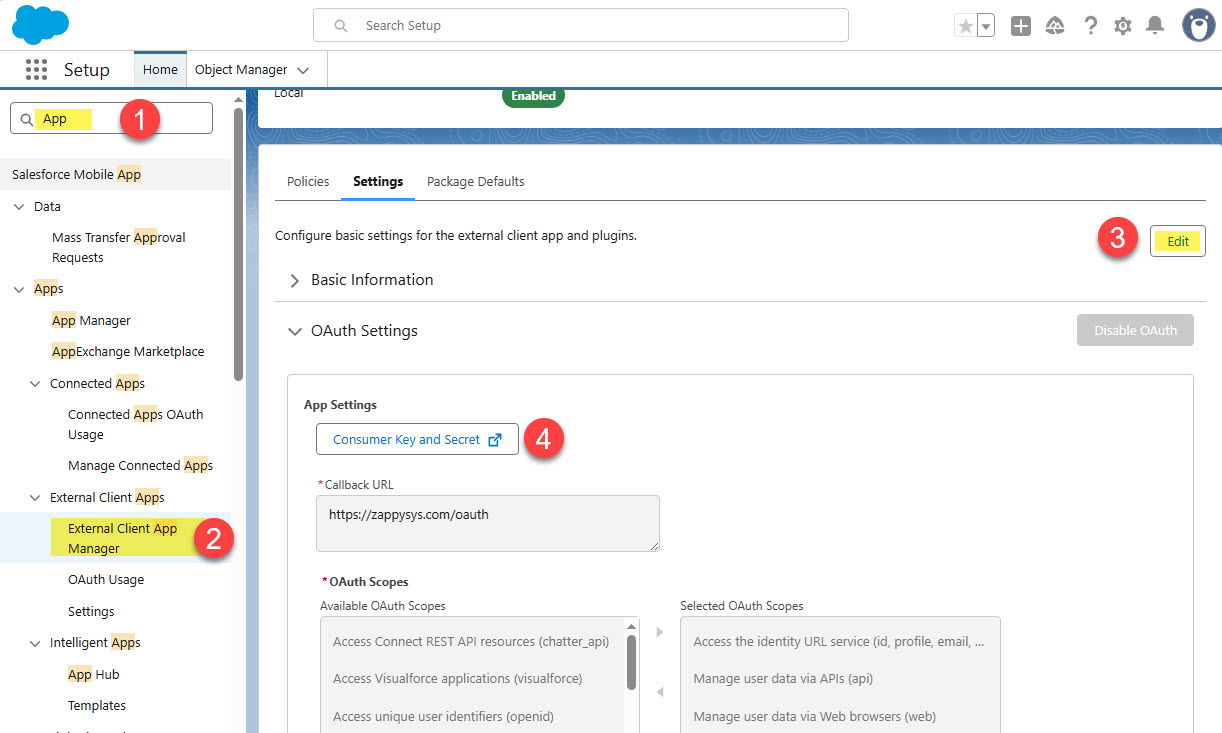 Get Client Id, Client Secret - For New External Client App[/caption]
Enable Client Credentials Grant (Non-Interactive Run-As)
If you like to enable Non-Interactive mode, just like UserId / Password Authentication, but without actually passing a real UserId or Password on the Connection UI, then you can enable Client Credentials Flow as below. NOTE: Only the New version of ZappySys Salesforce Connection supports Client Credentials Grant. Version released after Nov 1, 2025 supports this grant type. [caption id="attachment_11639" align="alignnone" width="419"] Enable Salesforce Client Credentials Grant (Run As)[/caption]
(OPTIONAL) Configure Salesforce OAuth refresh token validity
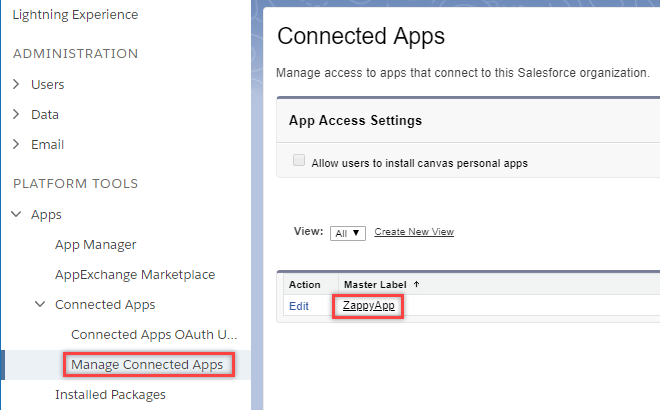
By default, Salesforce Refresh Token doesn't expire once you generate. If you want to change the default behavior, follow these steps.- Go to "Manage Connected Apps" menu item and press on your App name:
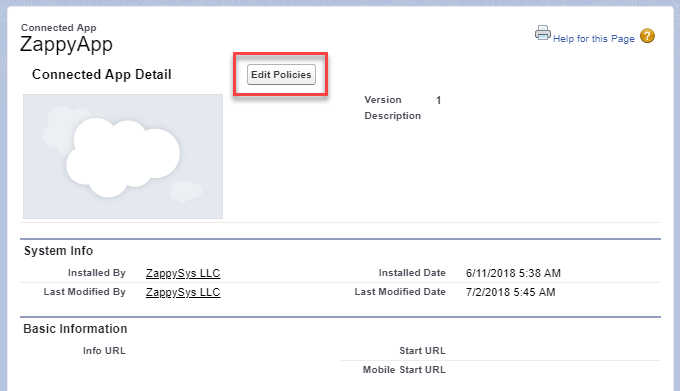
- Click "Edit Policies" to configure refresh token validity:
- Set "All users may self-authorize" and "Refresh token is valid until revoked" options:
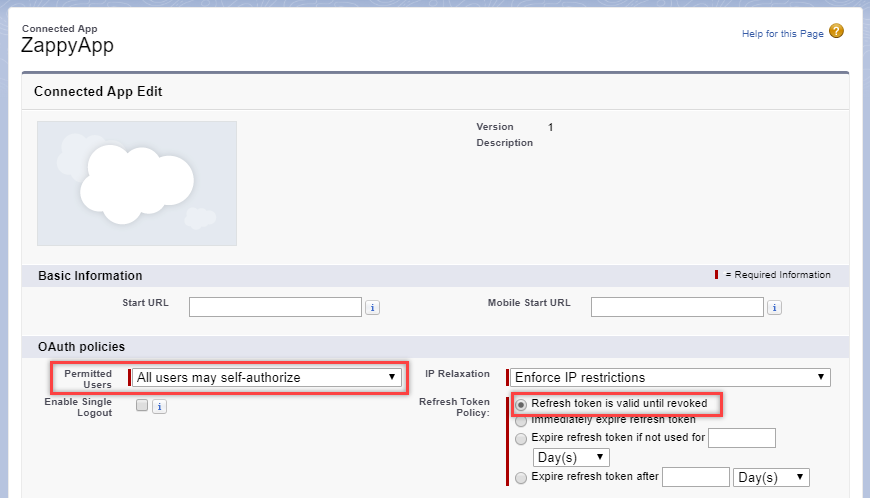
- Click "Save".
Using Salesforce Connection with OAuth App in SSIS / ODBC
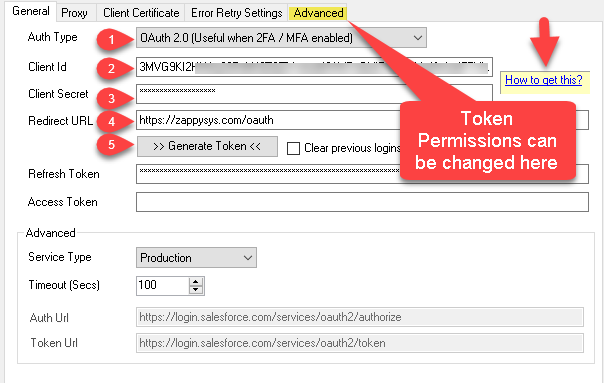
Once you have Client ID / Secret, you can use it in the Salesforce Connection in SSIS Connector / ODBC Driver for Salesforce like below (Only the new version will have OAuth option)
Troubleshooting Known Issues
Let’s look at some common issues with Salesforce Connection and how to fix them.
OAuth Error: Missing Required Code Challenge
When you click Generate Token button, you may get an error like the one below.
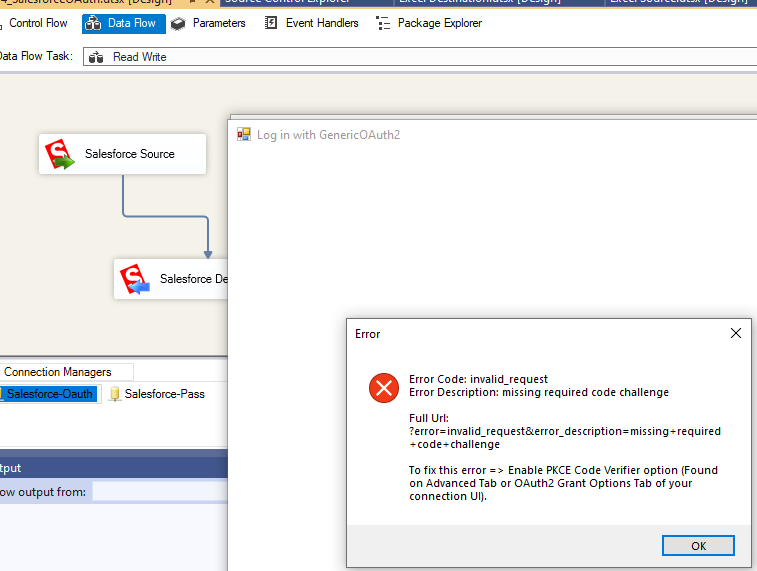
Salesforce OAuth Generate Token Error – Missing Required Code Challenge
Solution
Here is how to fix it.
For Salesforce Connection UI: Go to Advanced Tab => Check Enable PKCE Code Verifier option
–OR–
For OAuth Connection UI: Go to OAuth2 Grant Options Tab => Check Enable Code Verifier Option
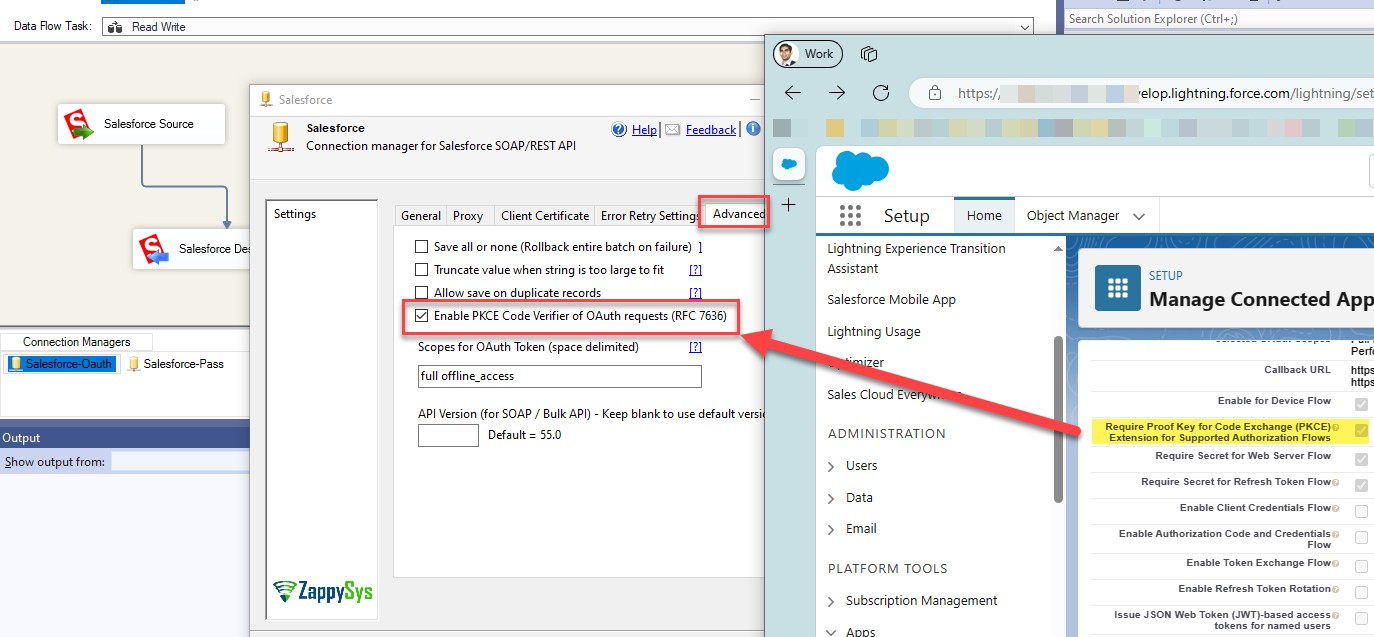
Enable PKCE code verifier option – OAuth Connection for Salesforce.