Introduction
 In this blog, we will learn How to read Constant Contact data in SSIS and load into SQL Server Table, along with few other topics such as how to generate an API Token using Mashery Developer Account for Constant Contact REST API Call, how to read all Contacts from Constant Contact with SSIS and finally How to add new Contact in Constant Contact Contact List Collection.
We will go through the steps to read Contact data from Constant Contact and Load into SQL Server using SSIS JSON Source.
In nutshell, this post will focus on how to call Constant Contact API using SSIS. If you are MailChimp user and curious how to perform data integration in SSIS then check this article about reading MailChimp data in SSIS.
So let’s get started.
Prerequisite
- First, you will need to have SSIS installed
- Secondly, make sure to have SSDT
- Finally, do not forget to install ZappySys SSIS PowerPack
What is Constant Contact
Keeping in touch with customers on a consistent basis is one key to maintaining current clients and bringing in new ones. A number of companies exist that provide businesses with a way to contact clients regularly through snail mail, email or social media. Constant Contact offers online marketing services for businesses to stay in touch with clients.
Getting Started
In order to start, we will show several examples. ZappySys includes an SSIS REST API Task and SSIS JSON Source that will help you to call Constant Contact API to read Constant Contact data, retrieve lists of Contacts data from Constant Contact, Add new Contact in Constant Contact with SSIS and do many more actions using REST API. To learn more about Constant Contact API check this help file.
Setup your Mashery Developer Account
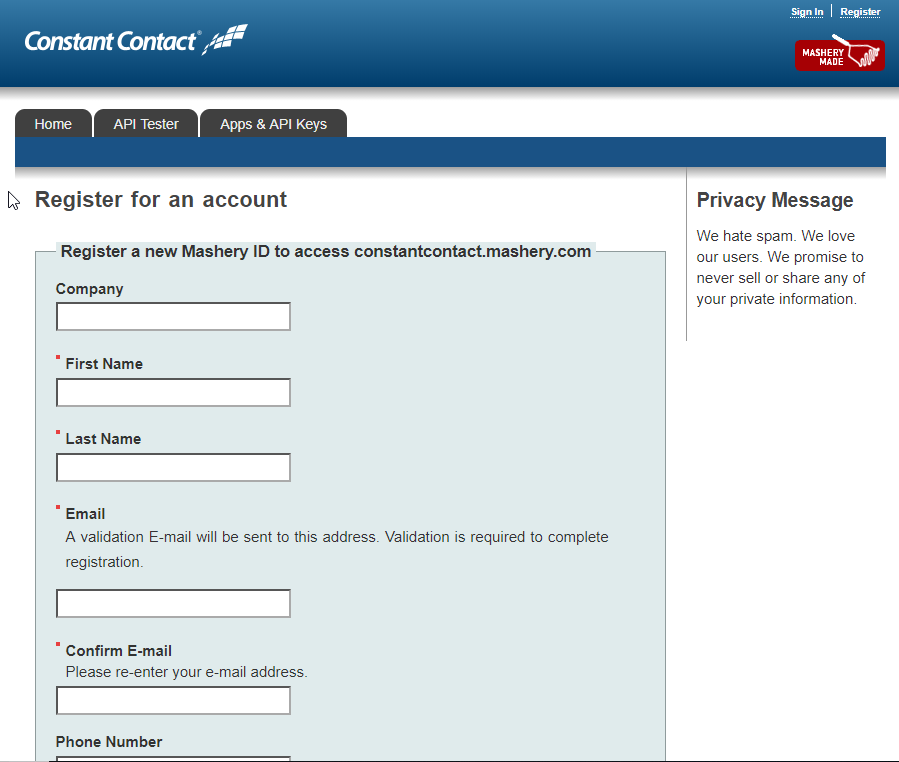
To access Constant Contact data using Mashery Developer Account you need to register a MasheryID with Constant Contact. Follow the steps mentioned below to register Mashery Developer Account for Constant Contact Access:
- first of all, you can directly login to the Constant Contact site with your credentials, and redirect to the Mashrey Developer Console to register a MasheryID.
- thereafter Fillup the form and click on Register button
- If you have already registered on Mashery Developer Account, then you just have to log in using your Credentials.
- So, when you are done with the Mashery, you can go to MyApplication Page to create a new application.
Create Constant Contact App (for OAuth)
To access Constant Contact data using REST API call you need to create a Mashery app. Follow the steps mentioned below to register Constant Contact OAuth App:
- First of all, you can directly login to the Mashery Developer Account with your credentials, and redirect to the Constant Contact My Application’s Page for creating an app.
- also, you can open the MyApps Page.
- Click on Create a New Application button while, the new Application form appears, Fill it up.
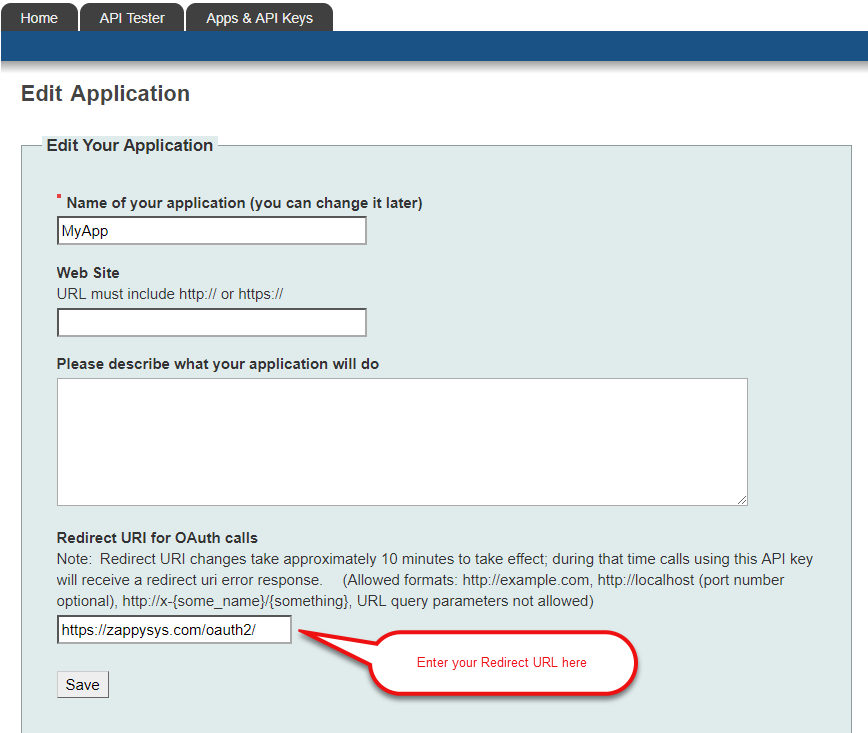
- Once you are done with the Creation of an App certainly, you can edit the Application.
Enter the Redirect URL there. - furthermore, Go to Keys tab and you have your App’s Lists there with App’s Key as Client ID and Secret as Client Secret.
finally, we are ready with an App. Let´s start with an example. In this example, we will show how to retrieve all Contacts data from Constant Contact and add a new Contact in Contact Collection List on Constant contact with SSIS.
Load Constant Contact data to SQL Server using SSIS JSON Source
Now once you registered OAuth app in the Constant Contact website we can move to SSIS Part.
Configure JSON Source Component
- First of all, Create a new SSIS Project or Open Existing Project in Visual Studio (File > New > Project > Business Intelligence > Integration Services)
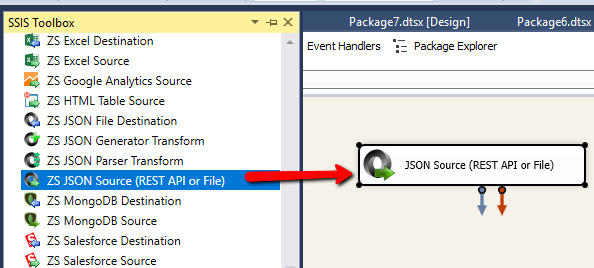
- Once SSIS Package is open, Goto Data Flow Section, Drag and Drop ZS JSON Source Component from the SSIS Toolbox.
- furthermore, Double click on that Component to Edit the Configurations. Select File path or web URL from the Access Mode drop-down.
Enter Web URL like this:
here, We have used 2 Parameters.1https://api.constantcontact.com/v2/contacts?status=ALL&limit=100&api_key=<<<Your_App_Key>>>* status is the filter the response based on the contact status property: ALL, ACTIVE, UNCONFIRMED, OPTOUT, or REMOVED.
* limit is the number of contacts to return per page, 1-500, default 50 (For more See this Constant Contact API Documentation for getting Contacts Request API)
* <<<Your_App_Key>>> is your App Key, So you need to add your app key.You can use Variable too in your Request URL, to make URL Dynamic, See the below-attached Screenshot.
To make URL dynamic first create a SSIS variable like below screenshot and then change URL to use Variable Placeholder like thishttps://api.constantcontact.com/v2/contacts?status=ALL&limit=100&api_key={{User::AppKey}}
Configure OAuth Connection Manager
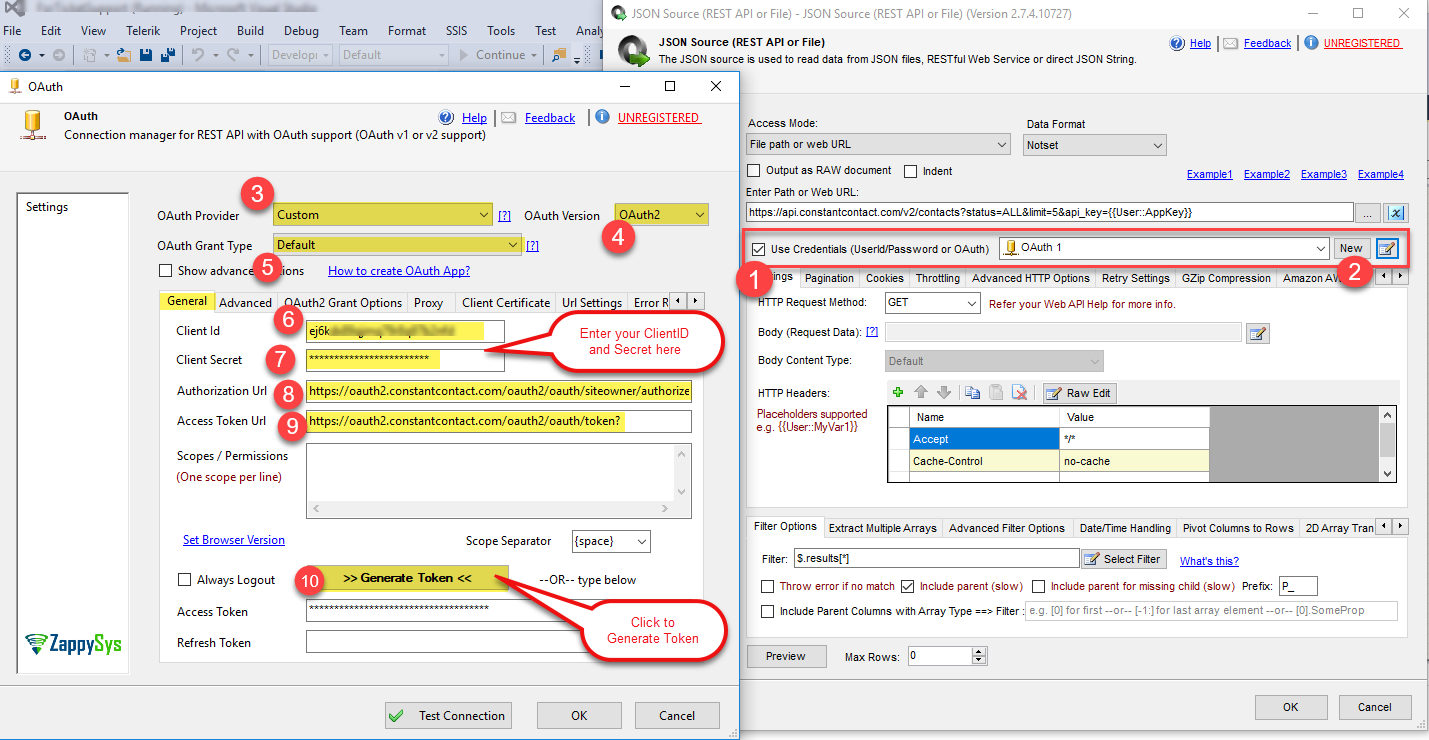
- Check Use Credentials Option and select a new ZS-OAuth Connection from the drop-down.
- Configure the new OAuth Connection for Constant Contact as below.
Basically, you need to configure the configurations of App on the General tab (i.e. Client ID, Client Secret, Authorization URL, Access Token URL)also, most importantly, you need to Enter your Callback URL in Advanced Tab.
JSON Source Configuration for Pagination
- now, we are going to set Pagination related configurations for Constant Contact Getting all Contacts request. Here in our example, we are setting Page size as 5. while We need to read the next page information from the response.
So, we can set the status=ALL, Limit=100 and also we can specify Next Link Expression something like this: $.meta.pagination.next_link and Suffix for Next URL: ?api_key={{User::AppKey}}
- furthermore Select the Filter to set the Filter. seems like you are all OK with the configurations, Click on Preview button to see the response data.
- finally, Click on OK button to save JSON Source settings.
Configure OLE DB Destination Component for dumping Contacts data into SQL
- first of all, Drag any destination (i.e. OLEDB Destination) from your SSIS toolbox. For demo purpose, we will load Contacts data into SQL Server Table.
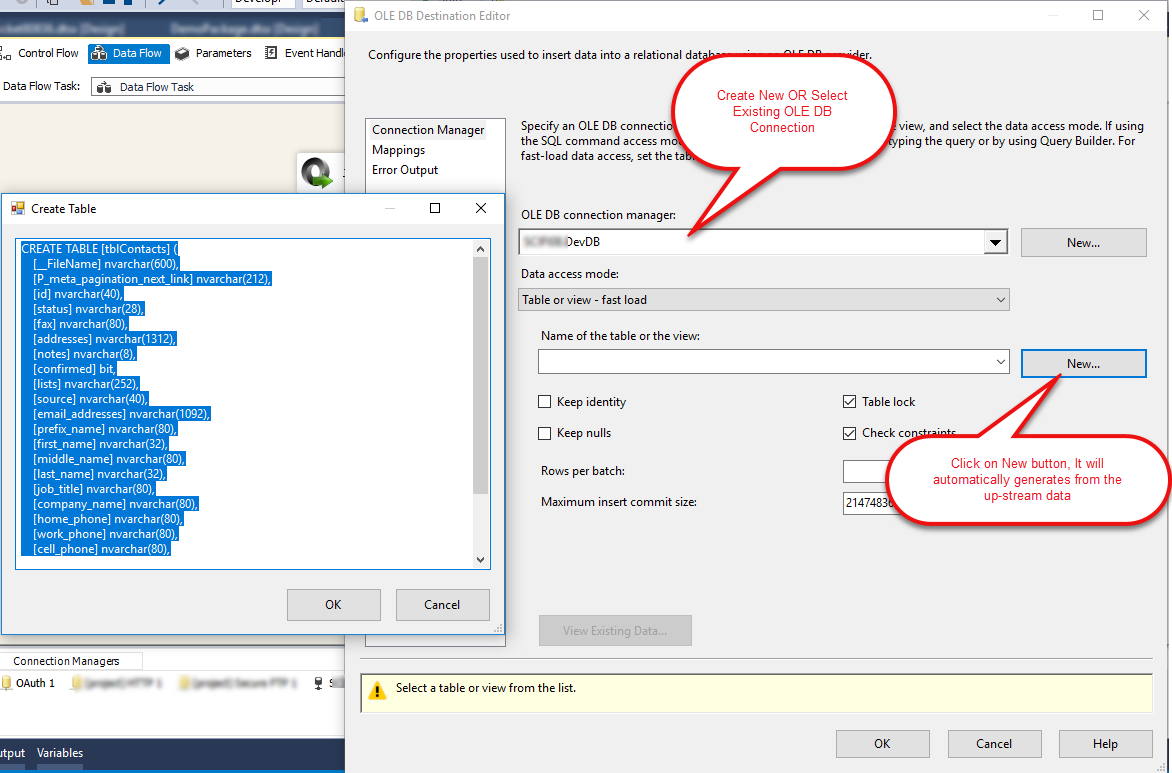
- Configure OLEDB Destination (Select Connection and Target Table). You can Create a new Table for the destination by clicking a NEW button next to Table drop-down.
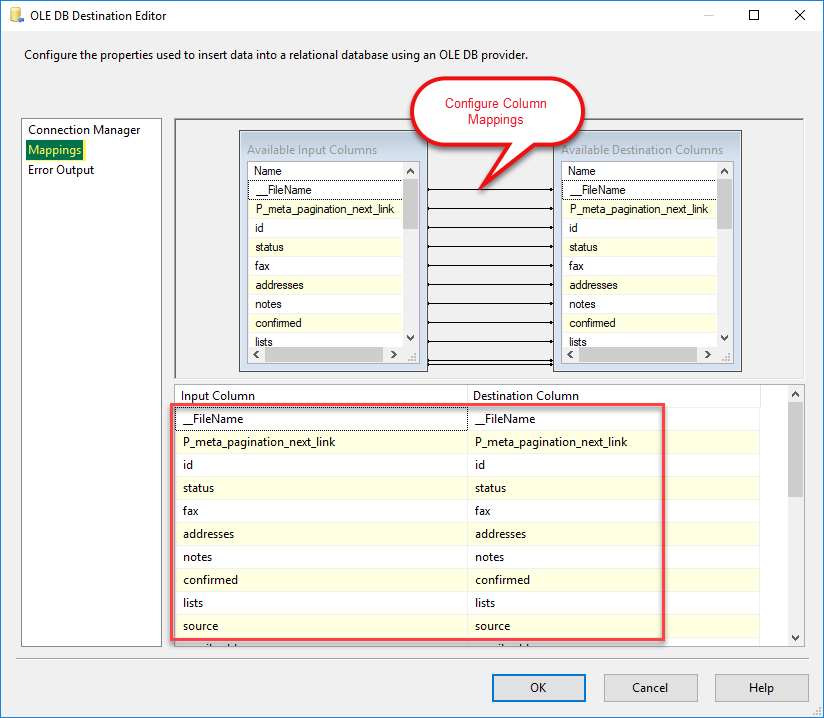
- almost you are done with the configurations, just need to configure mappings, So for that Click on the Columns Tab to configure Mappings. also, Click on OK button to Save the configurations of OLE DB Destination Component.
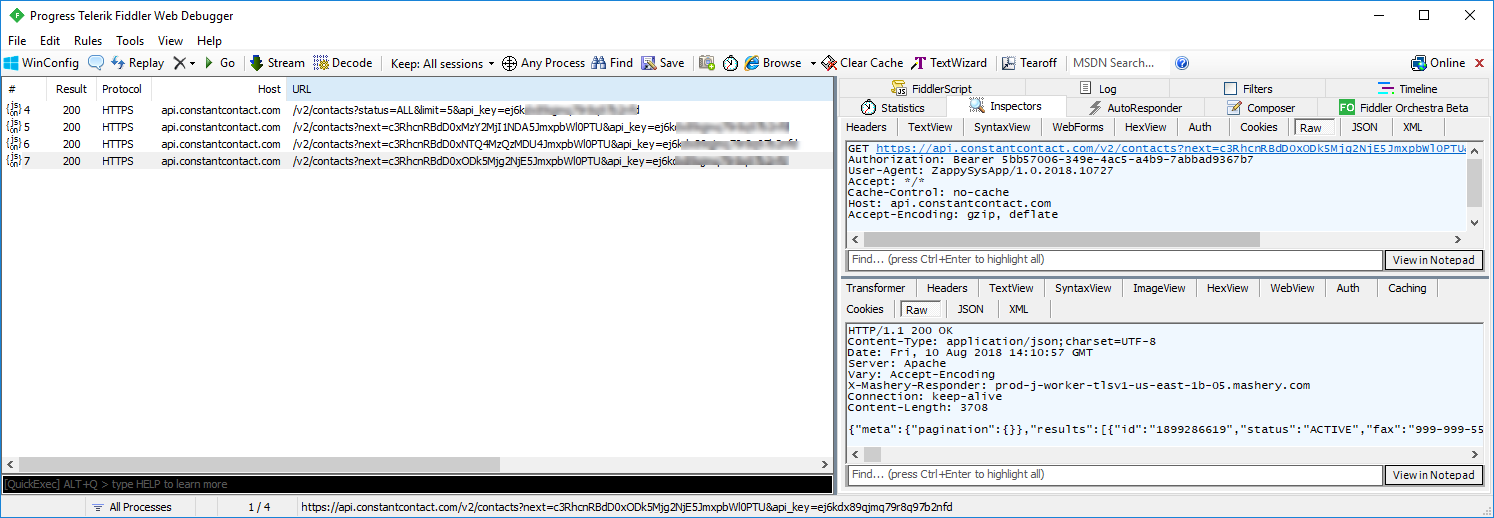
- furthermore, You can see the requests in Fiddler to see the Paginated requests flows.
- finally, Execute your package to Load Contacts data from Constant Contact to SQL Server.
Add a new Contact on Constant Contact (Use SSIS REST API Task)
Now let’s look at one more example to call Constant Contact REST API. This time we will add a new contact using REST API call in SSIS. For this, we will use SSIS REST API Task
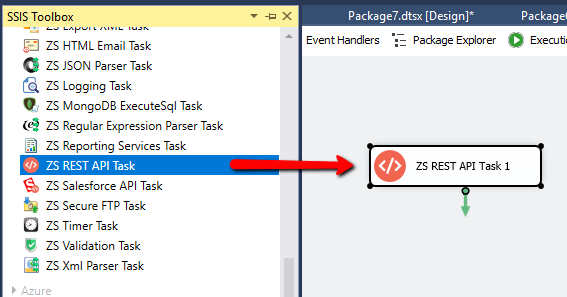
- First of All, Goto Control Flow Section, Drag and Drop SSIS REST API Task from the SSIS Toolbox.
- furthermore, Double click on that Component to Edit the Configurations and Configure the task like the below-attached screesnshot.
12345678910111213141516171819202122232425262728293031323334Request URL:https://api.constantcontact.com/v2/contacts?action_by=ACTION_BY_OWNER&api_key=<<<YOUR_APP_KEY>>>here, action_by Can be ACTION_BY_OWNER or ACTION_BY_VISITOR (from the API Document,<a href="http://developer.constantcontact.com/docs/contacts-api/contacts-collection.html?method=POST">Click here for more Informaion</a>)Sample Request Body:{"addresses": [{"line1": "4928 Small Street","city": "New York","address_type": "PERSONAL","state_code": "MA","country_code": "us","postal_code": "10022"}],"lists": [{"id": "1652428712"}],"email_addresses": [{"email_address": "hbshah@zappysys.com"}],"prefix_name": "Mr.","first_name": "Hardik","last_name": "Shah","job_title": "Tech Supporter","company_name": "ZappySys","home_phone": "555-555-5555","work_phone": "555-555-5555","cell_phone": "555-555-5555","fax": "555-555-5555","custom_fields": [{"name": "CustomField1","value": "Has control of $25 million budget"}]} - now you are done with the configurations. you can do Test Request/Response. See the below-attached request/response screen.
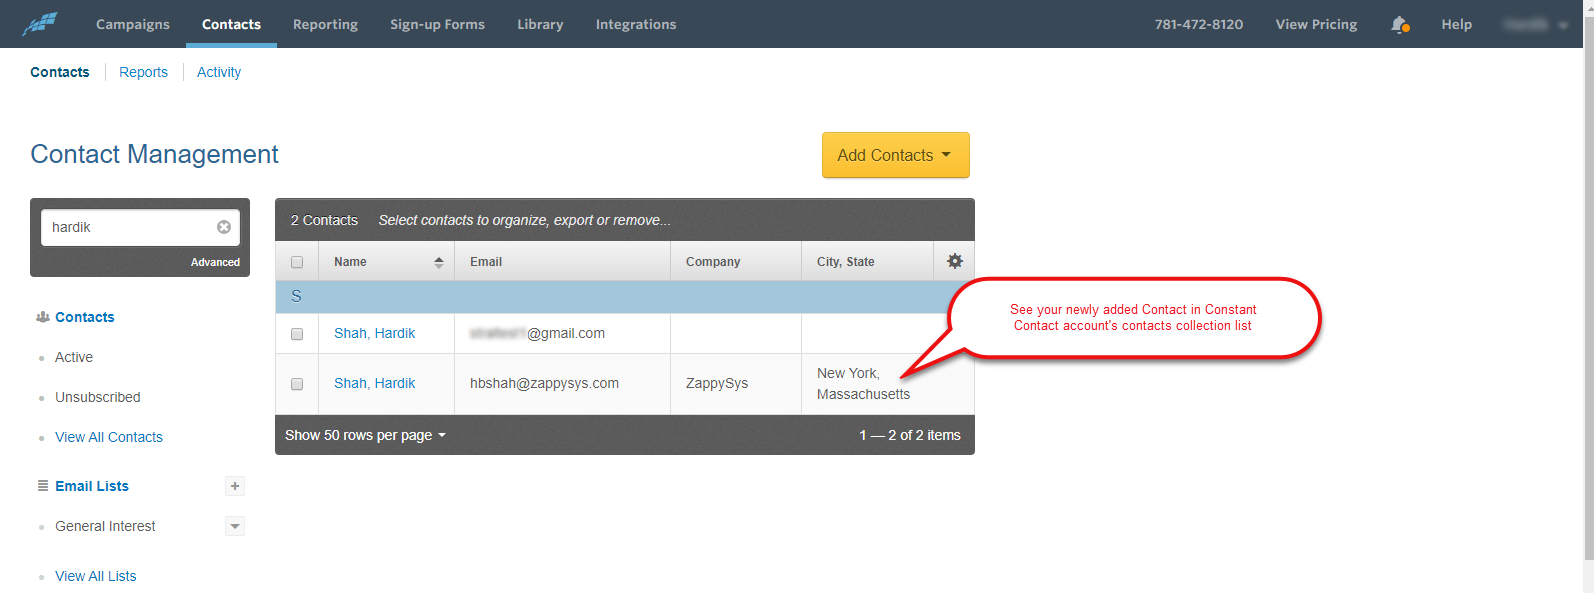
- finally, you have successfully added a contact. furthermore, Goto your Constant Contact Account on its site, you can see the latest Contact added which is added by us with the use of ZappySys and SSIS.
- though, You are done with adding a contact in Constant Contact. similarly, you can Update/Delete particular Contact in Contact Collection List.
Conclusion
In this blog, we learned how to Setup your Mashery Developer Account, Create Constant Contact App for OAuth, Get all Contacts data from Constant Contact and add a new contact on Constant Contact with SSIS using ZS JSON Source Component and SSIS REST API Task in a very simple way. You can achieve many more functionalities with the use of both of these tools. Check our blogs/articles on REST API Task https://zappysys.com/blog/tag/ssis-rest-api-task/ and JSON Source Component https://zappysys.com/blog/tag/ssis-json-source/ to find out what these tools are capable of more.
References
Finally, you can use the following links for more information about the use of Constant Contact API with our tools:
- Constant Contact Documentation for API
- Landing Page for REST API Task, you can also find Tutorial Video here.
- Landing Page for JSON Source Component, you can also find Tutorial Video here.
- Help File: Documentation of SSIS REST API Task and JSON Source Component.

