Introduction
Please visit this page to see all pre-configured, ready-to-use API connectors you can use in SSIS API Source/SSIS API Destination or the API ODBC Driver (for non-SSIS Apps such as Excel, Power BI, and Informatica).
 To consume Zendesk data using the REST API, you can use different methods. Now, let’s see how to create an OAuth Application so you don’t have to rely on a static Token or a UserID/Password to access data.
The OAuth method is more secure and recommended over other methods, so whenever possible, use it.
Create Zendesk OAuth Application
To create an OAuth App for Zendesk, perform the following steps.
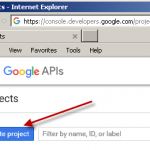
- Log in to your Zendesk Portal. And go tothe following URL (This step assumes you have admin rights to createan OAuth App)
1https://zappysys.zendesk.com/agent/admin/api/oauth_clients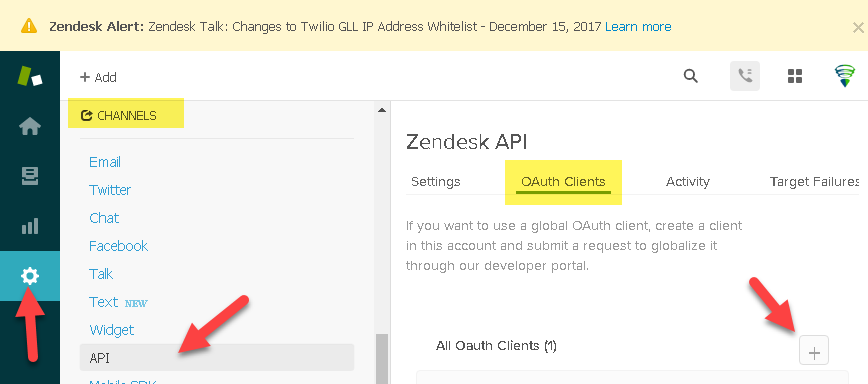
How to create a Zendesk OAuth Application for REST API Access
- After clicking on the plus sign and entering app information (e.g., Display name, Unique ID, also known as ClientId or AppId )
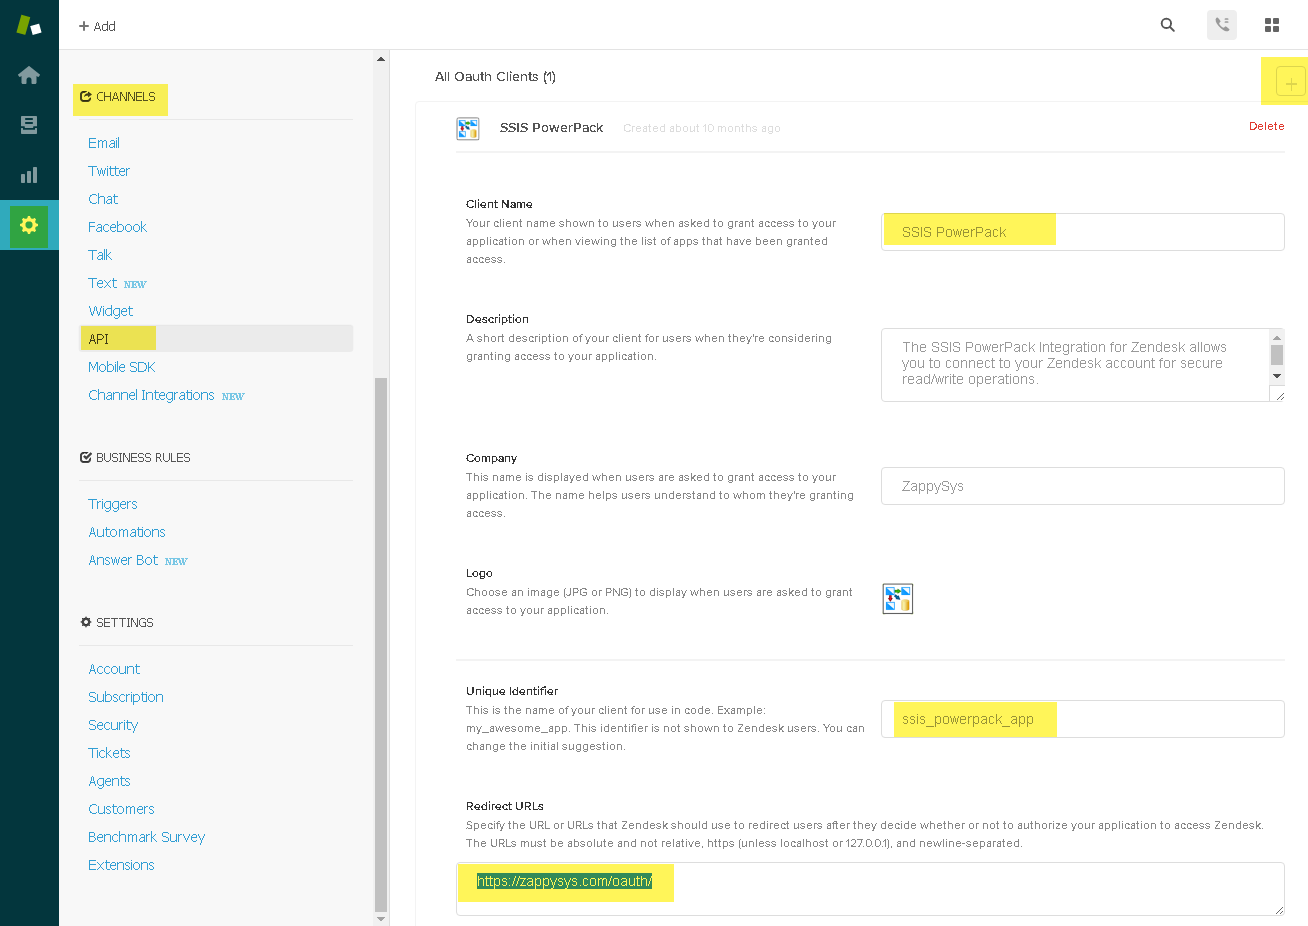
Configure Zendesk OAuth App
- All the way at the bottom of that page, you will see Secret (i.e., Client Secret). Save that along with a unique identifier for later use.
- That’s it. Now you can start using the Zendesk OAuth App to access the REST API
Understanding Scopes
In the next section, you will learn how to configure an OAuth connection. During that, you will need to specify scopes (Token Permissions you want to grant).
The syntax to define the scope is as follows. Scope can be read-only, write-only, or read-write. The resource is an optional part. If you omit the scope, it will be applied to all.
|
1 |
resource:scope |
You can use the following resource scope for the following resources:
- tickets
- users
- auditlogs (read only)
- organizations
- hc
- apps
- triggers
- automations
- targets
Examples of scopes for Zendesk Tickets APIs
|
1 2 3 4 5 6 |
read write read write users:read users:read users:write users:read users:write organizations:write |
Examples of scopes for Zendesk Chat APIs
|
1 2 |
read chat |
Calling Zendesk REST API using SSIS PowerPack OAuth Connection
Here is how you can use Zerdesk OAuth to access the API using the SSIS PowerPack JSON / REST Source
- First, drag the ZS JSON Source from the SSIS Toolbox into the Data Flow designer
- Configure JSON Source as below. Make sure you update the URL to your domain.
URL for Zendesk Tickets API
URL for Zendesk Chat API1https://{YOUR-DOMAIN}.zendesk.com/api/v2/tickets
1https://{YOUR-DOMAIN}.zopim.com/api/v2/chats - Configure the OAuth Connection As below for the Zendesk Ticket API. Scopes differ for the Ticket and Chat APIs; please enter the appropriate ones.
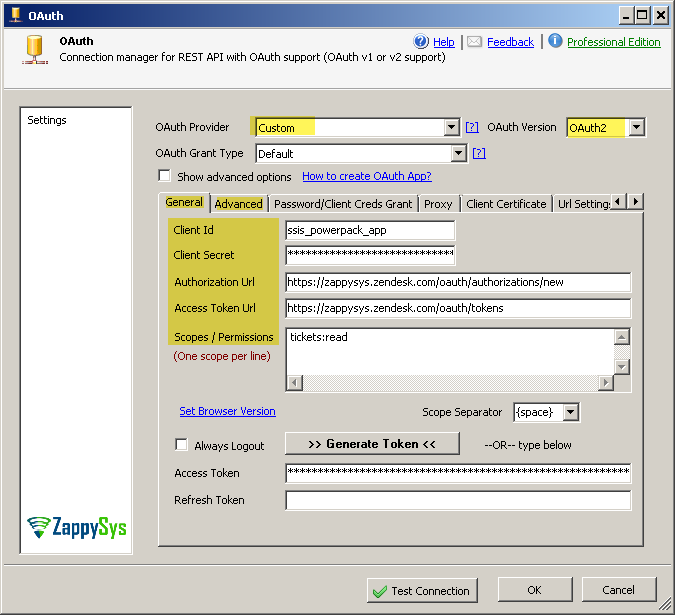
Configure SSIS OAuth connection for Zendesk API Access
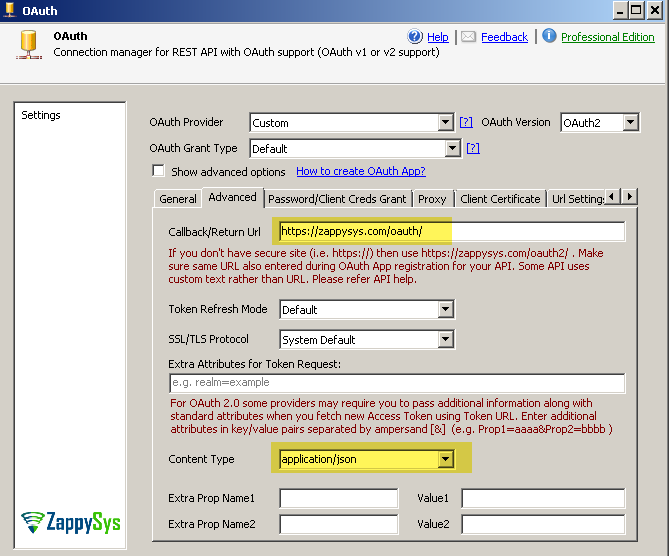
Configure OAuth Redirect URL and Content Type
- Configure the OAuth Connection As below for the Zendesk Chat API. Scopes differ for the Ticket and Chat APIs; please enter the appropriate ones.
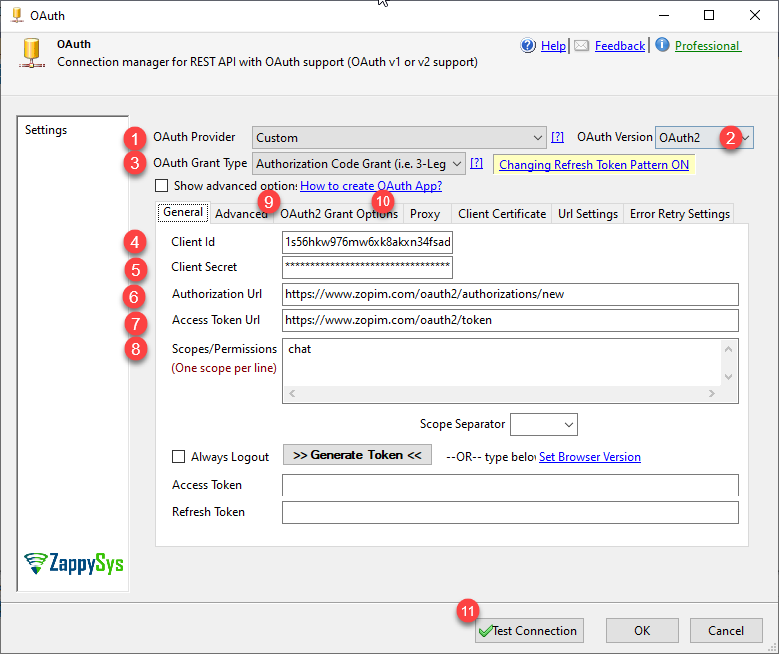
Zendesk Chat OAuth Settings – General Tab
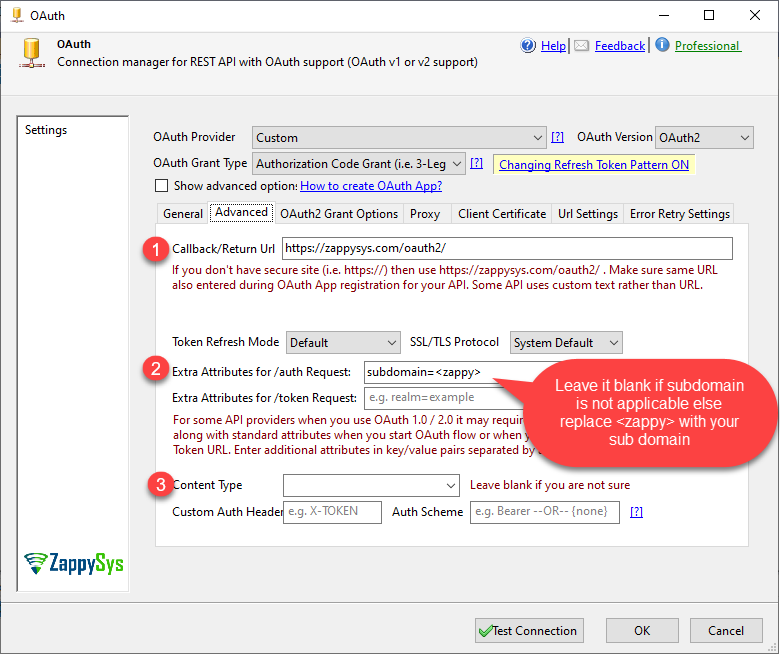
Zendesk Chat OAuth Settings – Advanced Tab
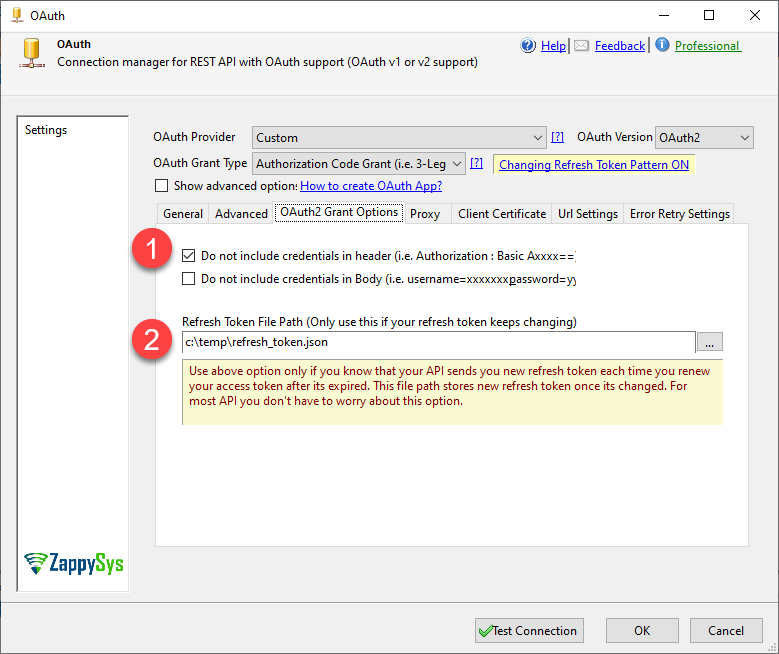
Zendesk Chat OAuth Settings – OAuth2 Grant Options Tab
- After you set the necessary parameters, click Generate Token (Login using your account with the required permission needed to access data)OAuth 2.0 Flow (Google API Example)As of now, Zendesk doesn’t support Refresh Token. So once you click Generate Token, it will only create an Access Token (which doesn’t expire until you revoke it explicitly). The Refresh Token will be blank, as expected.
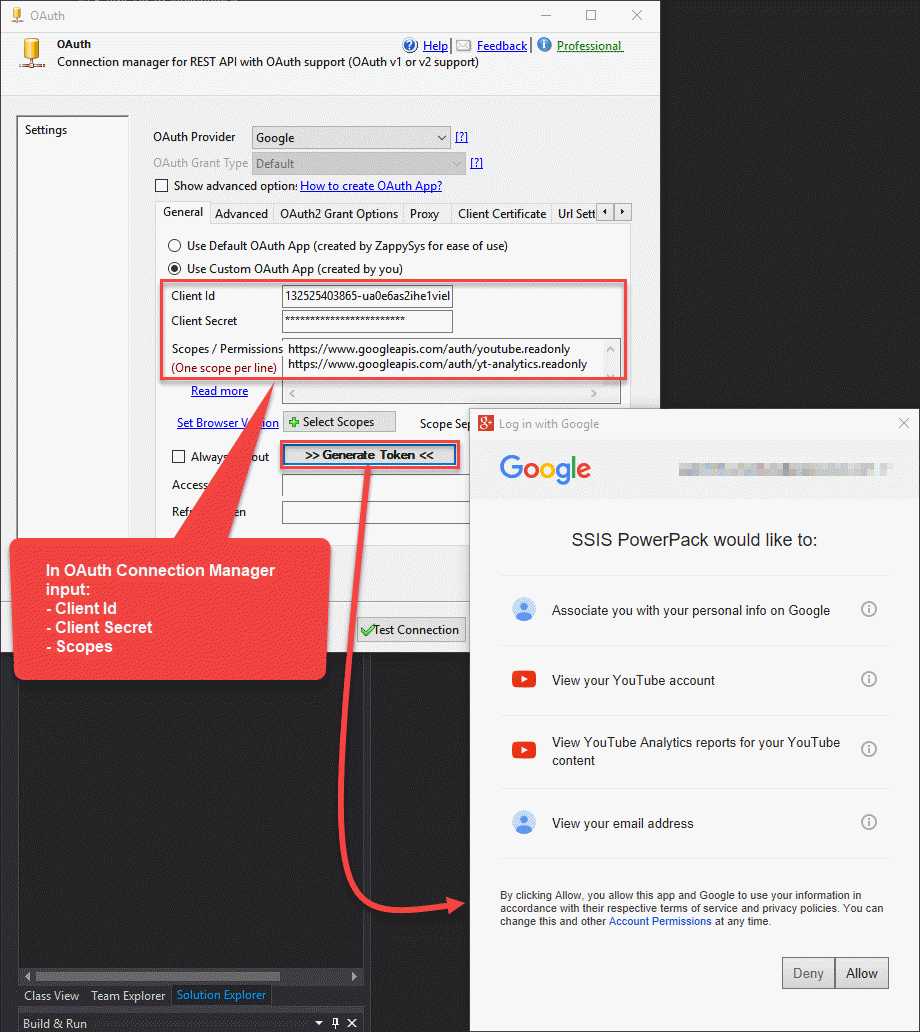
Connect to Google API using OAuth 2.0 (YouTube API Example)
- Configure Pagination parameters as below

SSIS JSON Source –
Configure Zendesk REST API Pagination - Select Filter
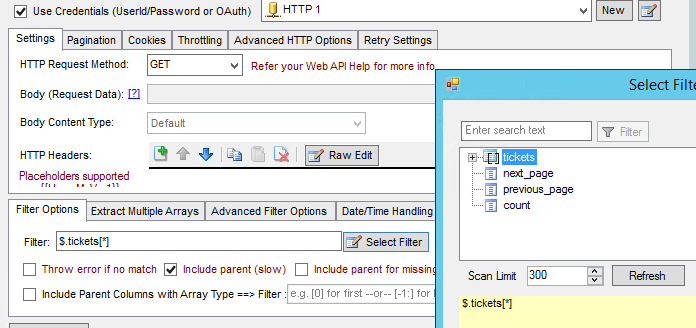
Select Filter – Extract Data from Zendesk API Response (Read Tickets)
- Click Preview to test
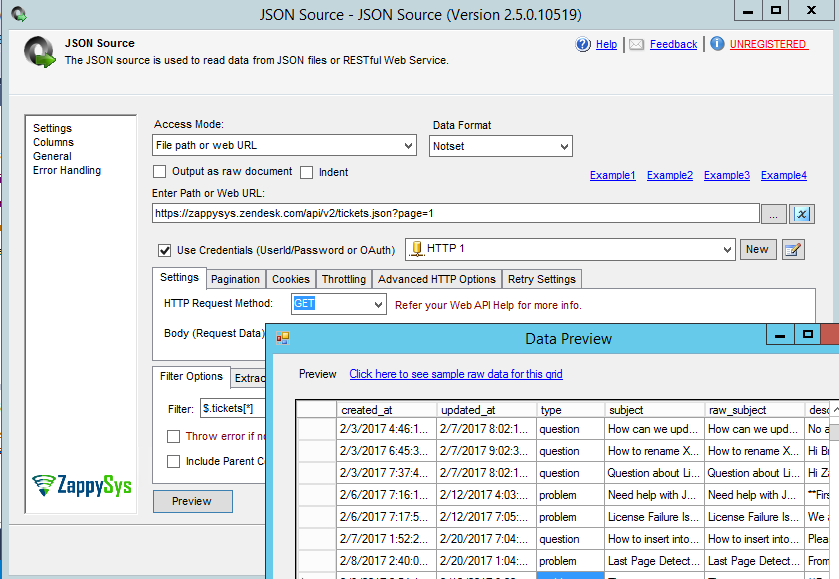
SSIS JSON Source – Data Preview – Zendesk REST API Call to extract tickets
Adding Retry Settings for HTTP or OAuth connection
Zendesk enforces an API rate limit, which means you cannot issue too many API calls in a given time frame. Check this document for exact information.
ZappySys provides API retry settings on both the OAuth Connection and the HTTP Connection. For Zendesk you can retry on a specific status code 429
- Open connection manager UI
- Go to Retry-Settings page
- Select Retry web error on matching response status code.
- Enter 429 for status code
- Check multiply wait time
- In the wait time enter 5000 (wait 5 seconds or multiple of 5 seconds)
- Set Max retry count as 6
See below example (Its not for Zendesk but will give you an idea)
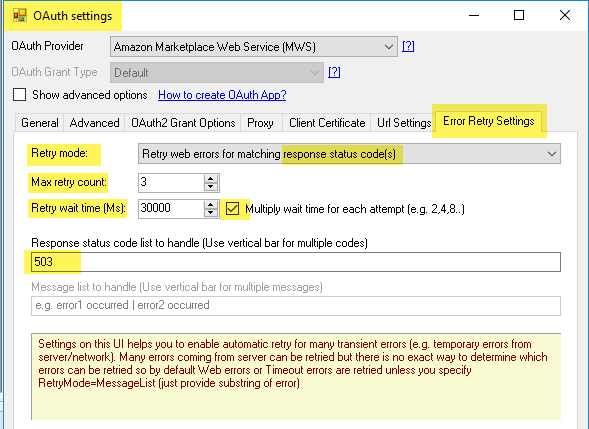
Retry Options