Introduction
![]()
Jamf Pro is a comprehensive Apple device management platform that provides REST APIs for managing Macs, iPads, and iPhones across your organization. This guide demonstrates how to connect Zappysys SSIS connectors to Jamf Pro using OAuth 2.0 API authentication.
Whether you are using Jamf Cloud or an on-premises Jamf Pro server, you will learn how to configure secure OAuth 2.0 authentication without writing any custom code. Zappysys handles all the technical complexity, allowing you to focus on building your ETL workflows for managing device inventory, policy configurations, and compliance reporting.
Prerequisites
- SQL Server Integration Services (SSIS) must be installed.
- Visual Studio with SSIS extension or SQL Server Data Tools (SSDT) is required.
- Active Jamf Pro account with administrator privileges for API client configuration.
- Finally, do not forget to install ZappySys SSIS PowerPack.
Steps
Generate Jamf credentials
- Log in to your Jamf Pro instance as an administrator.
- Navigate to Settings > System Settings > API Roles and Clients.
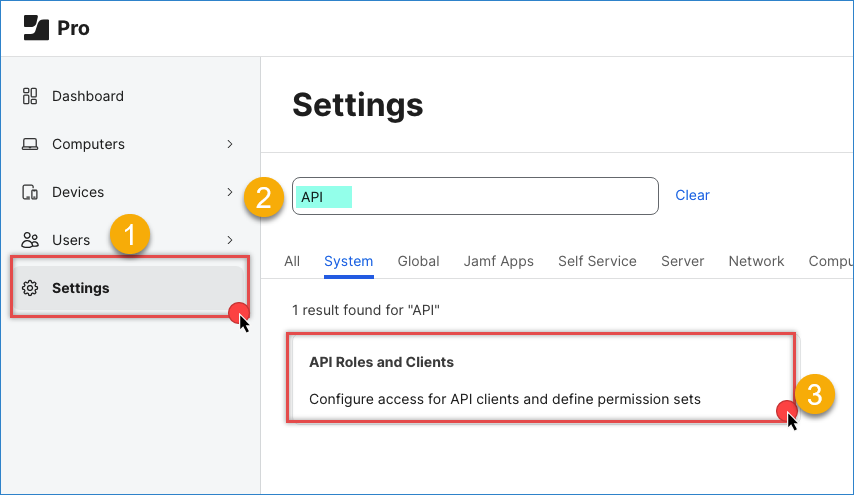
Jamf – API roles and clients
- First, create a new API Role with the required permissions:
- Click API Roles, then click + New.
- Enter a descriptive name (e.g., Admin).
- Assign permissions based on your use case:
- Check Read for data extraction (computers, devices, users)
- Check Create, Update, or Delete only if you need to write data back to Jamf Pro
- Click Save.
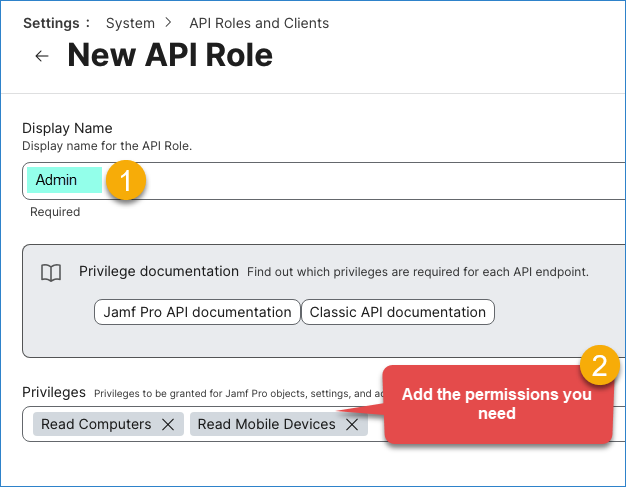
Jamf – new API role
- Now, create an API Client:
- Go back to API Roles and Clients and select the API Clients tab.
- Click + New in the upper right corner.
- Enter a Display Name (e.g., SSIS Connector).
- Select the API Role created in the previous step.
- Toggle Enable API client to ON, then click Save.
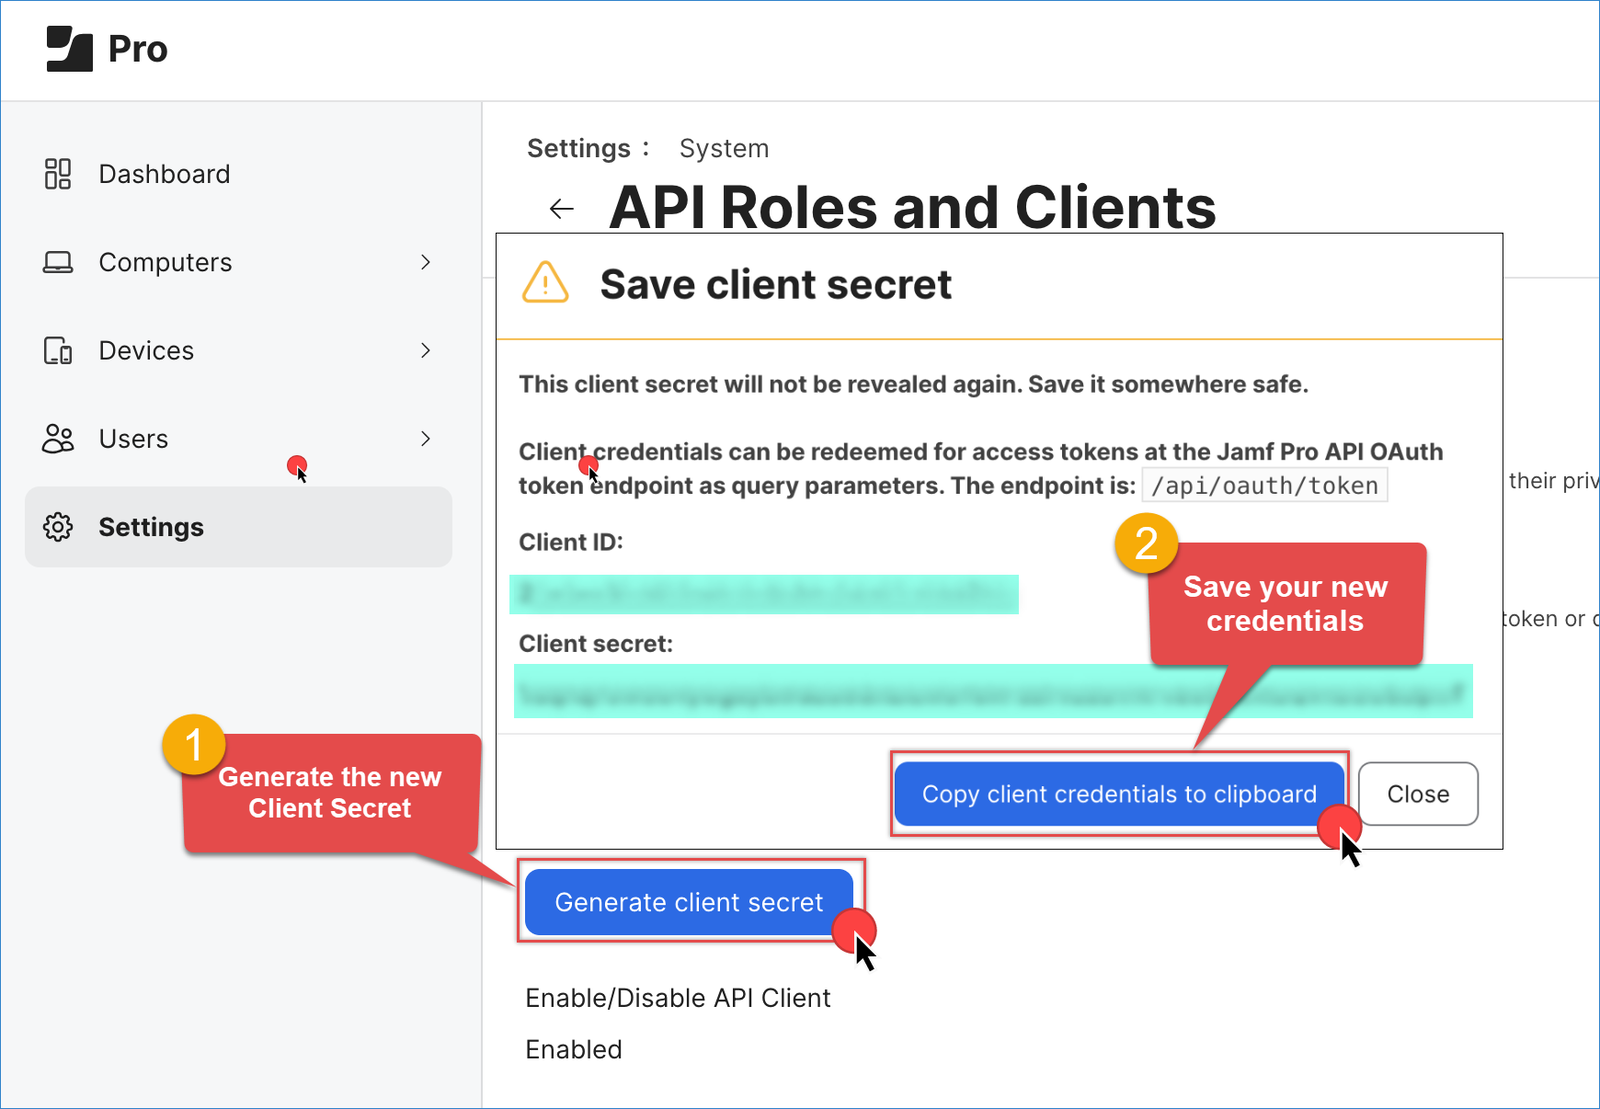
- Generate client credentials:
- Select Generate client secret and click Create secret in the pop-up dialog.
- Copy and securely save the Client ID and Client Secret for use in the next steps.

Jamf – Generate Client ID and Client Secret
- Record your Jamf Pro instance URL (e.g.,
https://your-company.jamfcloud.com).
Create the OAuth connection
- Create or select your SSIS project and open the package.
- Right-click in the Connection Managers pane and select New Connection…
- Select ZS-OAUTH from the SSIS connectors list.

Create a new SSIS OAuth API Connection Manager
- Set the OAuth Version to OAuth 2.0.
- Set the Grant Type to Client Credentials Grant.
- Enter the Client ID and the Client Secret from the API Client created above
- Enter the Token URL:
1https://your-company.jamfcloud.com/api/oauth/token - Click OK to save the connection.
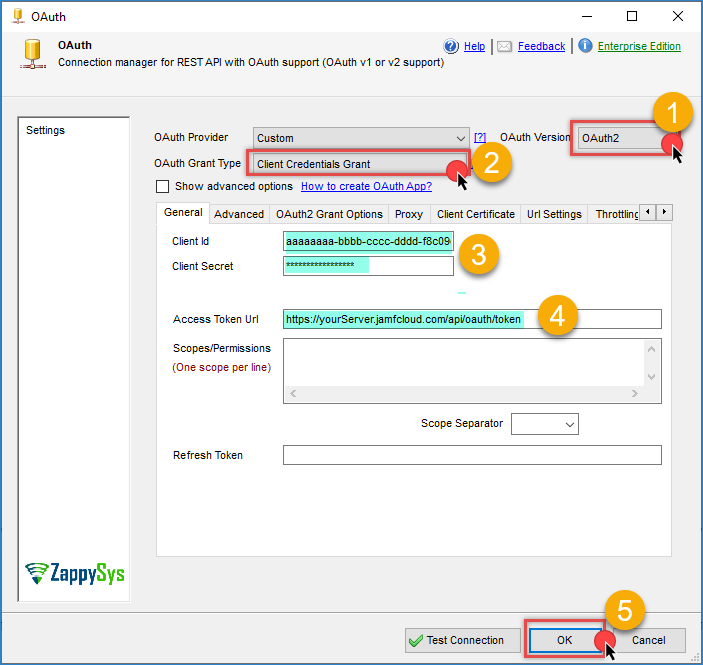
Jamf – OAuth connection
Create and Configure the JSON source
- In your SSIS package, drag and drop a Data Flow Task from the Toolbox into the Control Flow.
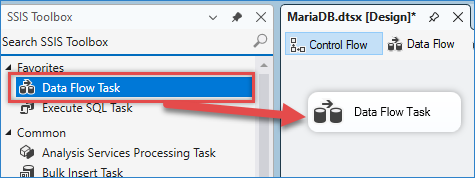
Drag and drop Data flow
- Double-click the Data Flow Task to enter the Data Flow tab.
- In the Data Flow, drag and drop a ZS JSON Source component from the Toolbox.
- Double-click the JSON Source to open its editor.
- Select your Jamf OAuth connection from the Connection Manager dropdown.
- Enter the Jamf Pro API endpoint path in the URL field. For example:
https://your-company.jamfcloud.com/JSSResource/accounts— To retrieve account datahttps://your-company.jamfcloud.com/JSSResource/computers— To retrieve computer inventoryhttps://your-company.jamfcloud.com/JSSResource/mobiledevices— To retrieve mobile device datahttps://your-company.jamfcloud.com/JSSResource/users— To retrieve user information
- Set the HTTP Method to GET for data retrieval.
- Configure the JSON Path Filter to extract the specific object you need from the response (e.g.,
$.accountor$.computers). - Click Preview to see sample data from the Jamf Pro API.
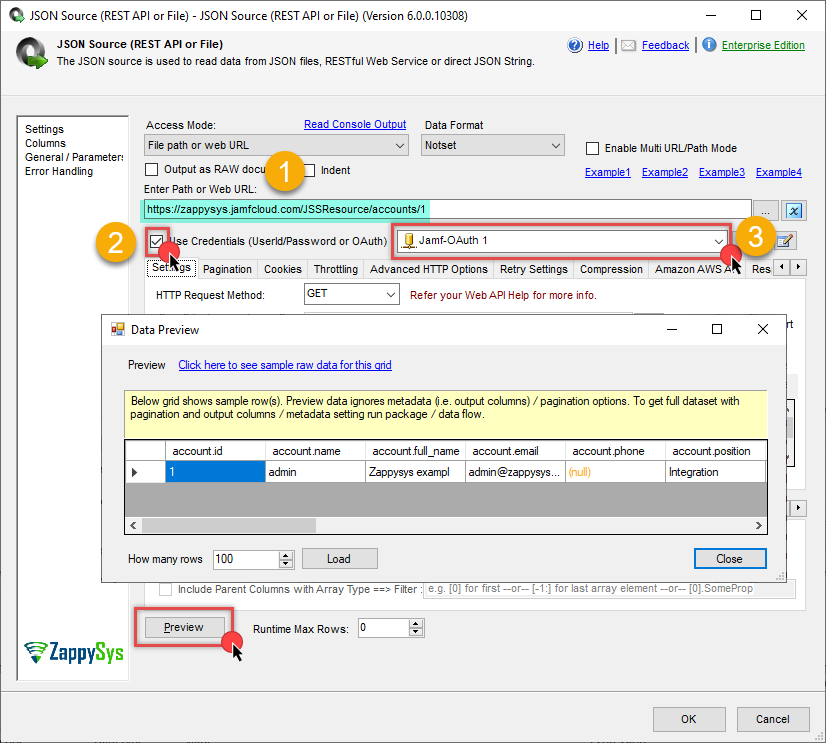
Jamf – JSON source request
Step 4: Configure the Destination
- Drag and drop a destination component (e.g., Trash destination) into the Data Flow.
- Connect the output arrow from the JSON Source to the destination component.
- Double-click the destination component and configure it to point to your target table or file.
- Map the columns from the Jamf Pro API response to the appropriate destination columns
- Click OK to save the destination configuration.
- Execute the package and verify that the data extraction is working correctly.
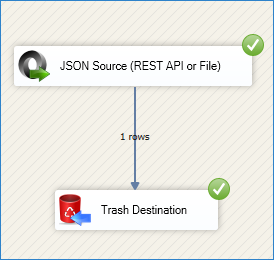
Jamf – Final Result
Conclusion
You now have a secure, reliable connection between Zappysys SSIS and Jamf Pro via OAuth 2.0. This modern, secure approach eliminates the need to store plaintext credentials and simplifies credential rotation and management. With your OAuth connection configured and JSON source component in place, you can build powerful ETL workflows to extract device inventory, policy data, user information, and compliance metrics from Jamf Pro—all flowing directly into your SQL Server database or data warehouse without writing a single line of custom code.
Explore the full capabilities of the ZappySys SSIS PowerPack to optimize your data integration tasks. By applying this pattern, you can extend your solution to include additional transformations, data validation, error handling, and scheduling through SQL Server Agent.
Need Help?
If you encounter any issues, our support team is here to help:
- Live Chat — Use the chat widget (bottom-right corner of this page)
- Email — support@zappysys.com
- Support Center — Visit the ZappySys Support Portal