Introduction
In our previous article we explored several powerful features of the ZappySys Data Gateway. This follow‑up post focuses on keeping the gateway secure. You’ll learn about the new options available in the Network Settings tab, how to restrict access by IP address, and how to grant dataset‑level permissions to non‑admin users.
Requirements
In order to access API data inside your App using ODBC Driver you will need to make sure following requirements are met.- Download and Install ZappySys ODBC PowerPack (This includes XML / JSON / REST API and few other drivers for SQL Server and ODBC connectivity in tools like Excel, Power BI, SSRS)
Network Settings Overview
The Network Settings tab contains filters that control which clients can connect to the gateway. Two common scenarios are addressed below: allowing a range of IP addresses, or permitting only a single IP address.
IP Range Filter
- Ensure you have installed the ZappySys ODBC PowerPack with the default options (this also installs the Data Gateway Service).
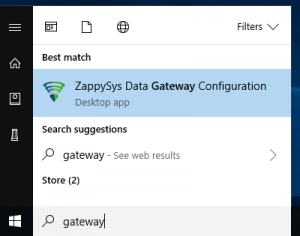
- Open the gateway configuration app by typing “Gateway” in the Start menu and selecting ZappySys Data Gateway Configuration.
Open ZappySys Data Gateway
- Assuming the other tabs are already configured the way you want, switch to Network Settings.
- Click the Edit IP Filters button (see screenshot below):
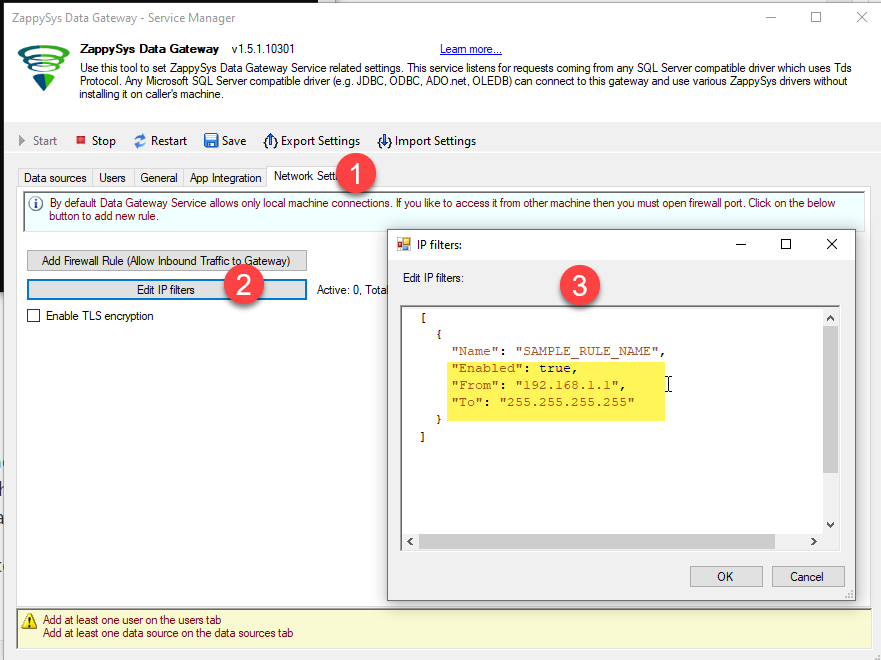
Range IP Filters Network Settings for Data Gateway
- In the IP Filters dialog, set Enabled to
true, then supply the From and To addresses that define the permitted range:
Single range example:
|
1 2 3 4 5 6 7 8 |
[ { "Name": "Network_1", "Enabled": true, "From": "192.168.1.1", "To": "192.168.1.255" } ] |
Multiple ranges example:
|
1 2 3 4 5 6 7 8 9 10 11 12 13 14 |
[ { "Name": "Network_1", "Enabled": true, "From": "192.168.1.1", "To": "192.168.1.255" }, { "Name": "Network_2", "Enabled": true, "From": "192.167.1.1", "To": "192.167.1.255" } ] |
- Save the dialog, then click OK to apply the settings. Only clients whose IP addresses fall within the defined ranges will be allowed.
Single IP Filter
- Repeat steps 1‑3 from the previous section.
- Open the IP Filters dialog and enable it.
- Enter the same value for the From and To fields to restrict access to one address.
- Save and close the dialog; only that address may connect to the gateway.
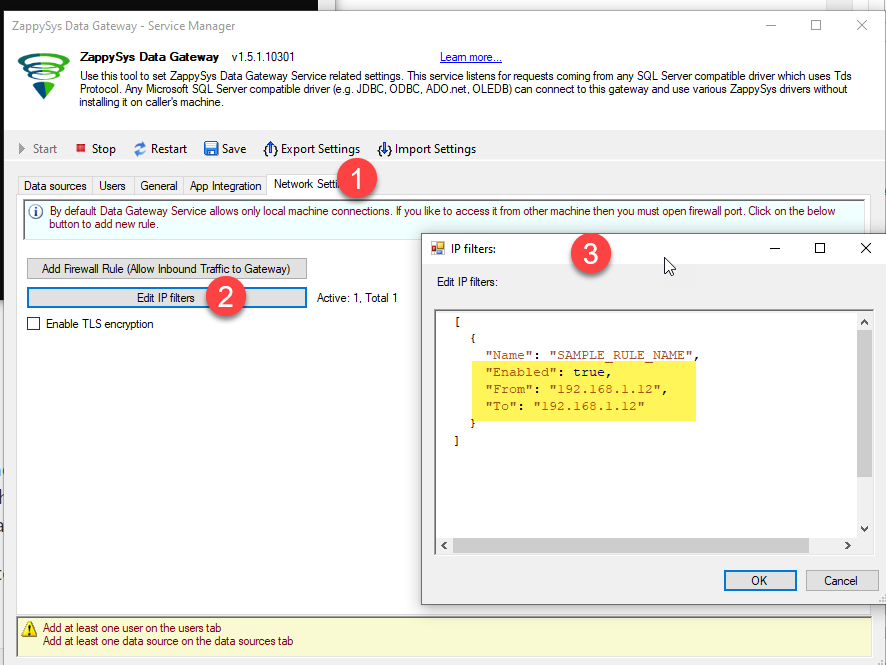
Specific IP Filter Network Settings for Data Gateway.
Note: once any filter rule is enabled, all other addresses are automatically blocked.
User‑Based Permissions
You can further limit access by granting specific users permission to individual data sources. This is useful when you want to allow non‑admin users to consume only certain datasets.
- Make sure the user(s) exist on the Users tab and that they are not assigned administrator rights.
- Switch to the Datasets tab.
- Find the row for the data source you wish to secure and click Edit in the Users column.
- In the dialog that appears, select one or more users on the left pane and click the [ >> ] button to move them to the right pane.
- Choose the desired permission type (for example, Full permission).
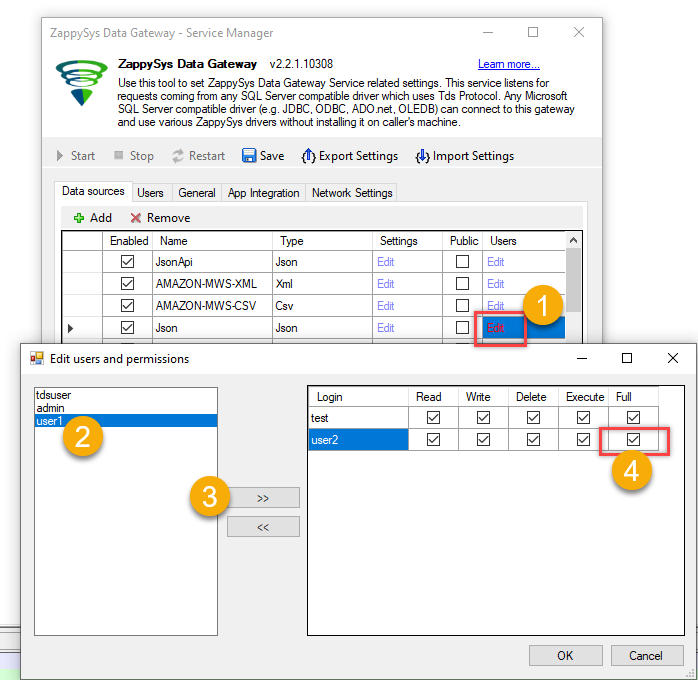
Set Dataset User Permissions – ZappySys Data Gateway
- Click OK to save the changes.
- Restart the Data Gateway service to ensure the new permissions take effect.
Conclusion
In this article we reviewed several ways to harden the ZappySys Data Gateway. The network filters let you restrict connections to either a specific IP address or a range of addresses. The new user‑based permissions allow you to grant dataset access to individual users. Together these features make your gateway more secure and easier to manage.
If you haven’t yet installed the gateway, download it here to get started.
More from ZappySys Blog
 How to create custom ODBC Driver for API without coding
 Connect to Infor Compass using JDBC Driver in ODBC Apps (e.g. SQL Server, Power BI, Excel, Informatica)
 How To Connect ADP API using HTTP Connection over OAuth Connection
 How to register Salesforce App and obtain Client ID / Secret (for API Call / OAuth)