FastSpring Connector for SSIS
Read / write FastSpring data related to Orders, Subscriptions, Quotes, Products, Accounts and more without coding.
In this article you will learn how to quickly and efficiently integrate FastSpring data in SSIS without coding. We will use high-performance FastSpring Connector to easily connect to FastSpring and then access the data inside SSIS.
Let's follow the steps below to see how we can accomplish that!
FastSpring Connector for SSIS is based on ZappySys API Connector Framework which is a part of SSIS PowerPack. It is a collection of high-performance SSIS connectors that enable you to integrate data with virtually any data provider supported by SSIS, including SQL Server. SSIS PowerPack supports various file formats, sources and destinations, including REST/SOAP API, SFTP/FTP, storage services, and plain files, to mention a few (if you are new to SSIS and SSIS PowerPack, find out more on how to use them).
Video Tutorial - Integrate FastSpring data in SSIS
This video covers the following topics and more, so please watch carefully. After watching the video, follow the steps outlined in this article:
- How to download and install the required PowerPack for FastSpring integration in SSIS
- How to configure the connection for FastSpring
- Features of the ZappySys API Source (Authentication / Query Language / Examples / Driver UI)
- How to use the FastSpring in SSIS

Prerequisites
Before we begin, make sure the following prerequisites are met:
- SSIS designer installed. Sometimes it is referred as BIDS or SSDT (download it from Microsoft).
- Basic knowledge of SSIS package development using Microsoft SQL Server Integration Services.
- SSIS PowerPack is installed (if you are new to SSIS PowerPack, then get started!).
Read data from FastSpring in SSIS (Export data)
In this section we will learn how to configure and use FastSpring Connector in API Source to extract data from FastSpring.
-
Begin with opening Visual Studio and Create a New Project.
-
Select Integration Service Project and in new project window set the appropriate name and location for project. And click OK.
In the new SSIS project screen you will find the following:
- SSIS ToolBox on left side bar
- Solution Explorer and Property Window on right bar
- Control flow, data flow, event Handlers, Package Explorer in tab windows
- Connection Manager Window in the bottom
 Note: If you don't see ZappySys SSIS PowerPack Task or Components in SSIS Toolbox, please refer to this help link.
 -
Now, Drag and Drop SSIS Data Flow Task from SSIS Toolbox. Double click on the Data Flow Task to see Data Flow designer.

-
From the SSIS toolbox drag and API Source (Predefined Templates) on the data flow designer surface, and double click on it to edit it:
 - Drag and Drop")
-
Select New Connection to create a new connection:

-
Use a preinstalled FastSpring Connector from Popular Connector List or press Search Online radio button to download FastSpring Connector. Once downloaded simply use it in the configuration:
FastSpring
-
Now it's time to configure authentication. Firstly, configure authentication settings in FastSpring service and then proceed by configuring API Connection Manager. Start by expanding an authentication type:
FastSpring authentication
Here is how to obtain FastSpring API credentials:
- In the FastSpring portal, navigate to Developer Tools > APIs > API Credentials.
-
Click Create, FastSpring will automatically generate your Username and Password.
Copy them, we will need them in the next step:
 WARNING: Securely store the credentials for future reference.
 -
Now go to SSIS package or ODBC data source and use this token in API Credentials authentication configuration:
- In the UserName field paste the Username value you copied in the previous step.
- In the Password field paste the Password value you copied in the previous step.
- Click Test Connection to confirm the connection is working.
- Done! Now you are ready to use FastSpring Connector!
API Connection Manager configuration
Just perform these simple steps to finish authentication configuration:
-
Set Authentication Type to
API Credentials [Http] - Optional step. Modify API Base URL if needed (in most cases default will work).
- Fill in all the required parameters and set optional parameters if needed.
- Finally, hit OK button:
FastSpringAPI Credentials [Http]https://api.fastspring.comRequired Parameters UserName Fill-in the parameter... Password Fill-in the parameter... Optional Parameters RetryMode RetryWhenStatusCodeMatch RetryStatusCodeList 429 RetryCountMax 5 RetryMultiplyWaitTime True Your Webstore URL (Only used by get_products_visibility endpoint) https://YOUR-STORE.onfastspring.com 
-
Select the desired endpoint, change/pass the properties values, and click on Preview Data button to make the API call.
API Source - FastSpringRead / write FastSpring data related to Orders, Subscriptions, Quotes, Products, Accounts and more without coding.

-
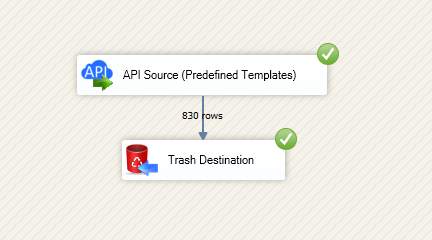
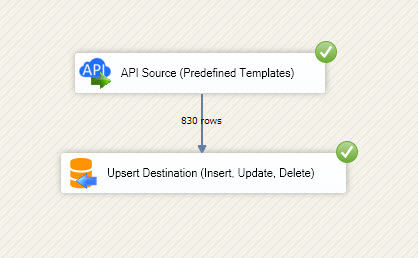
That's it! We are done! Just in a few clicks we configured the call to FastSpring using FastSpring Connector.
You can load the source data into your desired destination using the Upsert Destination , which supports SQL Server, PostgreSQL, and Amazon Redshift. We also offer other destinations such as CSV , Excel , Azure Table , Salesforce , and more . You can check out our SSIS PowerPack Tasks and components for more options. (*loaded in Trash Destination)
Write data to FastSpring using SSIS (Import data)
In this section we will learn how to configure and use FastSpring Connector in the API Destination to write data to FastSpring.
Video tutorial
This video covers following and more so watch carefully. After watching this video follow the steps described in this article.
- How to download SSIS PowerPack for FastSpring integration in SSIS
- How to configure connection for FastSpring
- How to write or lookup data to FastSpring
- Features about SSIS API Destination
- Using FastSpring Connector in SSIS
Step-by-step instructions
In upper section we learned how to read data, now in this section we will learn how to configure FastSpring in the API Source to POST data to the FastSpring.
-
Read the data from the source, being any desired source component. In example we will use ZappySys Dummy Data Source component.
-
From the SSIS Toolbox drag and drop API Destination (Predefined Templates) on the Data Flow Designer surface and connect source component with it, and double click to edit it.
 - Drag and Drop")
-
Select New Connection to create a new connection:
API Destination - FastSpringRead / write FastSpring data related to Orders, Subscriptions, Quotes, Products, Accounts and more without coding.

-
Use a preinstalled FastSpring Connector from Popular Connector List or press Search Online radio button to download FastSpring Connector. Once downloaded simply use it in the configuration:
FastSpring
-
Proceed with selecting the desired Authentication Type. Then select API Base URL (in most cases default one is the right one). Finally, fill in all the required parameters and set optional parameters if needed. You may press a link Steps to Configure which will help set certain parameters. More info is available in Authentication section.
FastSpring authentication
Here is how to obtain FastSpring API credentials:
- In the FastSpring portal, navigate to Developer Tools > APIs > API Credentials.
-
Click Create, FastSpring will automatically generate your Username and Password.
Copy them, we will need them in the next step:
WARNING: Securely store the credentials for future reference.
-
Now go to SSIS package or ODBC data source and use this token in API Credentials authentication configuration:
- In the UserName field paste the Username value you copied in the previous step.
- In the Password field paste the Password value you copied in the previous step.
- Click Test Connection to confirm the connection is working.
- Done! Now you are ready to use FastSpring Connector!
API Connection Manager configuration
Just perform these simple steps to finish authentication configuration:
-
Set Authentication Type to
API Credentials [Http] - Optional step. Modify API Base URL if needed (in most cases default will work).
- Fill in all the required parameters and set optional parameters if needed.
- Finally, hit OK button:
FastSpringAPI Credentials [Http]https://api.fastspring.comRequired Parameters UserName Fill-in the parameter... Password Fill-in the parameter... Optional Parameters RetryMode RetryWhenStatusCodeMatch RetryStatusCodeList 429 RetryCountMax 5 RetryMultiplyWaitTime True Your Webstore URL (Only used by get_products_visibility endpoint) https://YOUR-STORE.onfastspring.com
-
Select the desired endpoint, change/pass the properties values, and go to the Mappings tab to map the columns.
API Destination - FastSpringRead / write FastSpring data related to Orders, Subscriptions, Quotes, Products, Accounts and more without coding.

-
Finally, map the desired columns:
API Destination - FastSpringRead / write FastSpring data related to Orders, Subscriptions, Quotes, Products, Accounts and more without coding.

-
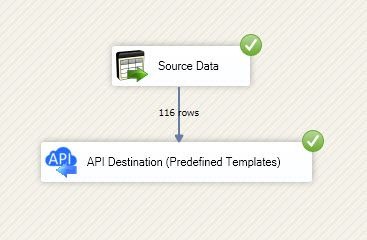
That's it; we successfully configured the POST API Call. In a few clicks we configured the FastSpring API call using ZappySys FastSpring Connector
Load FastSpring data into SQL Server using Upsert Destination (Insert or Update)
Once you configured the data source, you can load FastSpring data into SQL Server using Upsert Destination.
Upsert Destination can merge or synchronize source data with the target table.
It supports Microsoft SQL Server, PostgreSQL, and Redshift databases as targets.
Upsert Destination also supports very fast bulk upsert operation along with bulk delete.
Upsert operation
- a database operation which performs INSERT or UPDATE SQL commands
based on record's existence condition in the target table.
It
Upsert Destination supports INSERT, UPDATE, and DELETE operations,
so it is similar to SQL Server's MERGE command, except it can be used directly in SSIS package.
-
From the SSIS Toolbox drag-and-drop Upsert Destination component onto the Data Flow designer background.
-
Connect your SSIS source component to Upsert Destination.
-
Double-click on Upsert Destination component to open configuration window.
-
Start by selecting the Action from the list.
-
Next, select the desired target connection or create one by clicking <New [provider] Connection> menu item from the Target Connection dropdown.
-
Then select a table from the Target Table list or click New button to create a new table based on the source columns.
-
Continue by checking Insert and Update options according to your scenario (e.g. if Update option is unchecked, no updates will be made).
-
Finally, click Map All button to map all columns and then select the Key columns to match the columns on:
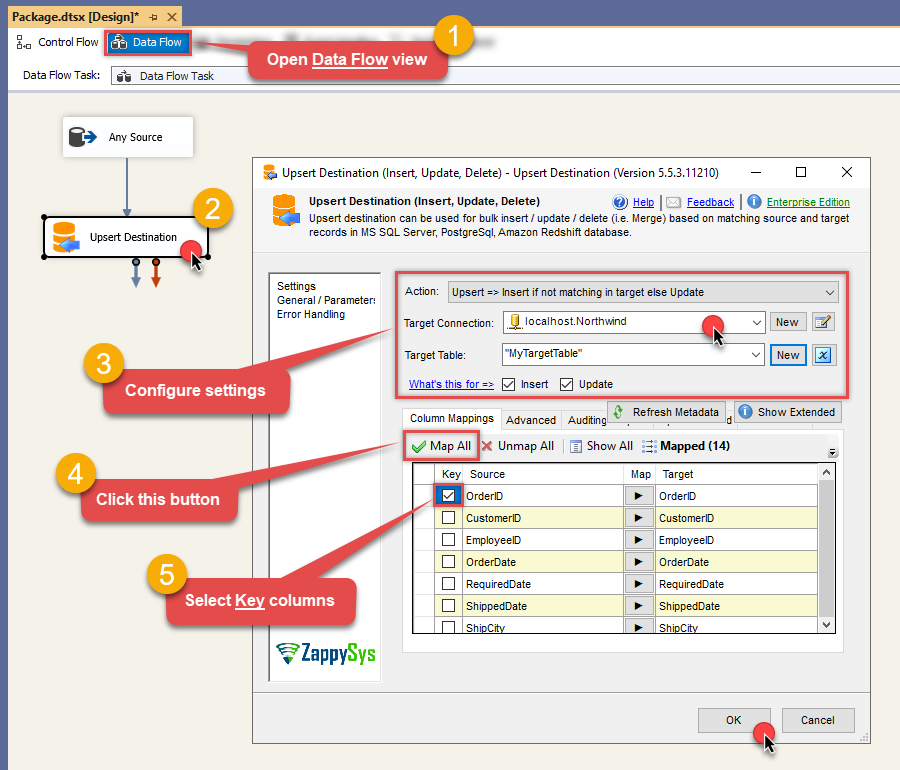
-
Click OK to save the configuration.
-
Run the package and FastSpring data will be merged with the target table in SQL Server, PostgreSQL, or Redshift:
-
Done!
Deploy and schedule SSIS package
After you are done creating SSIS package, most likely, you want to deploy it to SQL Server Catalog and run it periodically. Just follow the instructions in this article:
Running SSIS package in Azure Data Factory (ADF)
To use SSIS PowerPack in ADF, you must first prepare Azure-SSIS Integration Runtime. Follow this link for detailed instructions:
Actions supported by FastSpring Connector
Learn how to perform common FastSpring actions directly in SSIS with these how-to guides:
- Create Product
- Get Account By Id
- Get Account Charges
- Get Account Charges by Id
- Get Account Orders (For a single account)
- Get Account Orders (For all accounts)
- Get Accounts
- Get Order by Id
- Get Order Items
- Get Order Items by OrderId
- Get Orders
- Get Product
- Get Product IDs
- Get Product Prices
- Get Products
- Get Products Publish Status
- Get Quote By Id
- Get Quotes
- Get Revenue Report
- Get Subscription By Id
- Get Subscription Report
- Get Subscriptions
- Get Subscriptions Ids
- Update Product
- Make Generic API Request
- Make Generic API Request (Bulk Write)
Centralized data access via Data Gateway
In some situations, you may need to provide FastSpring data access to multiple users or services. Configuring the data source on a Data Gateway creates a single, centralized connection point for this purpose.
This configuration provides two primary advantages:
-
Centralized data access
The data source is configured once on the gateway, eliminating the need to set it up individually on each user's machine or application. This significantly simplifies the management process.
-
Centralized access control
Since all connections route through the gateway, access can be governed or revoked from a single location for all users.
| Data Gateway |
Local ODBC
data source
|
|
|---|---|---|
| Simple configuration | ||
| Installation | Single machine | Per machine |
| Connectivity | Local and remote | Local only |
| Connections limit | Limited by License | Unlimited |
| Central data access | ||
| Central access control | ||
| More flexible cost |
If you need any of these requirements, you will have to create a data source in Data Gateway to connect to FastSpring, and to create an ODBC data source to connect to Data Gateway in SSIS.
Let's not wait and get going!
Creating FastSpring data source in Gateway
In this section we will create a data source for FastSpring in Data Gateway. Let's follow these steps to accomplish that:
-
Download and install ODBC PowerPack.
-
Search for
gatewayin Windows Start Menu and open ZappySys Data Gateway Configuration:
-
Go to Users tab and follow these steps to add a Data Gateway user:
- Click Add button
-
In Login field enter username, e.g.,
john - Then enter a Password
- Check Is Administrator checkbox
- Click OK to save

-
Now we are ready to add a data source:
- Click Add button
- Give Datasource a name (have it handy for later)
- Then select Native - ZappySys API Driver
- Finally, click OK
FastspringDSNZappySys API Driver
-
When the ZappySys API Driver configuration window opens, configure the Data Source the same way you configured it in ODBC Data Sources (64-bit), in the beginning of this article.
-
Very important step. Now, after creating or modifying the data source make sure you:
- Click the Save button to persist your changes.
- Hit Yes, once asked if you want to restart the Data Gateway service.
This will ensure all changes are properly applied:
 Skipping this step may result in the new settings not taking effect and, therefore you will not be able to connect to the data source.
Creating ODBC data source for Data Gateway
In this part we will create ODBC data source to connect to Data Gateway from SSIS. To achieve that, let's perform these steps:
-
Open ODBC Data Sources (x64):

-
Create a User data source (User DSN) based on ODBC Driver 17 for SQL Server:
ODBC Driver 17 for SQL Server If you don't see ODBC Driver 17 for SQL Server driver in the list, choose a similar version driver.
 -
Then set a Name of the data source (e.g.
Gateway) and the address of the Data Gateway:GatewayDSNlocalhost,5000 Make sure you separate the hostname and port with a comma, e.g.
localhost,5000. -
Proceed with authentication part:
- Select SQL Server authentication
-
In Login ID field enter the user name you used in Data Gateway, e.g.,
john - Set Password to the one you configured in Data Gateway

-
Then set the default database property to
FastspringDSN(the one we used in Data Gateway):FastspringDSN
-
Continue by checking Trust server certificate option:

-
Once you do that, test the connection:

-
If connection is successful, everything is good:

-
Done!
We are ready to move to the final step. Let's do it!
Accessing data in SSIS via Data Gateway
Finally, we are ready to read data from FastSpring in SSIS via Data Gateway. Follow these final steps:
-
Go back to SSIS.
-
From the SSIS toolbox drag and drop ODBC Source on the dataflow designer surface:

-
Double-click on ODBC Source component to configure it.
-
Click on New... button, it will open Configure ODBC Connection Manager window. Once it opens, click on New... button to create a new ODBC connection to FastSpring ODBC data source:

-
Then choose the data source from the list and click Test Connection button. If the connection test is successful, close the window, and then click OK button to finish the configuration:
GatewayDSN
-
Read the data the same way we discussed at the beginning of this article.
-
That's it!
Now you can connect to FastSpring data in SSIS via the Data Gateway.
john and your password.
Conclusion
In this article we showed you how to connect to FastSpring in SSIS and integrate data without any coding, saving you time and effort.
We encourage you to download FastSpring Connector for SSIS and see how easy it is to use it for yourself or your team.
If you have any questions, feel free to contact ZappySys support team. You can also open a live chat immediately by clicking on the chat icon below.
Download FastSpring Connector for SSIS Documentation


 Connector")


 Connector")


 Connector")
 Connector")


