Smartsheet Connector for SSIS How to List Reports
Prerequisites
Before we begin, make sure the following prerequisites are met:
- SSIS designer installed. Sometimes it is referred as BIDS or SSDT (download it from Microsoft).
- Basic knowledge of SSIS package development using Microsoft SQL Server Integration Services.
- SSIS PowerPack is installed (if you are new to SSIS PowerPack, then get started!).
List Reports in SSIS
-
Begin with opening Visual Studio and Create a New Project.
-
Select Integration Service Project and in new project window set the appropriate name and location for project. And click OK.
In the new SSIS project screen you will find the following:
- SSIS ToolBox on left side bar
- Solution Explorer and Property Window on right bar
- Control flow, data flow, event Handlers, Package Explorer in tab windows
- Connection Manager Window in the bottom
 Note: If you don't see ZappySys SSIS PowerPack Task or Components in SSIS Toolbox, please refer to this help link.
 -
Now, Drag and Drop SSIS Data Flow Task from SSIS Toolbox. Double click on the Data Flow Task to see Data Flow designer.

-
From the SSIS toolbox drag and API Source (Predefined Templates) on the data flow designer surface, and double click on it to edit it:
 - Drag and Drop")
-
Select New Connection to create a new connection:

-
Use a preinstalled Smartsheet Connector from Popular Connector List or press Search Online radio button to download Smartsheet Connector. Once downloaded simply use it in the configuration:
Smartsheet
-
Now it's time to configure authentication. Firstly, configure authentication settings in Smartsheet service and then proceed by configuring API Connection Manager. Start by expanding an authentication type:
Smartsheet authentication
OAuth Walkthrough
Apps connect to Smartsheet using OAuth 2.0 to authenticate and authorize users. If you are building an app, this documentation will walk you through the steps you need to authenticate your users. The Smartsheet SDKs contain APIs for OAuth 2.0.
NOTE: For users of apps like AWS AppFabric, you will need a Tenant ID. You can find your Tenant ID in Admin Center under Security & Controls. There is a Smartsheet Tenant ID pane.
First Steps
Before you can start using OAuth 2.0 with your app, Smartsheet needs the following information:
- You must register with Smartsheet to get a developer account*. The developer account gives you access to "Developer Tools", which is where you manage your app.
- In "Developer Tools", complete any required fields in your developer profile.
- In "Developer Tools", register your app so Smartsheet can assign a client Id and a client secret to the app.
- Review the list of access scopes. You'll need to choose which ones your app needs to get to a user's Smartsheet data, and then ask the user to consent to that access.
- After you've worked through these steps, you'll be ready to implement the OAuth Flow.
Open Developer Tools
- Log in to Smartsheet with your developer account.
- Click the "Account" button in the lower-left corner of your Smartsheet screen, and then click "Developer Tools".
- Do one of the following:
- If you need to register an app, click "Create New App".
- If you need to manage an app, click "view/edit" for the app.
Register Your App Using Developer Tools
- Log in to Smartsheet with your developer account.
- Click the "Account" button in the upper-right corner of your Smartsheet screen, and then click "Developer Tools".
- In the "Create New App" form, provide the following information:
- Name: the name the user sees to identify your app
- Description: a brief description intended for the user
- URL: the URL to launch your app, or the landing page if not a web app
- Contact/support: support information for the user
- Redirect URL: also known as a callback URL. The URL within your application that will receive the OAuth 2.0 credentials After you click "Save", Smartsheet assigns a client Id and secret to your app. Make a note of these Ids for the next steps; however, you can always look them up again in "Developer Tools".
API Connection Manager configuration
Just perform these simple steps to finish authentication configuration:
-
Set Authentication Type to
OAuth (Dynamic Token) [OAuth] - Optional step. Modify API Base URL if needed (in most cases default will work).
- Fill in all the required parameters and set optional parameters if needed.
- Press Generate Token button to generate the tokens.
- Finally, hit OK button:
SmartsheetOAuth (Dynamic Token) [OAuth]https://api.smartsheet.com/2.0Required Parameters ClientId Fill-in the parameter... ClientSecret Fill-in the parameter... Scope Fill-in the parameter... Optional Parameters RetryMode RetryWhenStatusCodeMatch RetryStatusCodeList 429|503 RetryCountMax 5 RetryMultiplyWaitTime True 
Smartsheet authentication
Raw Token Requests
If you want to get started quickly, or are developing a standalone application that can run with your credentials, follow these instructions:
- Click the "Account" button in the lower-left corner of the Smartsheet screen, and then click "Personal Settings".
- Click the "API Access" tab.
- Click the "Generate new access token" button to obtain an access token.
The access token must be sent with every API call in an HTTP authorization header (except for therequests to Get Access Token or Refresh Access Token). Once you have an access token, include it in the Authorization header for every request you make:
Authorization: Bearer JKlMNOpQ12RStUVwxYZAbcde3F5g6hijklM789The header name is Authorization and the value of the header is Bearer JKlMNOpQ12RStUVwxYZAbcde3F5g6hijklM789. Since the access token is being transmitted in clear text, all API calls are done over HTTPS.
NOTE: A best practice is to use a shared account, such as ticket-processor@example.com, rather than your individual work account.
API Connection Manager configuration
Just perform these simple steps to finish authentication configuration:
-
Set Authentication Type to
Static Token [Http] - Optional step. Modify API Base URL if needed (in most cases default will work).
- Fill in all the required parameters and set optional parameters if needed.
- Finally, hit OK button:
SmartsheetStatic Token [Http]https://api.smartsheet.com/2.0Required Parameters Access Token Fill-in the parameter... Optional Parameters RetryMode RetryWhenStatusCodeMatch RetryStatusCodeList 429|503 RetryCountMax 5 RetryMultiplyWaitTime True 
-
Select Reports table from the dropdown and hit Preview Data:
 API Source - SmartsheetRead / write SmartSheet data inside your app, perform many SmartSheet operations such as Read, Insert, Update, Delete, List, Search, Export on objects like Sheets, Rows, Users etc without coding with easy to use high performance API ConnectorSmartsheetReports
Optional Parameters Modified Since 
-
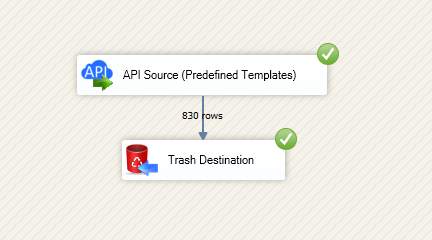
That's it! We are done! Just in a few clicks we configured the call to Smartsheet using Smartsheet Connector.
You can load the source data into your desired destination using the Upsert Destination , which supports SQL Server, PostgreSQL, and Amazon Redshift. We also offer other destinations such as CSV , Excel , Azure Table , Salesforce , and more . You can check out our SSIS PowerPack Tasks and components for more options. (*loaded in Trash Destination)
More actions supported by Smartsheet Connector
Learn how to perform other actions directly in SSIS with these how-to guides:
- Add Sheet Rows
- Delete Sheet Rows
- Export Report (to PDF, Excel, CSV file)
- Export Sheet (to PDF, Excel, CSV file)
- Get Contacts
- Get Sheet Fields
- Get Sheet Row by ID(s)
- Get Sheet Rows
- List Contacts
- List Groups
- List Sheets
- Search (cell data or other object types)
- Send Report Via Email Excel Pdf Or Pdf Gantt Format
- Send Sheet Via Email Excel Pdf Or Pdf Gantt Format
- Update Sheet Rows
- Make Generic API Request
- Make Generic API Request (Bulk Write)