SharePoint Online Connector for UiPath How to Create / Update JSON File (Generic)
Introduction
In this article we will delve deeper into SharePoint Online and UiPath integration, and will learn how to create / update json file (generic). We are continuing from where we left off. By this time, you must have installed ODBC PowerPack, created ODBC Data Source, and configured authentication settings in your SharePoint Online account .
So, let's not waste time and begin.
Use Query Builder to generate SQL query
-
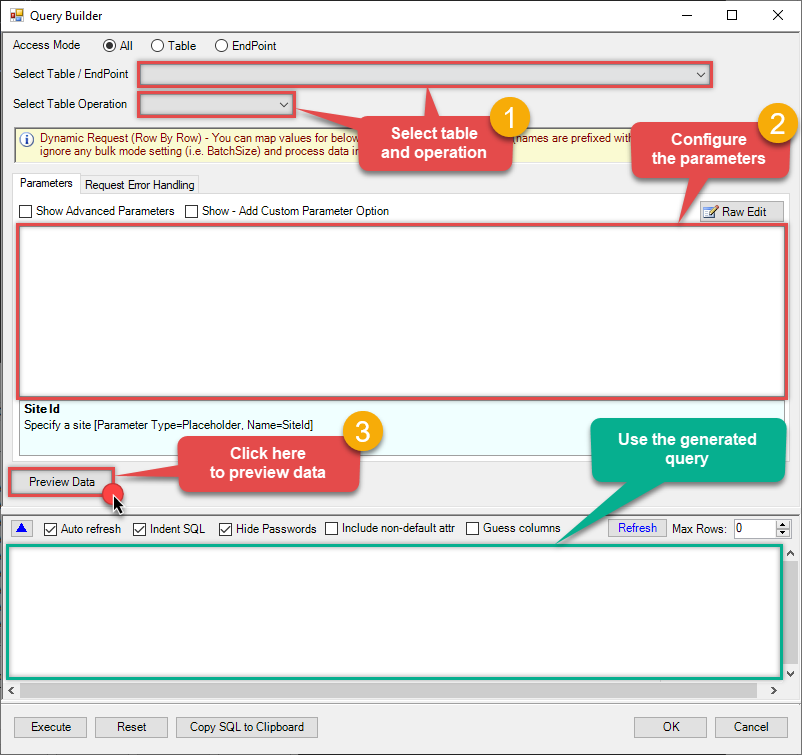
The first thing you have to do is open Query Builder:
ZappySys API Driver - SharePoint OnlineSharePoint Connector can be used to read, write data in SharePoint Online List / Document Library, perform file operations such as upload, download, create, move, delete, rename in a few clicks!SharepointOnlineDSN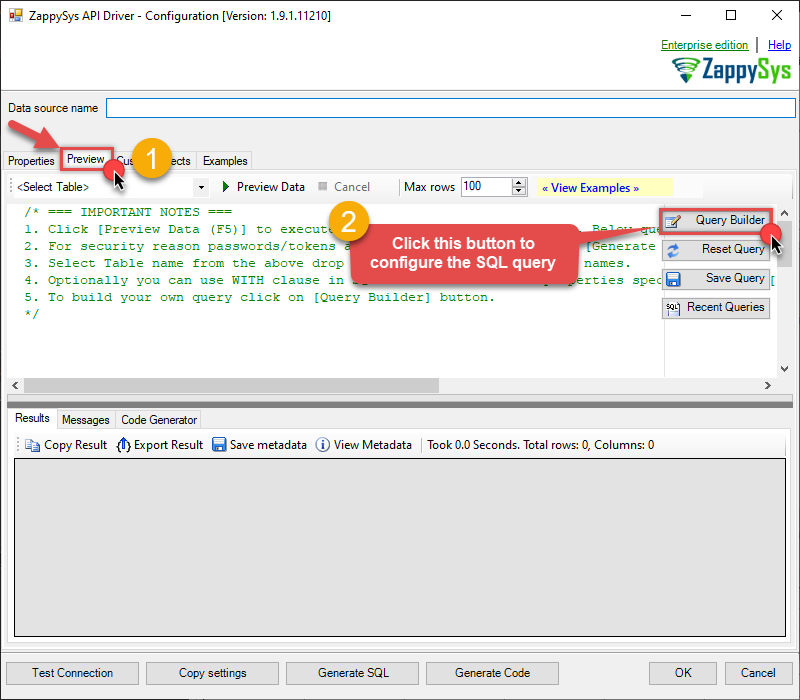
-
Then simply select the JSON File Read/Write table and Insert, Update operation.
-
Continue by configuring the Required parameters. You can also set optional parameters too.
-
Move on by hitting Preview Data button to preview the results.
-
If you see the results you need, simply copy the generated query:
-
That's it! You can use this query in UiPath.
Let's not stop here and explore SQL query examples, including how to use them in Stored Procedures and Views (virtual tables) in the next steps.
SQL query examples
Use these SQL queries in your UiPath data source:
How to Create / Update a JSON File in SharePoint Document Library from External Data Source (e.g. MSSQL / ODBC)
This example shows how to create / update a JSON file directly inside SharePoint Document Library using streaming approach. This example reads records from Microsoft SQL Server database and writes data to JSON file on SharePoint Document Library. If file does not exists then it creates a new one. It uses LayoutMap to generate JSON with custom layout.
INSERT INTO FileReaderWriterJson
SOURCE( 'MSSQL'--OR 'ODBC'
, 'Data Source=localhost;Initial Catalog=Northwind;Integrated Security=true'
, 'select OrderId,CustomerId,OrderDate FROM Northwind.dbo.Orders'
)
WITH(
	    DriveId='b!0zqXLXXJh0uUMzl-JXAd9Ztngc-5utVDqRyD2lKpD2535-11HLQTR5z4hOzmA7Q0'
	  , FileId='root:/test_out.json:'
	--, FileId='root:/subfolder/test_out.json:'
	--, FileId='01N3NxxxxxxxWZYSDJ'  --exising File ID
	  , JsonOutputFormat='Multicontent' --Default , Array2D, ArrayLines ...
	--, DoNotOutputNullProperty='True'
	--, Encoding='UTF8' --UTF8WithoutBOM
  --, WriterDateTimeFormat='yyyy-MM-ddTHH:mm:ss.fff'

	--Example#1: Output all columns
	, LayoutMap='<?xml version="1.0"  ?>
<settings>
  <dataset id="root" main="True" readfrominput="True" />
  <map src="*" />
</settings>'

	--Example#2: Nested JSON (Records under an array)
	/*
	, LayoutMap='<?xml version="1.0" ?>
<settings singledataset="True">
  <dataset id="root" main="True" readfrominput="True" />
  <map name="MyArray" dataset="root" maptype="DocArray">
    <map src="OrderID" name="OrderID" />
    <map src="OrderDate" name="OrderDate" />
  </map>
</settings>'
   */

	--Example#3: Nested JSON (Records under a sub document section)
	/*
	, LayoutMap='<?xml version="1.0" ?>
<settings>
  <dataset id="dsRoot" main="True" readfrominput="True" />
  <map name="NestedSection">
    <map src="OrderID" name="OrderID_MyLabel" />
    <map src="OrderDate" name="OrderDate_MyLabel" />
  </map>
</settings>'
	*/
)
create_json_file endpoint belongs to
FileReaderWriterJson
table(s), and can therefore be used via those table(s).
Stored Procedures and Views
Create Custom Stored Procedure
You can create procedures to encapsulate custom logic and then only pass handful parameters rather than long SQL to execute your API call.
Steps to create Custom Stored Procedure in ZappySys Driver. You can insert Placeholders anywhere inside Procedure Body. Read more about placeholders here
-
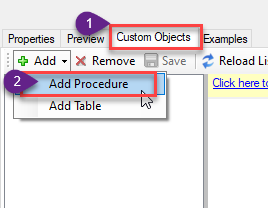
Go to Custom Objects Tab and Click on Add button and Select Add Procedure:
-
Enter the desired Procedure name and click on OK:
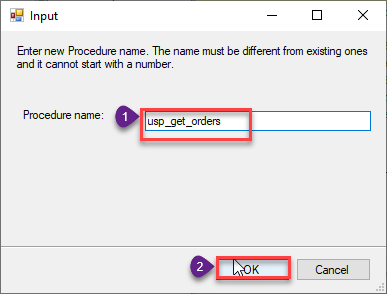
-
Select the created Stored Procedure and write the your desired stored procedure and Save it and it will create the custom stored procedure in the ZappySys Driver:
Here is an example stored procedure for ZappySys Driver. You can insert Placeholders anywhere inside Procedure Body. Read more about placeholders here
CREATE PROCEDURE [usp_get_orders]
    @fromdate = '<<yyyy-MM-dd,FUN_TODAY>>'
 AS
    SELECT * FROM Orders where OrderDate >= '<@fromdate>';
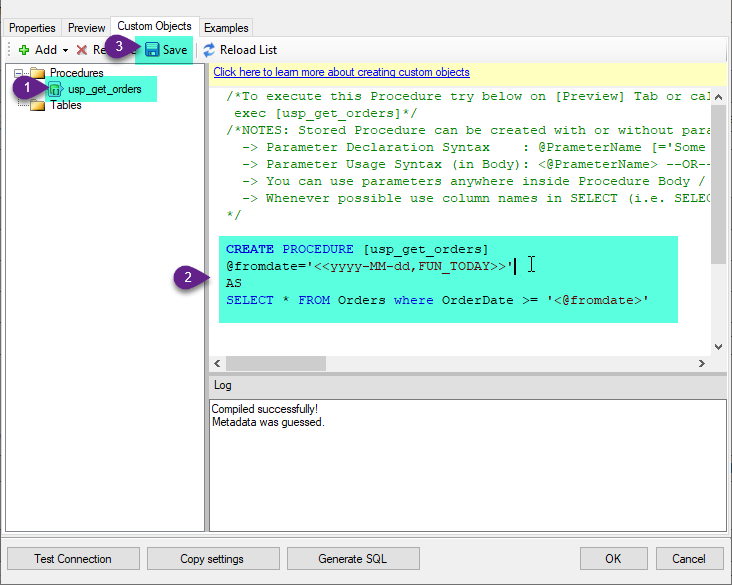
-
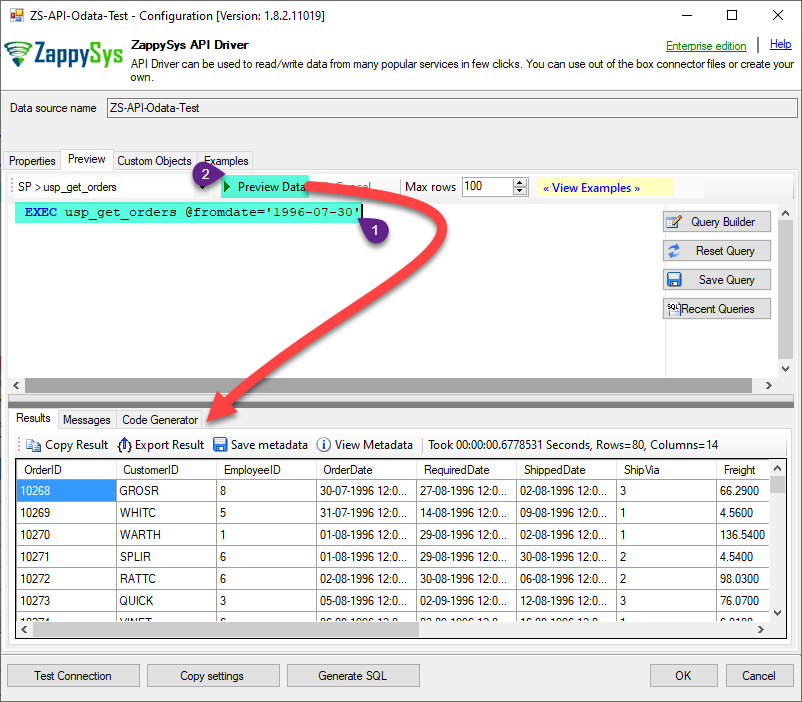
That's it now go to Preview Tab and Execute your Stored Procedure using Exec Command. In this example it will extract the orders from the date 1996-01-01:
Exec usp_get_orders '1996-01-01';
Create Custom Virtual Table
ZappySys API Drivers support flexible Query language so you can override Default Properties you configured on Data Source such as URL, Body. This way you don't have to create multiple Data Sources if you like to read data from multiple EndPoints. However not every application support supplying custom SQL to driver so you can only select Table from list returned from driver.
If you're dealing with Microsoft Access and need to import data from an SQL query, it's important to note that Access doesn't allow direct import of SQL queries. Instead, you can create custom objects (Virtual Tables) to handle the import process.
Many applications like MS Access, Informatica Designer wont give you option to specify custom SQL when you import Objects. In such case Virtual Table is very useful. You can create many Virtual Tables on the same Data Source (e.g. If you have 50 URLs with slight variations you can create virtual tables with just URL as Parameter setting.
-
Go to Custom Objects Tab and Click on Add button and Select Add Table:
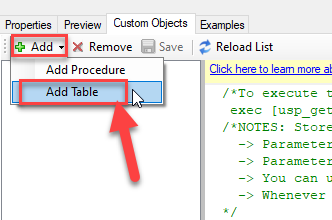
-
Enter the desired Table name and click on OK:
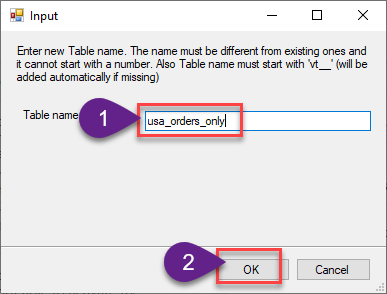
-
And it will open the New Query Window Click on Cancel to close that window and go to Custom Objects Tab.
-
Select the created table, Select Text Type AS SQL and write the your desired SQL Query and Save it and it will create the custom table in the ZappySys Driver:
Here is an example SQL query for ZappySys Driver. You can insert Placeholders also. Read more about placeholders here
SELECT
  "ShipCountry",
  "OrderID",
  "CustomerID",
  "EmployeeID",
  "OrderDate",
  "RequiredDate",
  "ShippedDate",
  "ShipVia",
  "Freight",
  "ShipName",
  "ShipAddress",
  "ShipCity",
  "ShipRegion",
  "ShipPostalCode"
FROM "Orders"
Where "ShipCountry"='USA'
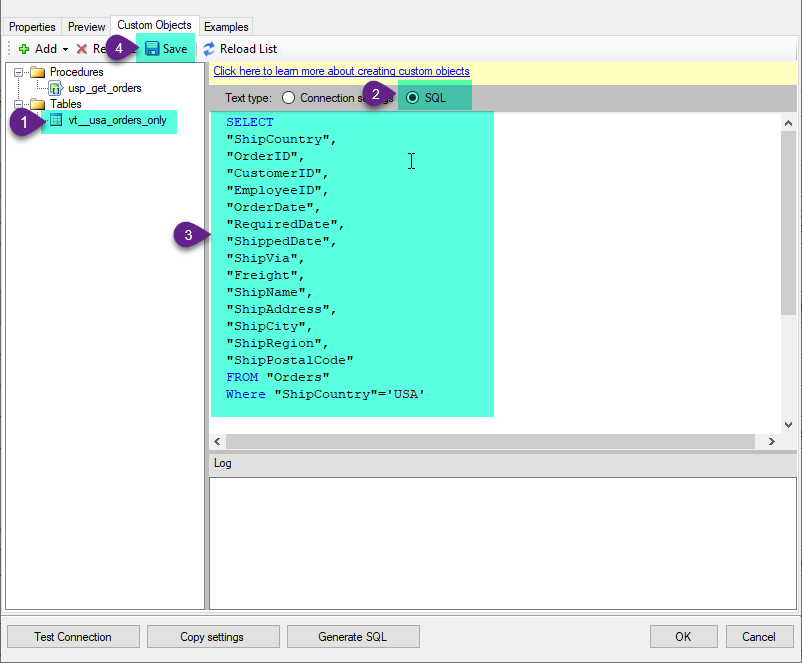
-
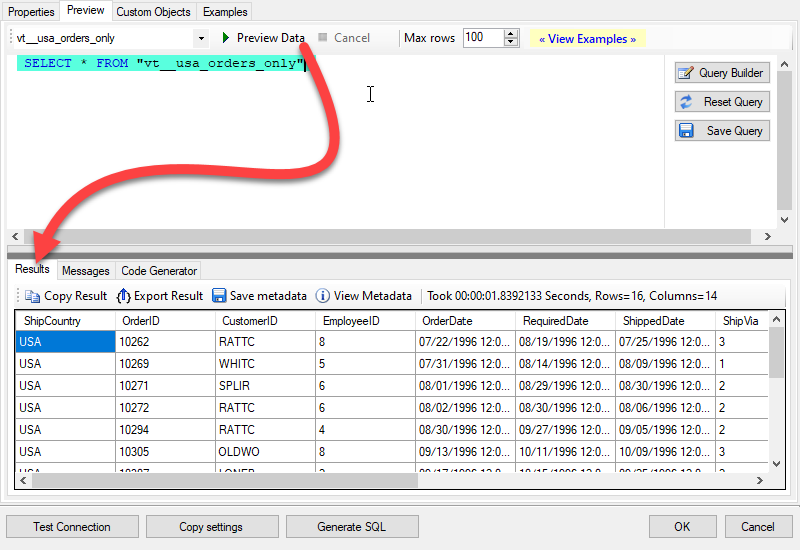
That's it now go to Preview Tab and Execute your custom virtual table query. In this example it will extract the orders for the USA Shipping Country only:
SELECT * FROM "vt__usa_orders_only"
Create / Update JSON File (Generic) in UiPath
-
Open UiPath Studio.
-
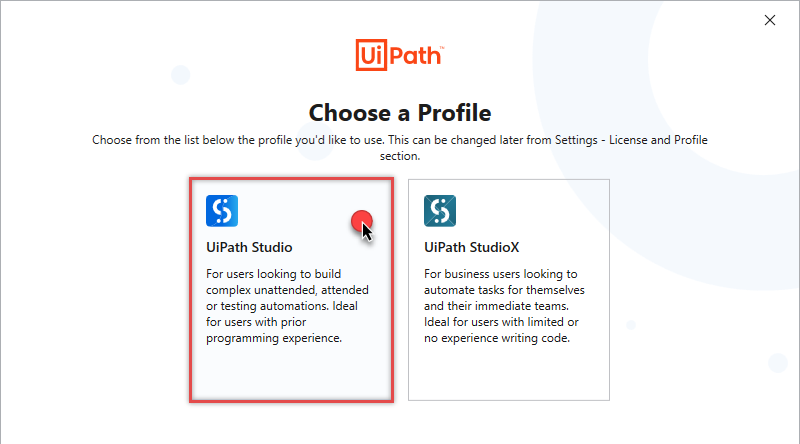
Before we really begin the work, make sure UiPath Studio is set as your profile (blue application icon).
-
In case, it is set to UiPath StudioX, you can change it in UiPath StudioX Settings:
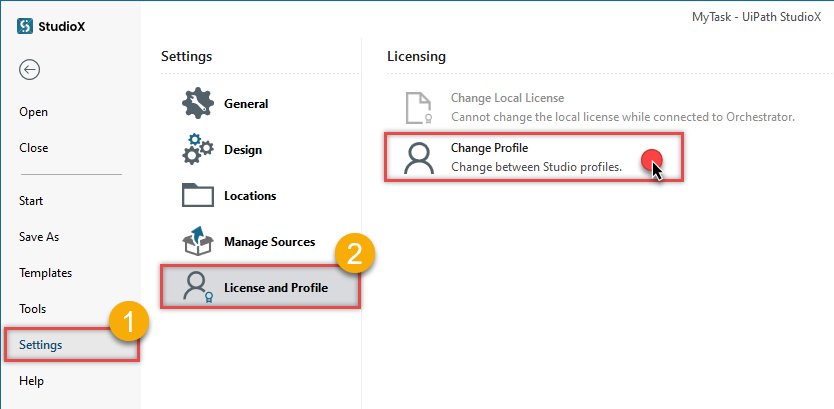
Simply select UiPath Studio option:
-
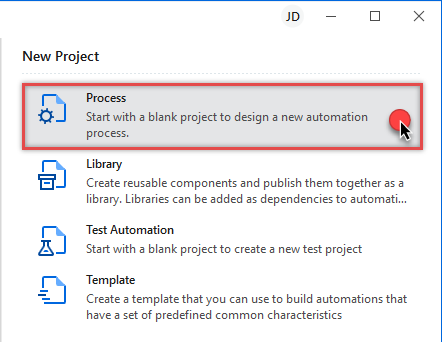
Start by creating a new project based on UiPath Process template:
-
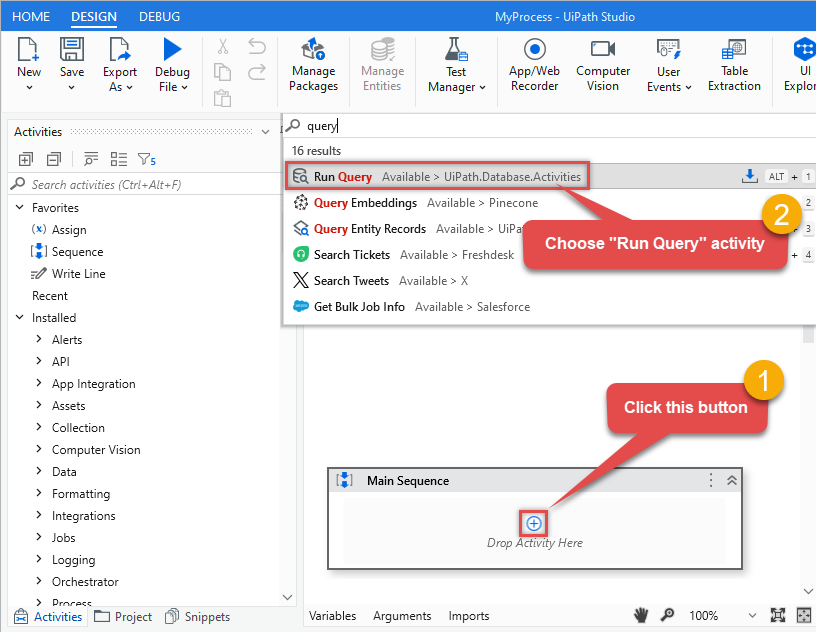
Add Run Query activity in Main Sequence box:
-
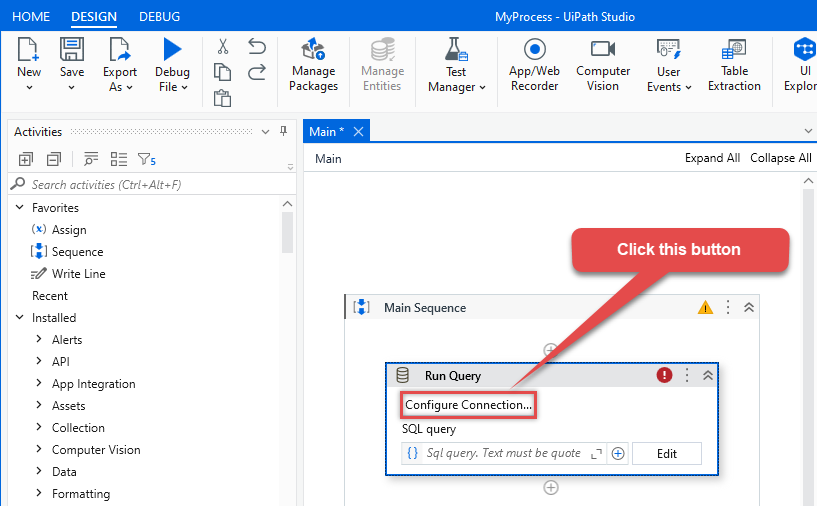
Click Configure Connection... button to create an ODBC connection:
-
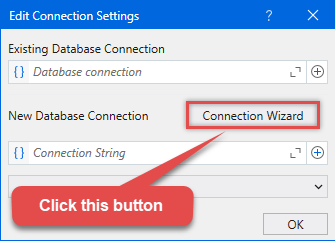
Continue by clicking Connection Wizard:
-
When the window opens, select ODBC-based driver, provider, and then choose ODBC data source:
SharepointOnlineDSNSharepointOnlineDSN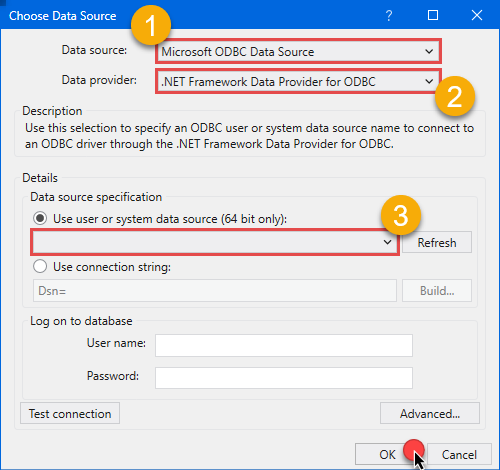 You can also select Use connection string option and use whole ODBC connection string instead. Obtain the connection string by pressing Copy Settings button in your data source configuration.
 -
Once you do that, it's time to configure a SQL query:
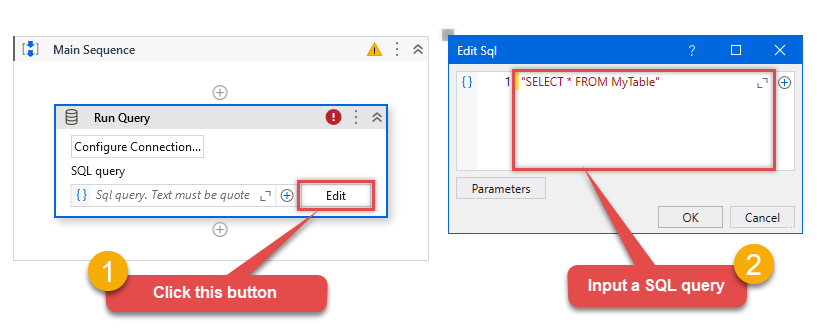 Make sure, you enclose the query in double quotes!
 -
Proceed by adding a Write CSV activity after Run Query:
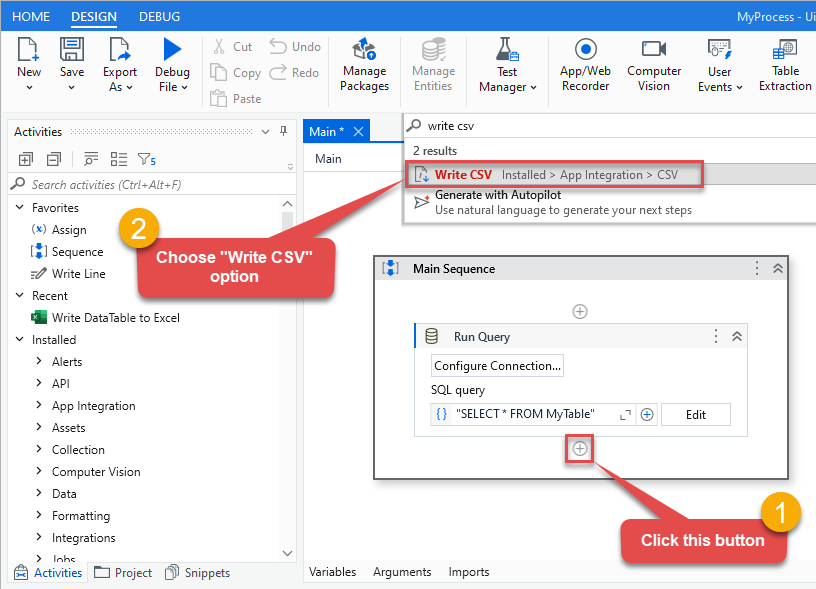 In this article we are using Write CSV, but you can freely add any other destination of your choice, e.g. Write DataTable to Excel.
 -
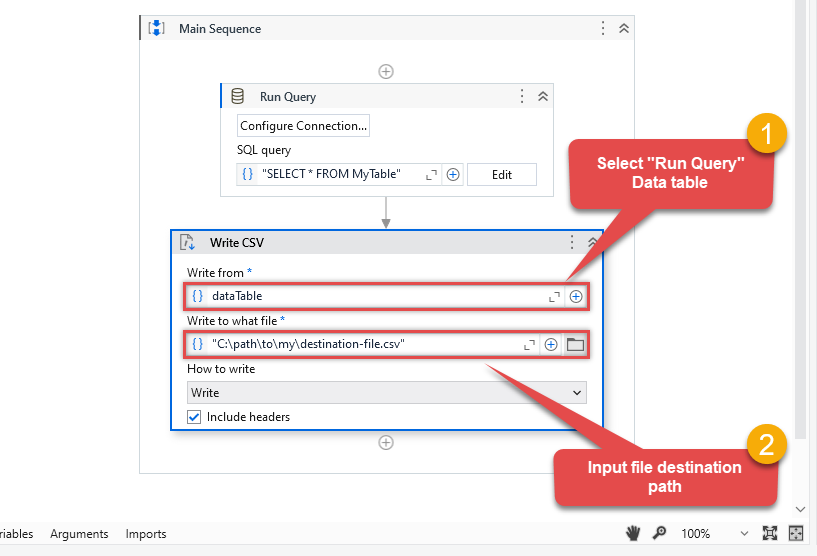
Once you do that, configure the added Write CSV, this will write SharePoint Online data to a CSV file:
-
It's time for fun! Which means it's time for debugging! Just run the package locally to debug:

-
Finally, ensure there are no execution errors!

More actions supported by SharePoint Online Connector
Learn how to perform other actions directly in UiPath with these how-to guides:
- Copy item (File or Folder)
- Create / Update CSV File (Generic)
- Create List Item
- Delete Item (File or Folder)
- Delete List Item
- Download File
- Get Item (File or Folder)
- List Drives
- List Excel Files
- List Excel Worksheets of a File (i.e. List Tabs)
- List Files
- List Folders
- List SharePoint Lists
- List SharePoint System Lists
- List Sites
- Move or rename item (File or Folder)
- Read CSV File (Generic)
- Read Drive
- Read Excel Worksheet (Auto Detect Range)
- Read Excel Worksheet (From Exact Range)
- Read File Data (As Byte Array)
- Read JSON File (Generic)
- Read List
- Read List Fields
- Read List Item (By ID)
- Read List Items
- Read List Items (Dynamic Columns)
- Read Main Site
- Update List Item
- Upload File
- Make Generic API Request
- Make Generic API Request (Bulk Write)

