How to Delete a product variant — Shopify Connector for SSIS
Prerequisites
Before we begin, make sure the following prerequisites are met:
- SSIS designer installed. Sometimes it is referred as BIDS or SSDT (download it from Microsoft).
- Basic knowledge of SSIS package development using Microsoft SQL Server Integration Services.
- SSIS PowerPack is installed (if you are new to SSIS PowerPack, then get started!).
Delete a product variant in SSIS
-
Begin with opening Visual Studio and Create a New Project.
-
Select Integration Service Project and in new project window set the appropriate name and location for project. And click OK.
In the new SSIS project screen you will find the following:
- SSIS ToolBox on left side bar
- Solution Explorer and Property Window on right bar
- Control flow, data flow, event Handlers, Package Explorer in tab windows
- Connection Manager Window in the bottom
 Note: If you don't see ZappySys SSIS PowerPack Task or Components in SSIS Toolbox, please refer to this help link.
 -
Now, Drag and Drop SSIS Data Flow Task from SSIS Toolbox. Double click on the Data Flow Task to see Data Flow designer.

-
Read the data from the source, being any desired source component. In example we will use ZappySys Dummy Data Source component.
-
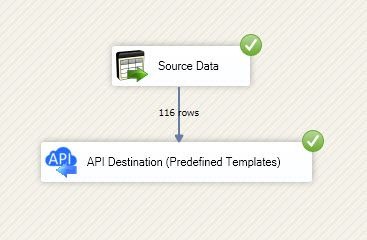
From the SSIS Toolbox drag and drop API Destination (Predefined Templates) on the Data Flow Designer surface and connect source component with it, and double click to edit it.
 - Drag and Drop")
-
Select New Connection to create a new connection:
API Destination - ShopifyShopify Connector can be used to integrate Shopify REST API in your App / BI Tools. You can read/write data about Customers, Orders, OrderItems, Products and more.

-
Use a preinstalled Shopify Connector from Popular Connector List or press Search Online radio button to download Shopify Connector. Once downloaded simply use it in the configuration:
Shopify
-
Now it's time to configure authentication. Firstly, configure authentication settings in Shopify service and then proceed by configuring API Connection Manager. Start by expanding an authentication type:
Shopify authentication
Setting up your Shopify store account for API access involves creating an "app" for your store. The "app" is installed into the Shopify account and configured with the appropriate access levels for your data integration needs.- Visit https://accounts.shopify.com and log into your Shopify store account.
- After logging in, select the store to connect to with the ZappySys Shopify Connector.
- Select the Settings link (usually in the lower-left corner) to launch the Settings screen.
- On the left menu panel, select Apps and sales channels.
- On the Apps and sales channels screen, select Develop apps (near the top of the screen).
- On the App development screen, select Create an app (near the upper-right corner of the screen).
- Give the app that will be used to provide Shopify API access a name, select the appropriate developer from the App developer drop-down, and then select Create app.
- Select Configure Admin API scopes and the Admin API access scopes screen will appear.
-
In the Admin API access scopes screen, select every access scope checkbox that applies to your integration needs. It is generally not a good idea to allow more access than what is needed in order to fulfill your integration needs.
- To enable the reading of customer information, select read_customers.
- To enable the writing of customer information, select write_customers.
- To enable the reading of inventory item information, select read_inventory.
- To enable the writing of inventory item information, select write_inventory.
- To enable the reading of order information, select read_orders.
- To enable the writing of order information, select write_orders.
- Install the app by selecting the Install app button (near the upper-right corner of the screen). If any other prompts for installation appears, select Install.
- After the app is installed, the Admin API access token will be available in the API credentials tab of the page. It can only be revealed ONCE for security purposes. Select Reveal token once to show the new Admin API access token. SAVE THE ADMIN API ACCESS TOKEN IN A SAFE PLACE WHERE YOU HAVE IT CONFIDENTIAL, SECURE, AND NOT ACCESSIBLE TO UNAUTHORIZED INDIVIDUALS. The Admin API access token will be needed in this process later.
- In the ZappySys connector API screen, enter the subdomain of your Shopify store into the Subdomain parameter textbox. For example, if your Shopify URL is https://acmetoys.myshopify.com, the subdomain would be acmetoys.
- In the same screen, enter the Admin API access token saved from step 11 above into the Admin API Access Token textbox. In order to edit the text in this field, select the ellipses (...) button that appears when the textbox is clicked and edit the access token with the dialog box that appears.
- Select the Test Connection button at the bottom of the window to verify proper connectivity with the Shopify store.
- If the connection test succeeds, select OK.
API Connection Manager configuration
Just perform these simple steps to finish authentication configuration:
-
Set Authentication Type to
Access Token [Http] - Optional step. Modify API Base URL if needed (in most cases default will work).
- Fill in all the required parameters and set optional parameters if needed.
- Finally, hit OK button:
ShopifyAccess Token [Http]https://[$Subdomain$].myshopify.com/admin/api/2023-01Required Parameters Sub-domain Fill-in the parameter... Admin API Access Token Fill-in the parameter... Optional Parameters RetryMode RetryWhenStatusCodeMatch RetryStatusCodeList 429 RetryCountMax 5 RetryMultiplyWaitTime True 
-
Select ProductVariants table from the dropdown, then select Delete as operation, and hit Preview Data:
 API Destination - ShopifyShopify Connector can be used to integrate Shopify REST API in your App / BI Tools. You can read/write data about Customers, Orders, OrderItems, Products and more.ShopifyProductVariantsDelete
There are no parameters to configure. 
-
Finally, map the desired columns:
API Destination - ShopifyShopify Connector can be used to integrate Shopify REST API in your App / BI Tools. You can read/write data about Customers, Orders, OrderItems, Products and more.

-
That's it; we successfully configured the POST API Call. In a few clicks we configured the Shopify API call using ZappySys Shopify Connector
More actions supported by Shopify Connector
Learn how to perform other actions directly in SSIS with these how-to guides:
- Create a Customer
- Create a Location
- Create a Product
- Create a Product Variant
- Create an Order
- Delete a Customer
- Delete a Location
- Delete a product
- Delete an Order
- Get Customer
- Get Customers
- Get Inventory Item
- Get Inventory Items
- Get Inventory Levels
- Get Location
- Get Locations
- Get Order
- Get Order Items
- Get Orders
- Get Orders Count
- Get Payouts
- Get Product
- Get Product Variants
- Get Products
- Get Products Count
- Insert Inventory Levels
- Update a Customer
- Update a Location
- Update a Product
- Update a Product Variant
- Update an Order
- Update Inventory Item
- Update Inventory Levels
- Make Generic API Request
- Make Generic API Request (Bulk Write)