Reading data in SSIS
In this section we will learn how to configure and use Azure DevOps Connector in API Source to extract data from Azure DevOps.
Video tutorial
This video covers following and more so watch carefully. After watching this video follow the steps described in this article.
- How to download SSIS PowerPack for Azure DevOps integration in SSIS
- How to configure connection for Azure DevOps
- How to read data from Azure DevOps
- Features about SSIS API Source
- Using Azure DevOps Connector in SSIS
Step-by-step instructions
-
Begin with opening Visual Studio and Create a New Project.
-
Select Integration Service Project and in new project window set the appropriate name and location for project. And click OK.
In the new SSIS project screen you will find the following:
- SSIS ToolBox on left side bar
- Solution Explorer and Property Window on right bar
- Control flow, data flow, event Handlers, Package Explorer in tab windows
- Connection Manager Window in the bottom
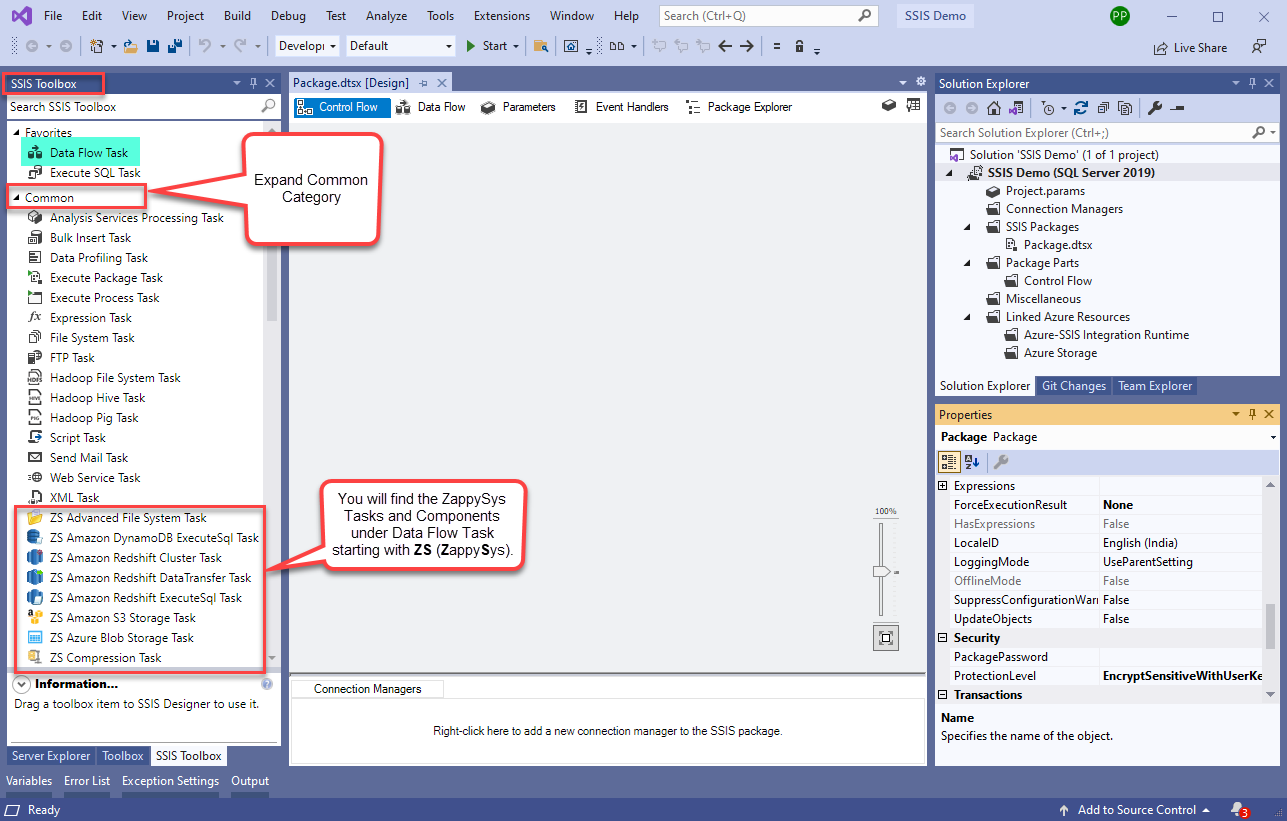 Note: If you don't see ZappySys SSIS PowerPack Task or Components in SSIS Toolbox, please refer to this help link.
 -
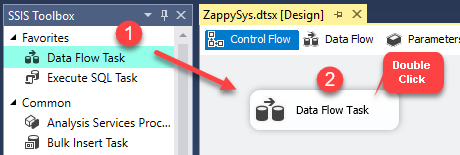
Now, Drag and Drop SSIS Data Flow Task from SSIS Toolbox. Double click on the Data Flow Task to see Data Flow designer.
-
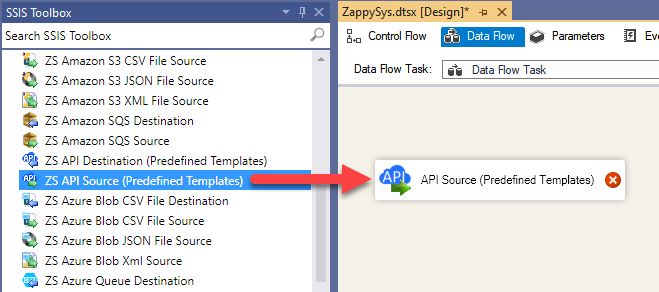
From the SSIS toolbox drag and API Source (Predefined Templates) on the data flow designer surface, and double click on it to edit it:
-
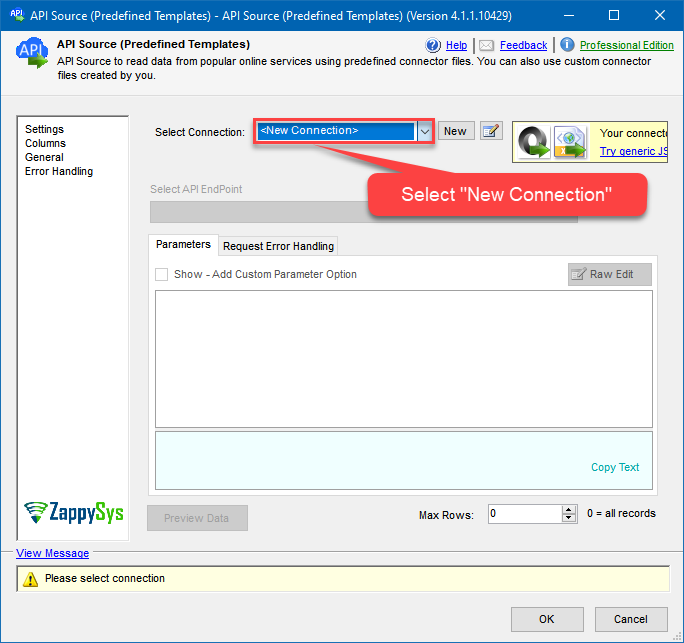
Select New Connection to create a new connection:
-
Use a preinstalled Azure DevOps Connector from Popular Connector List or press Search Online radio button to download Azure DevOps Connector. Once downloaded simply use it in the configuration:
Azure DevOps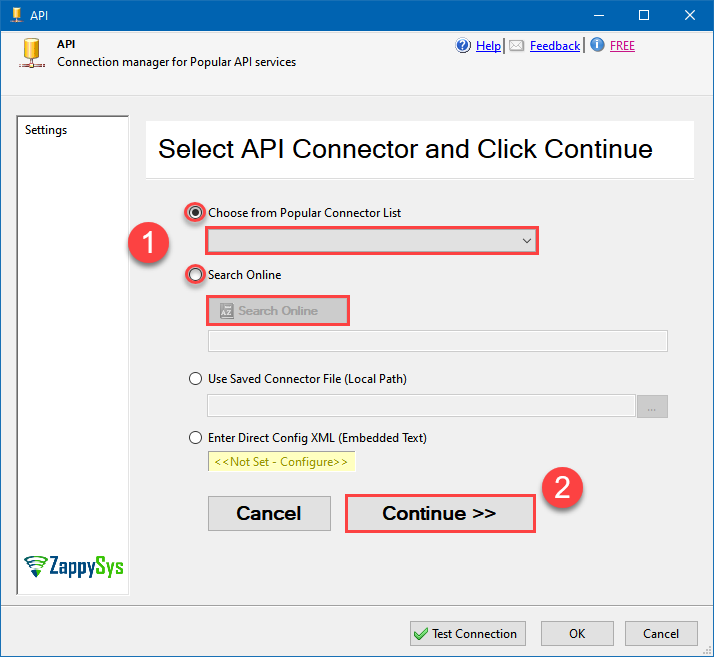
-
Now it's time to configure authentication. Firstly, configure authentication settings in Azure DevOps service and then proceed by configuring API Connection Manager. Start by expanding an authentication type:
Azure DevOps authentication
Connecting to your Azure DevOps data requires you to authenticate your REST API access. Follow the instructions below:- Go to https://app.vsaex.visualstudio.com/app/register to register your app.
-
Fill in your application and company's information as required, and then select the scopes that your application needs.
This should typically be Project and team (read and write) and Work items (read and write).
Your selected scopes when registering your app must match the scopes you enter here on the connector screen. If they don't match, the connector will not be able to work with your Azure DevOps account!If you need further information about the scopes used in Azure DevOps, or need to see what to enter into the connector screen to match up with your selected scopes, visit https://learn.microsoft.com/en-us/azure/devops/integrate/get-started/authentication/oauth?view=azure-devops.
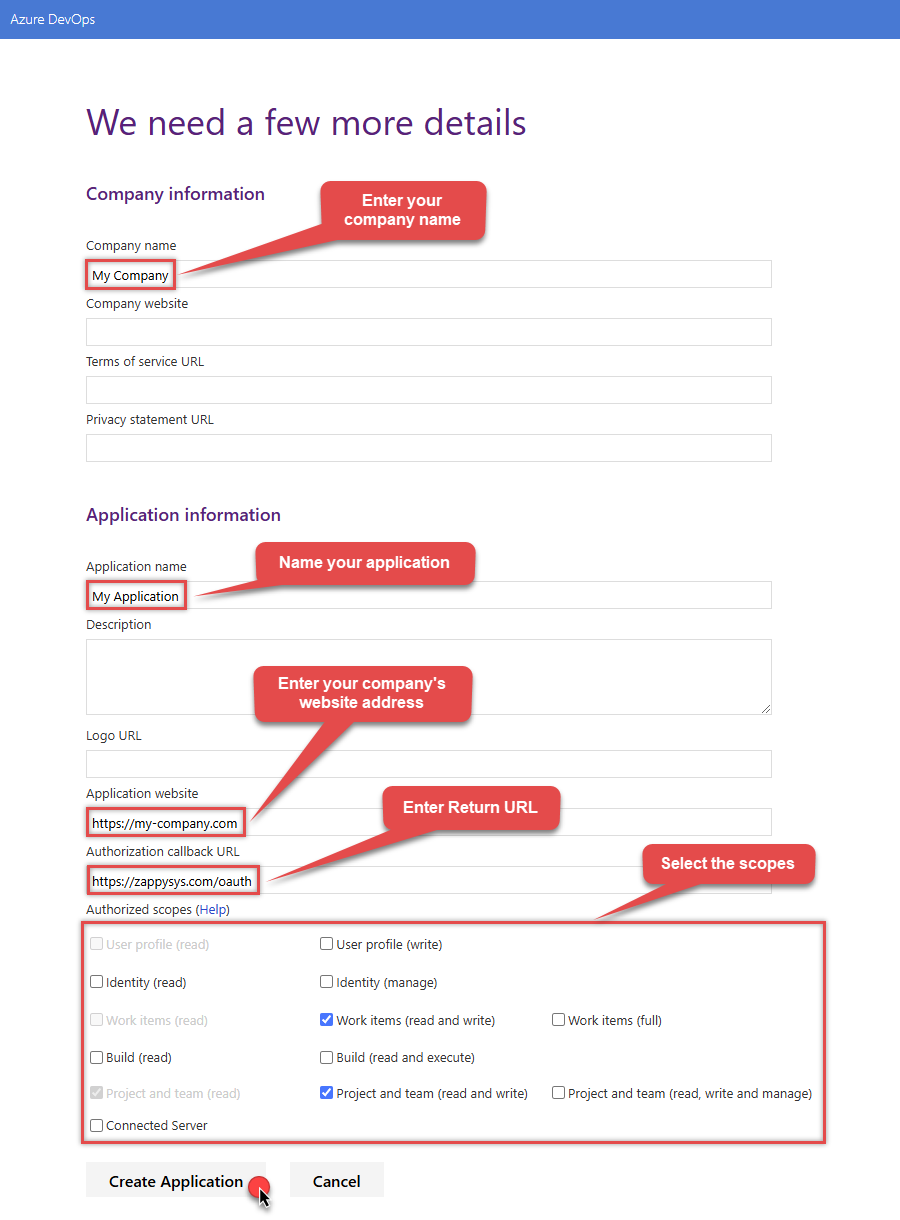
NOTE: For Authorization callback URL use your company's OAuth Redirect URL (if IT administrator provides you one) or you can use
https://zappysys.com/oauth(it's safe). - Select Create Application and then the Application Settings page will be displayed.
-
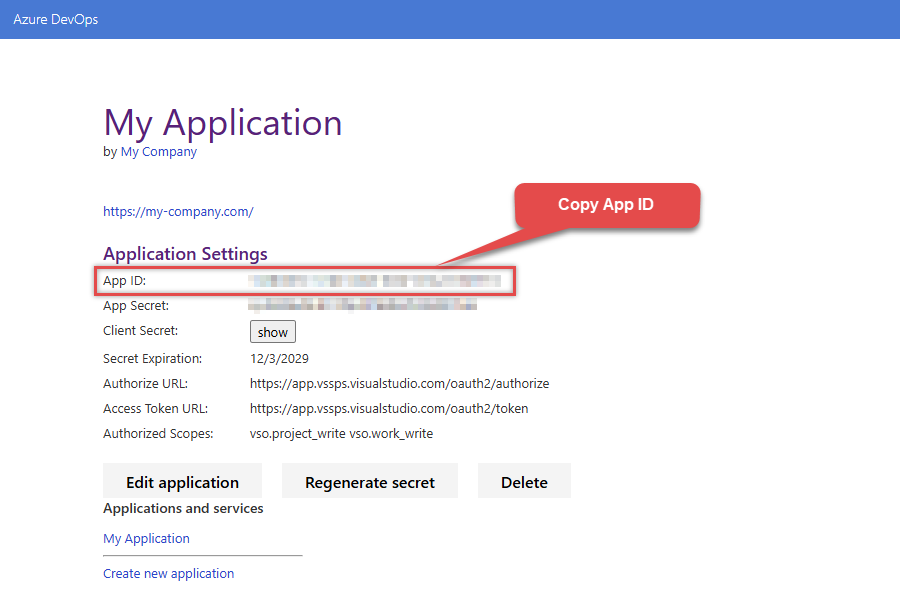
Record the App ID for us to use later:
-
And do the same with Client Secret:
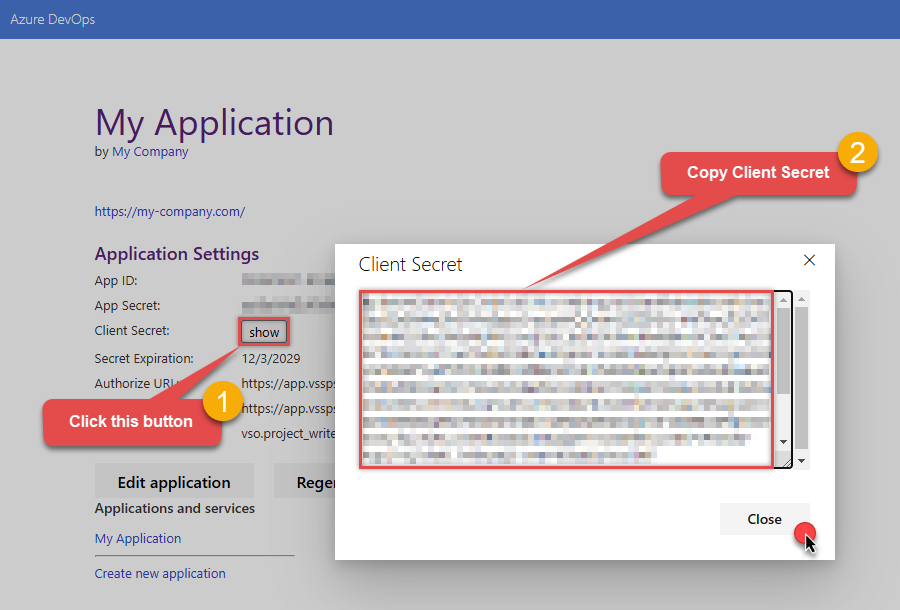
- Then go to https://aex.dev.azure.com and select relevant organization on the left.
-
Then copy Organization's host name part (e.g.
acmeinc, if full host name isacmeinc.visualstudio.com), save it to a file, and click it: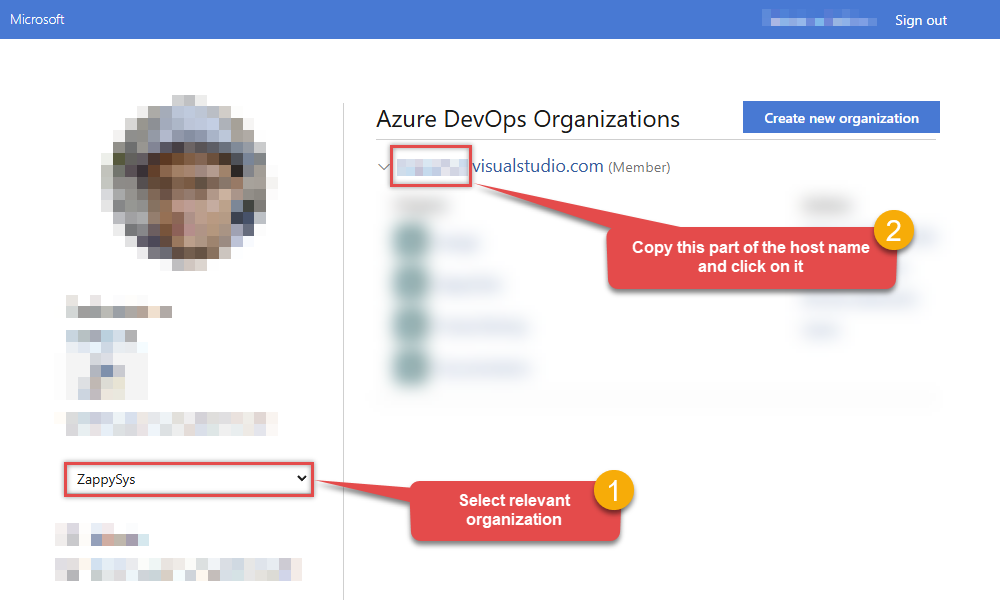
- Back at the connector screen, enter the App ID into the Client Id (App ID) field that was recorded in the previous step.
- Enter the Client Secret that was recorded in the previous step into the Client Secret field. In order to edit the text in this field, select the ellipses (...) button that appears when the textbox is clicked, and edit the Client Secret with the dialog box that appears.
- Enter the organization that was recorded in step 5 into the Organization name or Id for url field.
- Click Generate Token. If proper authentication occurs, you will see a notice saying so. You can click Yes to save a backup file of your generated tokens.
- Select the project you want to connect to by default from the Default Project (Choose after Generating Token) field.
- Select the Security tab.
-
Enter
https://auditservice.dev.azure.com,https://almsearch.dev.azure.cominto the Additional Trusted Domains field. - Select the Test Connection button at the bottom of the window to verify proper connectivity with your Azure DevOps account.
- If the connection test succeeds, select OK.
-
To edit previously created app you can visit
https://app.vsaex.visualstudio.com/meand see Applications and services section. Click on your desired app name.
API Connection Manager configuration
Just perform these simple steps to finish authentication configuration:
-
Set Authentication Type to
(Cloud) OAuth App - User Credentials [OAuth] - Optional step. Modify API Base URL if needed (in most cases default will work).
- Fill in all the required parameters and set optional parameters if needed.
- Press Generate Token button to generate the tokens.
- Finally, hit OK button:
Azure DevOps(Cloud) OAuth App - User Credentials [OAuth]https://dev.azure.comRequired Parameters Client Id (App ID) Fill-in the parameter... Client Secret Fill-in the parameter... Organization name or Id (e.g. mycompany) Fill-in the parameter... Return URL Fill-in the parameter... Scopes (Must match with App Registration) Fill-in the parameter... API Version Fill-in the parameter... Optional Parameters Default Project Name (Choose after Generating Token) RetryMode RetryWhenStatusCodeMatch RetryStatusCodeList 429 RetryCountMax 5 RetryMultiplyWaitTime True 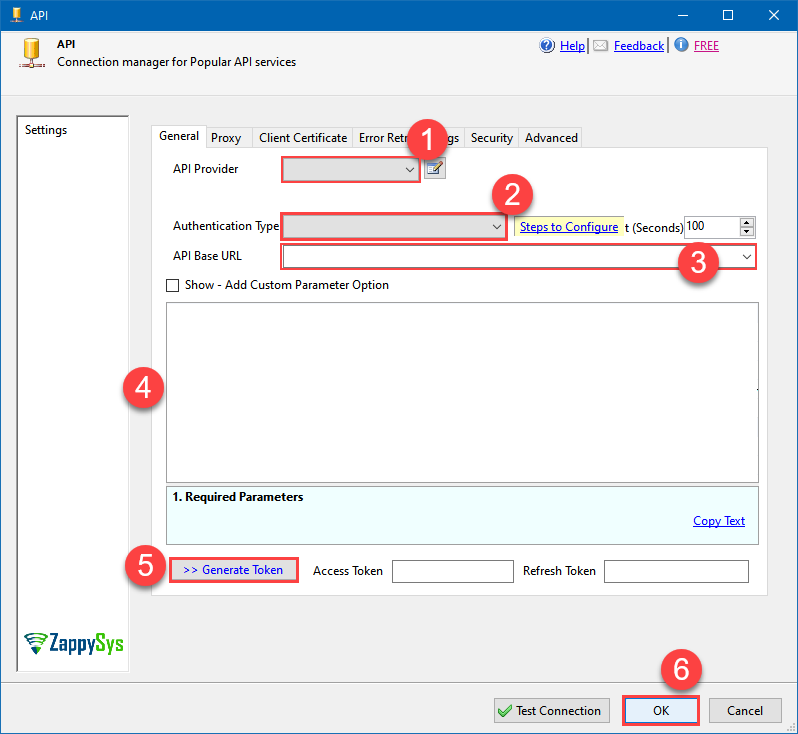
Azure DevOps authentication
To connect to Azure DevOps using a Personal Access Token (PAT), you must first create a valid PAT:- Start by going to https://aex.dev.azure.com and selecting relevant organization on the left.
-
Then copy Organization's host name part (e.g.
acmeinc, if full host name isacmeinc.visualstudio.com), save it to a file, and click it:
-
Next, click User settings icon and then click Personal access tokens:
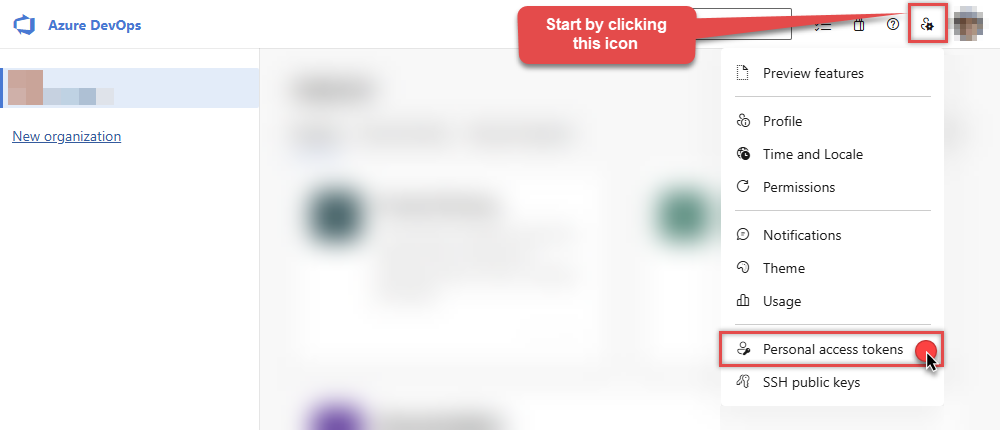
-
Then click New Token button to create a new personal access token:
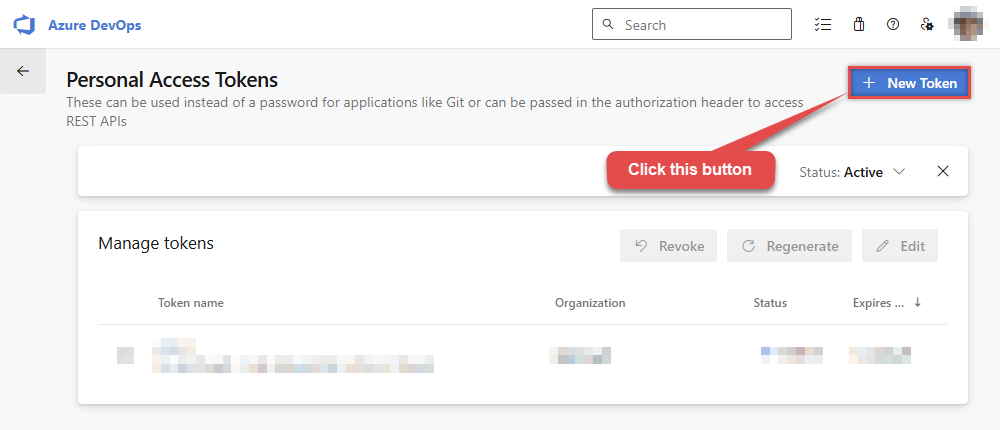
-
Continue by...
- naming your token
- selecting the right Organization
- setting token's Expiration date (it's recommended to use
Custom definedoption and make it expire after one year or later) - and setting the Scopes:
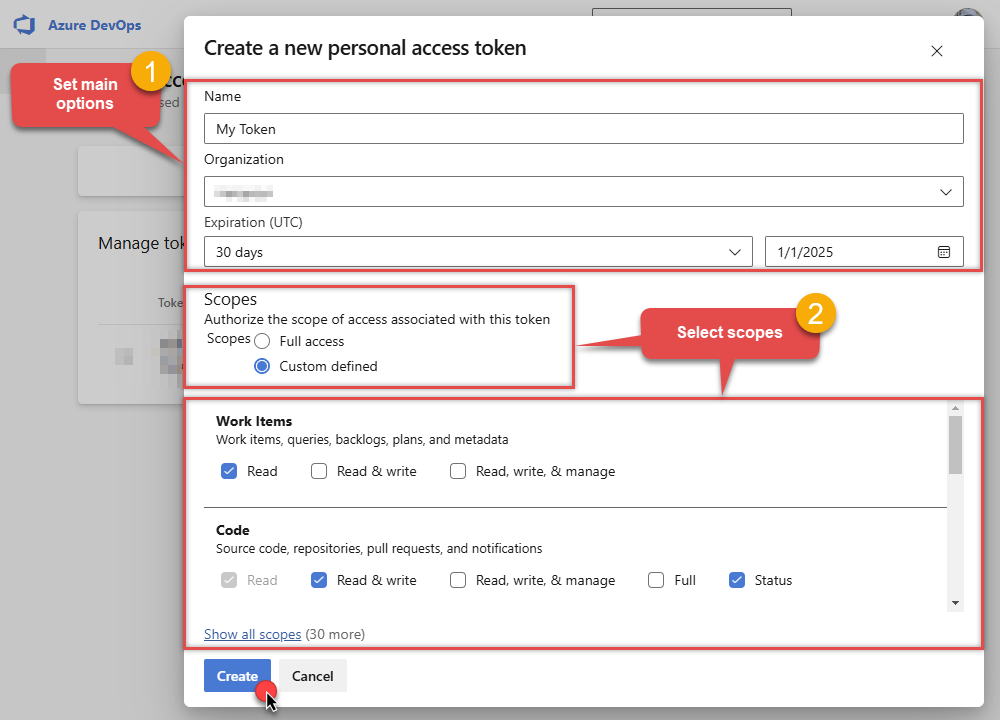
NOTE: You may be restricted from creating full-scoped PATs. If so, your Azure DevOps administrator in Azure AD has enabled a policy which limits you to a specific custom defined set of scopes.
-
Now click Copy button and save the newly created token into a file for quick access later:
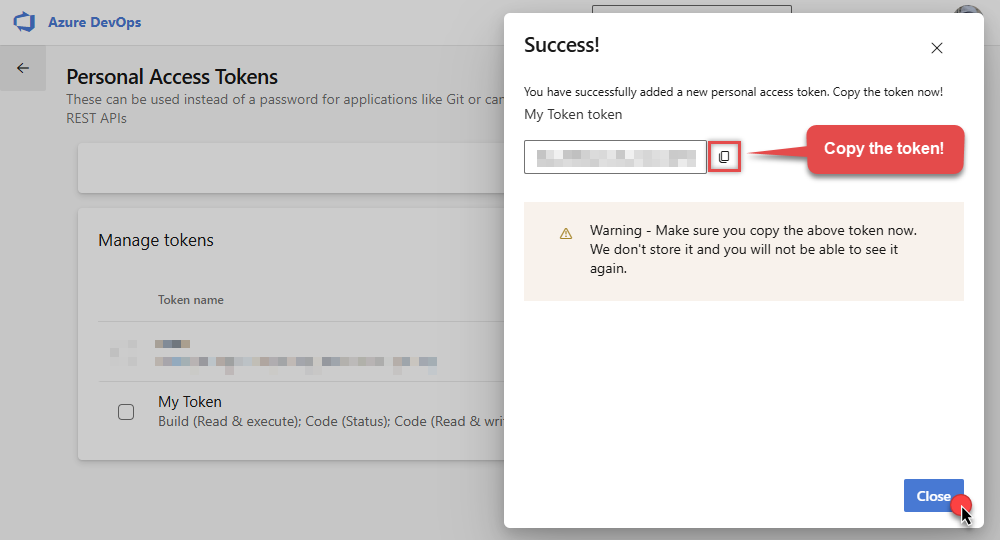
- Go back to the connector screen, input the token you saved in a previous step into the Personal Access Token (PAT) field.
- Then enter the Organization host name part that you noted recorded in previous step into Organization name or Id for url field.
- Enter the name or Id of the project you want to connect to by default in the Default Project (Choose after above fields) field.
- Select the Security tab.
- Enter
https://auditservice.dev.azure.com,https://almsearch.dev.azure.com,https://analytics.dev.azure.cominto the Additional Trusted Domains field. - Select the Test Connection button at the bottom of the window to verify proper connectivity with your Azure DevOps account.
- Done!
API Connection Manager configuration
Just perform these simple steps to finish authentication configuration:
-
Set Authentication Type to
(Cloud) Personal Access Token (PAT) [Http] - Optional step. Modify API Base URL if needed (in most cases default will work).
- Fill in all the required parameters and set optional parameters if needed.
- Finally, hit OK button:
Azure DevOps(Cloud) Personal Access Token (PAT) [Http]https://dev.azure.comRequired Parameters Personal Access Token (PAT) Fill-in the parameter... Organization name or Id for url Fill-in the parameter... API Version Fill-in the parameter... Optional Parameters AuthScheme Bearer AuthHeader Authorization Default Project Name RetryMode RetryWhenStatusCodeMatch RetryStatusCodeList 429 RetryCountMax 5 RetryMultiplyWaitTime True 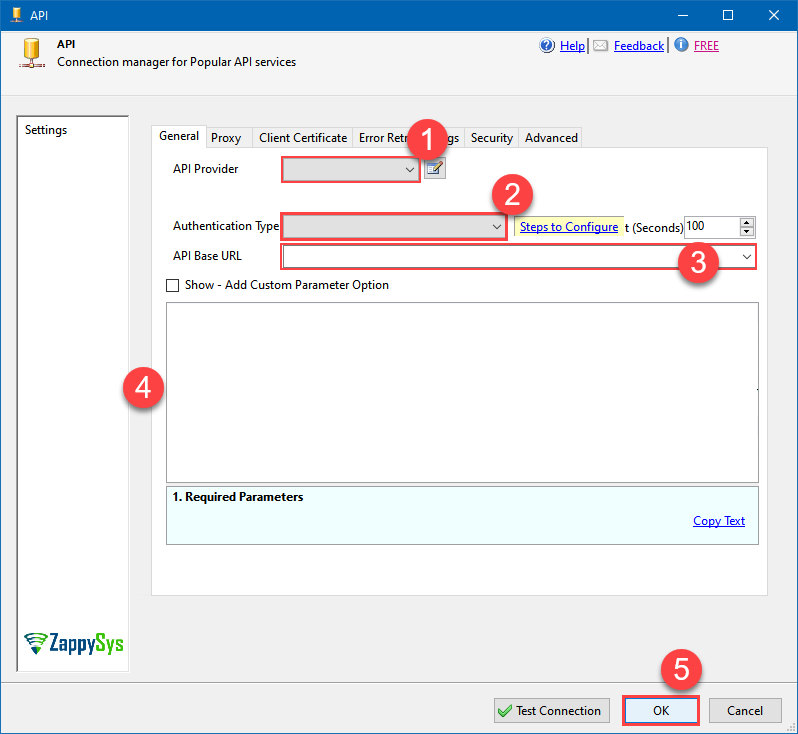
Azure DevOps authentication
To connect to Azure DevOps On-Premises Server using a Personal Access Token (PAT), you must first create a valid PAT:-
Start by navigating to your on-premises Azure DevOps Server URL.
NOTE: The screenshots shown below are from the cloud version, so your interface may look slightly different depending on which on-premises Azure DevOps Server version you’re using — however, the overall concepts and steps are very similar between the cloud and on-premises editions. -
Now open any project and capture Collection Name from the URL. For example if your URL is
https://tfs.mycompany.local/tfs/MyCollection/MyProject/
then your collection name is MyCollection usually after /tfs/. Copy this collection name and later we will enter on Connection UI. -
Next, click User settings icon and then click Personal access tokens:

-
Then click New Token button to create a new personal access token:

-
Continue by...
- naming your token
- selecting the right Organization
- setting token's Expiration date (it's recommended to use
Custom definedoption and make it expire after one year or later) - and setting the Scopes:

NOTE: You may be restricted from creating full-scoped PATs. If so, your Azure DevOps administrator in Azure AD has enabled a policy which limits you to a specific custom defined set of scopes.
-
Now click Copy button and save the newly created token into a file for quick access later:

- Go back to the connector screen, input the token you saved in a previous step into the Personal Access Token (PAT) field.
- Then enter the Organization host name part that you noted recorded in previous step into Organization name or Id for url field.
- Enter the name or Id of the project you want to connect to by default in the Default Project (Choose after above fields) field.
- Select the Security tab.
- Enter
https://auditservice.dev.azure.com,https://almsearch.dev.azure.com,https://analytics.dev.azure.cominto the Additional Trusted Domains field. - Select the Test Connection button at the bottom of the window to verify proper connectivity with your Azure DevOps account.
- Done!
API Connection Manager configuration
Just perform these simple steps to finish authentication configuration:
-
Set Authentication Type to
(On-Premises) Personal Access Token (PAT) [Http] - Optional step. Modify API Base URL if needed (in most cases default will work).
- Fill in all the required parameters and set optional parameters if needed.
- Finally, hit OK button:
Azure DevOps(On-Premises) Personal Access Token (PAT) [Http]https://dev.azure.comRequired Parameters Personal Access Token (PAT) Fill-in the parameter... Collection name (e.g. MyCollection) Fill-in the parameter... API Version Fill-in the parameter... Optional Parameters AuthScheme Bearer AuthHeader Authorization Default Project Name RetryMode RetryWhenStatusCodeMatch RetryStatusCodeList 429 RetryCountMax 5 RetryMultiplyWaitTime True 
-
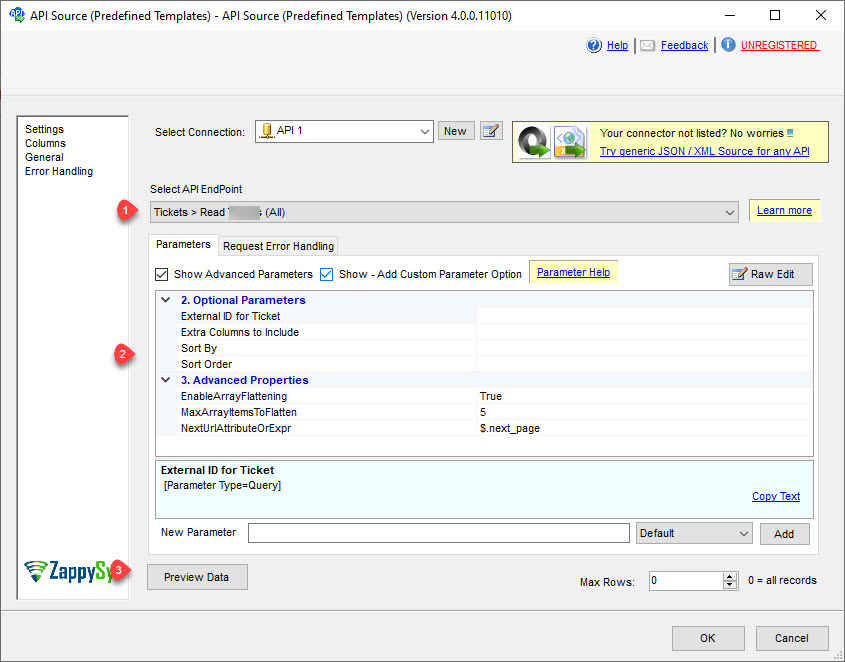
Select the desired endpoint, change/pass the properties values, and click on Preview Data button to make the API call.
API Source - Azure DevOpsAzure DevOps Connector can be used to integrate Azure DevOps (Cloud or On-Premises) data in your App / BI Tools. You can create, read, query, modify, and delete WorkItems, Projects, Teams and more.
-
That's it! We are done! Just in a few clicks we configured the call to Azure DevOps using Azure DevOps Connector.
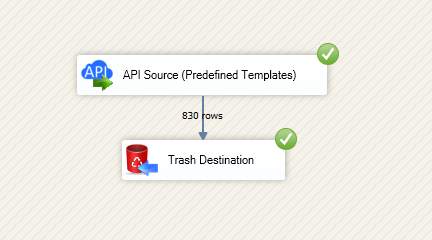
You can load the source data into your desired destination using the Upsert Destination , which supports SQL Server, PostgreSQL, and Amazon Redshift. We also offer other destinations such as CSV , Excel , Azure Table , Salesforce , and more . You can check out our SSIS PowerPack Tasks and components for more options. (*loaded in Trash Destination)
