| Property Name |
Description |
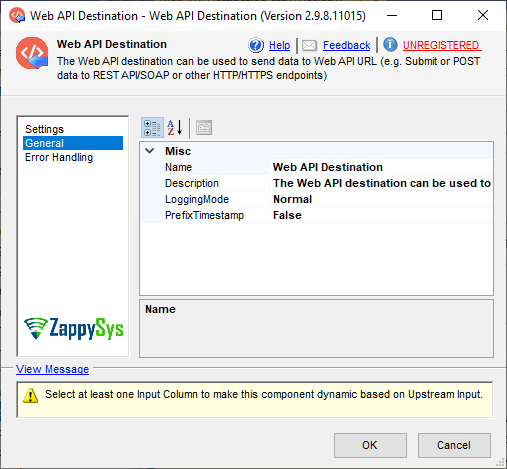
| LoggingMode |
LoggingMode determines how much information is logged during Package Execution. Set Logging mode to Debugging for maximum log.
Available Options (Use numeric value listed in bracket if you have to define expression on this property (for dynamic behavior).
| Option |
Description |
| Normal [0] |
Normal |
| Medium [1] |
Medium |
| Detailed [2] |
Detailed |
| Debugging [3] |
Debugging |
|
| PrefixTimestamp |
When you enable this property it will prefix timestamp before Log messages. |
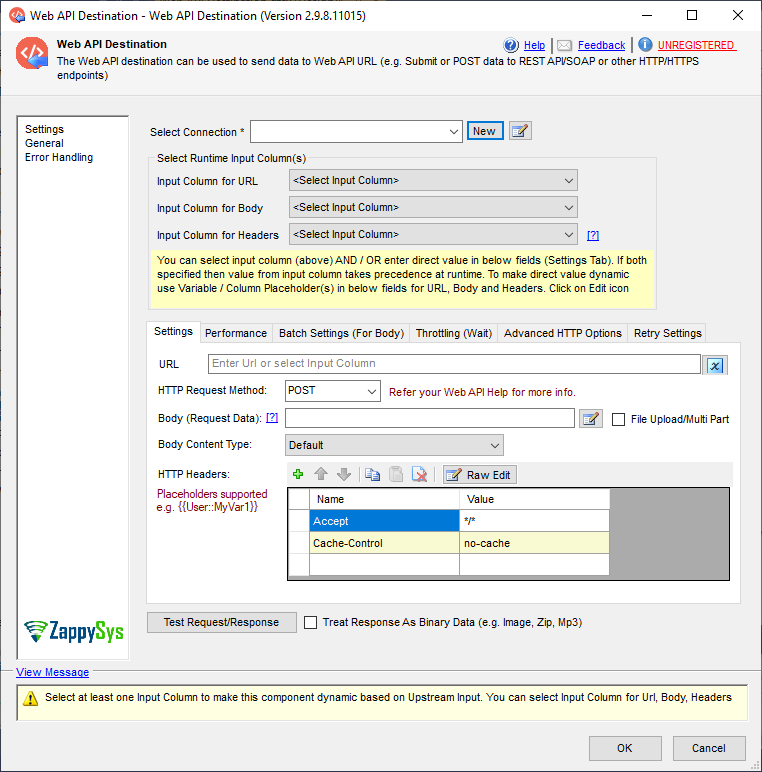
| HttpRequestUrl |
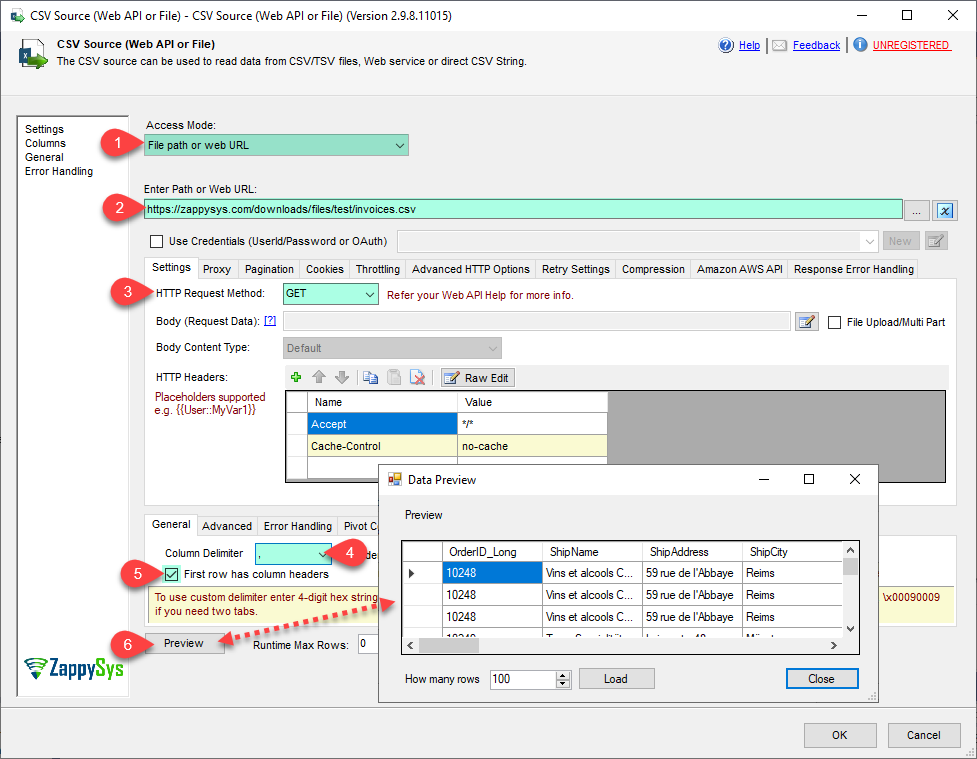
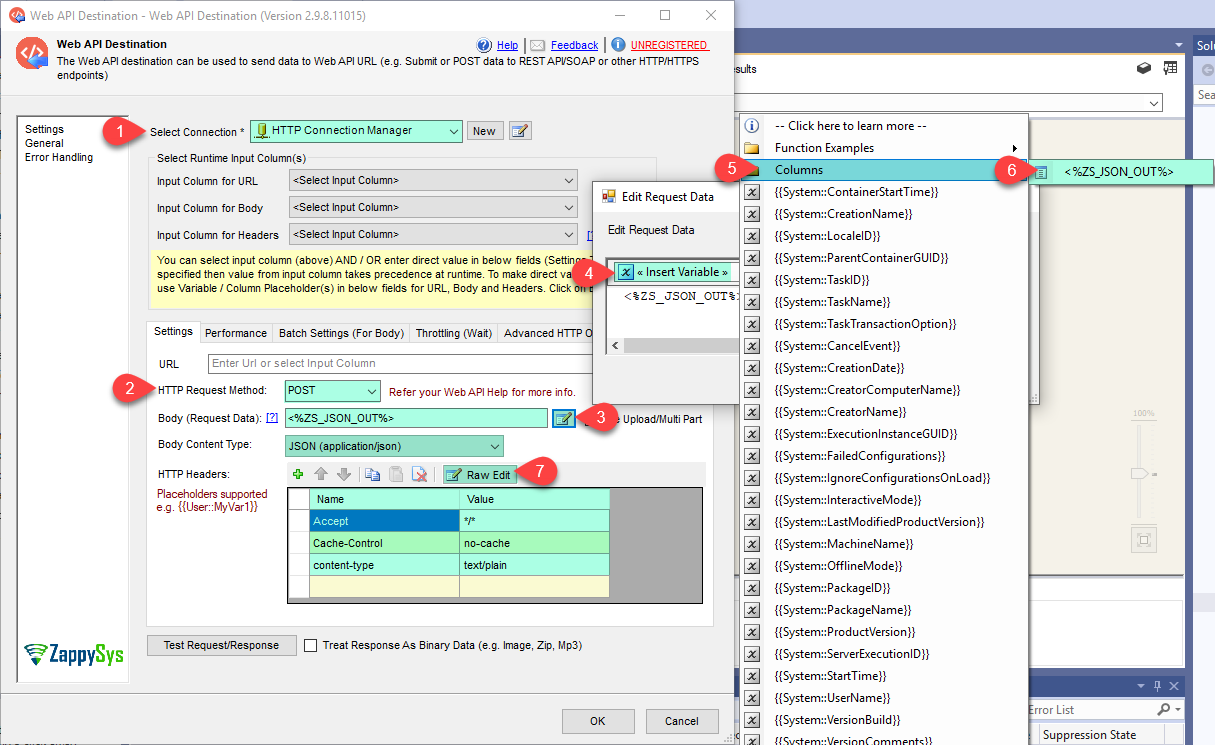
API URL you like to call |
| HttpRequestMethod |
Http Web Request Method (e.g. POST, GET, PUT, LIST, DELETE...). Refer your API documentation if you are not sure which method you have to use. |
| HttpHeaders |
Set this if you want to set custom Http headers. You may use variable anywhere in the header value using syntax {{User::YourVarName}}. Syntax of Header key value pair is : <request><header><name>x-myheader-1</name><value>AAA</value></header> <header><name>x-myheader-2</name><value>BBB</value></header></request> |
| HttpRequestData |
User defined data you wish to send along with your HTTP Request (e.g. Upload file data, Form POST data). Usually you have to set content-type of your data but if you select RequestMethod=POST then system will automatically set content-type=application/x-www-form-urlencoded. |
| HttpRequestContentType |
Specifies content type for data you wish to POST. If you select Default option then system default content type will be used (i.e. application/x-www-form-urlencoded). If you specify Content-Type header along with this option then header value takes precedence.
Available Options (Use numeric value listed in bracket if you have to define expression on this property (for dynamic behavior).
| Option |
Description |
| Default [0] |
Default |
| TextPlain [1] |
Text (text/plain) |
| ApplicationJson [2] |
JSON (application/json) |
| ApplicationXml [3] |
XML (application/xml) |
| TextXml [4] |
XML (text/xml) |
| TextXmlUtf8 [5] |
XML (text/xml;charset=UTF-8) |
| TextHtml [6] |
HTML (text/html) |
| ApplicationFormUrlencoded [7] |
Form (application/x-www-form-urlencoded) |
| ApplicationOctetStream [8] |
Binary (application/octet-stream) |
| Raw [9] |
Raw (No content-type) |
| MultiPartMixed [10] |
Multipart Mixed (multipart/mixed) |
| ApplicationGraphql [11] |
GraphQL (application/graphql) |
|
| ContinueOnUrlNotFoundError |
If this option is true then component will continue without exception on 404 error (Url not found). This allows you to consume data gracefully. |
| DisableExpect100Continue |
Set this option to true to disable Expect 100-continue negotiation for POST requests (or any requests with BODY). By default client waits for server response for POST request (this is done via Expect: 100-continue header in POST request). Disable this option to improve response time significantly in some cases (Disabling this option is not recommended for larger POST requests- i.e. File Upload) |
| IgnoreCertificateErrors |
Ignore SSL certificate related errors. Example: if you getting SSL/TLS errors because of certificate expired or certificate is not from trusted authority or certificate is self-signed. By checking this option you will not get SSL/TLS error. |
| AllowUnsecureSuite |
Allow unsecure ciphers/suites and curves for SSLS/TLS communication. Use this option to communicate with web servers which needs legacy / unsecured ciphers support. This option is only trigged when you change default SSL/TLS Version on advanced settings tab. |
| EnableCompressionSupport |
Enable support for gzip or deflate compression (for deflate you must turn on [Tls 1.0 Or Higher] Option on Advanced Settings - Security Protocol for HTTPS). When you check this option compressed response automatically de-compressed saving bandwidth. This option is only valid if web server supports compressed response stream. Check your API documentation for more information. |
| SecurityProtocol |
Specifies which security protocol is supported for HTTPS communication. Using this option you can enable legacy protocol or enforce to use latest version of security protocol (Note: TLS 1.2 is only supported in SSIS 2014 or Higher).
Available Options (Use numeric value listed in bracket if you have to define expression on this property (for dynamic behavior).
| Option |
Description |
| Default [0] |
System Default |
| Ssl3 [1] |
SSL v3.0 |
| Ssl3Plus [2] |
SSL v3.0 or higher |
| Tls [3] |
TLS v1.0 |
| TlsPlus [4] |
TLS v1.0 or higher |
| Tls11 [5] |
TLS v1.1 |
| Tls11Plus [6] |
TLS v1.1 or higher |
| Tls12 [7] |
TLS v1.2 |
| Tls12Plus [8] |
TLS v1.2 or higher |
| Tls13 [9] |
TLS v1.3 |
|
| WaitTime |
Wait time in milliseconds (Pause after each request). 0=No wait. Use this delay time if your API has limit on how many requests you can make in certain time frame. |
| OnErrorOutputResponseBody |
When you redirect error to error output by default you get additional information in ErrorMessage column. Check this option if you need exact Response Body (Useful if its in JSON/XML format which needs to be parsed for additional information for later step). |
| EnableParallelRequests |
Enable multiple requests using parallel threads. |
| MaxParallelThreads |
Maximum parallel threads to use for processing multiple web requests. |
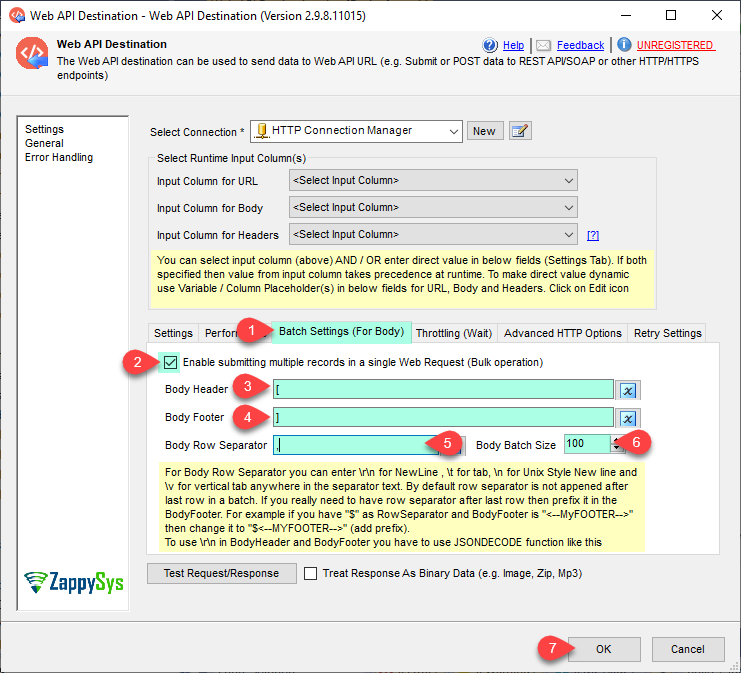
| EnableBodyBatch |
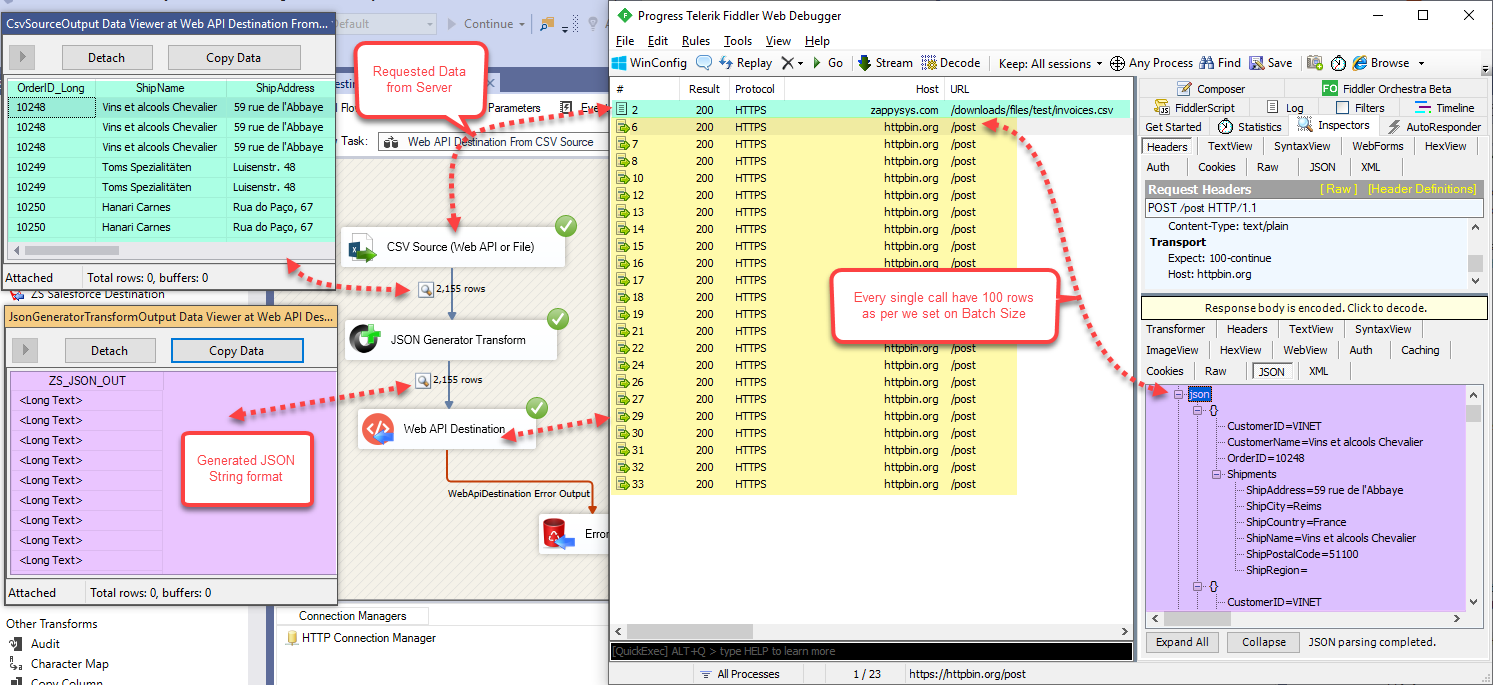
By default one request is sent for each input row. If your API supports multiple records in a single call via HTTP Body then enable this setting. See also BodyBatchSize, BodyHeader, BodyFooter and BodyRowSeparator property. |
| BodyHeader |
When you have to wrap input content between opening and closing tags for each call then set this property to specify opening for body content. For Example if you want to build Body like this (send max 100 rows per call) ==> { records : [ {...}, {...}, {...} ] } then you can set BatchSize=100, BodyHeader as "{ records: [" , BodyFooter as "] }" and BodyRowSeperator as comma {,}. This property is ignored if EnableBodyBatch=false. |
| BodyFooter |
When you have to wrap input content between opening and closing tags for each call then set this property to specify closing for body content. For Example if you want to build Body like this (send max 100 rows per call) ==> { records : [ {...}, {...}, {...} ] } then you can set BatchSize=100, BodyHeader as "{ records: [" , BodyFooter as "] }" and BodyRowSeperator as comma {,}. This property is ignored if EnableBodyBatch=false. |
| BodyBatchSize |
If your API supports multiple records via HTTP Body then change this setting > 1 to include multiple upstream records into single call. See also BodyHeader, BodyFooter and BodyRowSeparator property. This property is ignored if EnableBodyBatch=false. |
| BodyRowSeparator |
When you submit multiple rows in a batch you can separate multiple documents / records using custom separator (e.g. in JSON Array you can use comma {,} as record separator if POST document is in array format [ {...}, {...}, {...} ] ). For last row of batch blank separator is used. |
| TreatResponseAsBinary |
Returns response data as binary data (e.g. Byte Array). Check this option is response is Zip file, Image file or any non text data which needs to be exported as raw data without any encoding. |
| IsMultiPartUpload |
Set this option if you want to upload file(s) using either raw file data (i.e., POST raw file data) or send data using the multi-part encoding method (i.e. Content-Type: multipart/form-data).
A multi-part request allows you to mix key/value pairs and upload files in the same request. On the other hand, raw upload allows only a single file to be uploaded (without any key/value data).
==== Raw Upload (Content-Type: application/octet-stream) =====
To upload a single file in raw mode, check this option and specify the full file path starting with the @ sign in the Body (e.g. @c:\data\myfile.zip)
==== Form-Data / Multipart Upload (Content-Type: multipart/form-data) =====
To treat your request data as multi-part fields, you must specify key/value pairs separated by new lines in the RequestData field (i.e., Body). Each key/value pair should be entered on a new line, and key/value are separated using an equal sign (=). Leading and trailing spaces are ignored, and blank lines are also ignored.
If a field value contains any special character(s), use escape sequences (e.g., for NewLine: \r\n, for Tab: \t, for at (@): @). When the value of any field starts with the at sign (@), it is automatically treated as a file you want to upload. By default, the file content type is determined based on the file extension; however, you can supply a content type manually for any field using this format: [YourFileFieldName.Content-Type=some-content-type].
By default, file upload fields always include Content-Type in the request (non-file fields do not have Content-Type by default unless you supply it manually). If, for some reason, you don't want to use the Content-Type header in your request, then supply a blank Content-Type to exclude this header altogether (e.g., SomeFieldName.Content-Type=).
In the example below, we have supplied Content-Type for file2 and SomeField1. All other fields are using the default content type.
See the example below of uploading multiple files along with additional fields. If some API requires you to pass Content-Type: multipart/form-data rather than multipart/form-data, then manually set Request Header => Content-Type: multipart/mixed (it must start with multipart/ or it will be ignored).
file1=@c:\data\Myfile1.txt
file2=@c:\data\Myfile2.json
file2.Content-Type=application/json
SomeField1=aaaaaaa
SomeField1.Content-Type=text/plain
SomeField2=12345
SomeFieldWithNewLineAndTab=This is line1\r\nThis is line2\r\nThis is \ttab \ttab \ttab
SomeFieldStartingWithAtSign=\@MyTwitterHandle
|
| AddMultiPartPostamble |
Enable this option if your server is expecting
(i.e. CRLF) after last Multi-Part boundary in the Body. This option is only applicable if you enabled IsMultiPartUpload and sending data in Key=value format (i.e. Mutipart). For raw file upload this option has no effect. |
| EnableRequestCompression |
Enable this option if you like to compress request body (i.e. Content-Encoding: gzip). Enabling this option can speedup data transfer especially when you are sending large amount data (i.e. Upload file) |
| AllowAuthRedirectToAnyDomain |
By default when redirect happens (i.e. HTTP Code 301, 302, 307 and 308) to a different Host (domain or IP) then it removes the authorization header before redirecting to a new Host. If you trust the new host and you like to pass credentials after redirect then set this option. Without setting this option your HTTP request might fail. |


