Step-By-Step
In this tutorial we will see how to extract data into JSON File Format from multiple source(parent-child relationship).
You can use SQL Tables source for generate JSON file. In this tutorial we are going use ZS DummyData Source.
This is same as JSON Generator Transform.
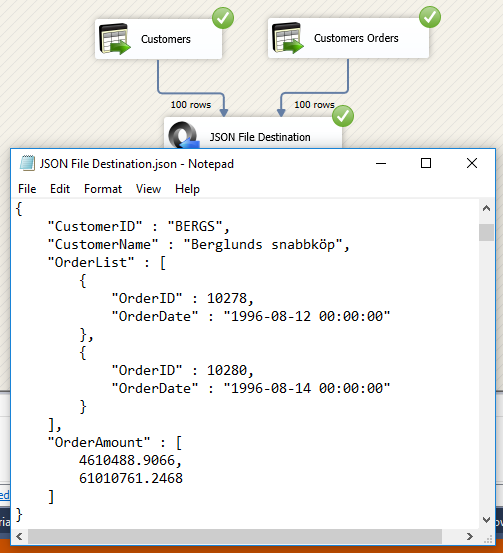
Sample JSON (Root pattern).
{
    "CustomerID" : "BERGS",
    "CustomerName" : "Berglunds snabbk?p",
    "OrderList" : [
        {
            "OrderID" : 10278,
            "OrderDate" : "1996-08-12 00:00:00"
        },
        {
            "OrderID" : 10280,
            "OrderDate" : "1996-08-14 00:00:00"
        }
    ],
    "OrderAmount" : [
        4610488.9066,
        61010761.2468
    ]
}
-
Firstly, You need to Download and Install SSIS ZappySys PowerPack.
-
Once you finished first step, Open Visual Studio and Create New SSIS Package Project.
-
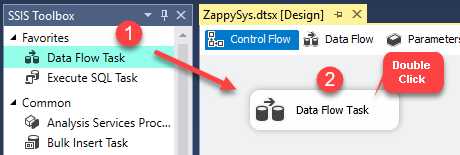
Now, Drag and Drop SSIS Data Flow Task from SSIS Toolbox.
-
Double click on the Data Flow task to see Data Flow designer surface.
-
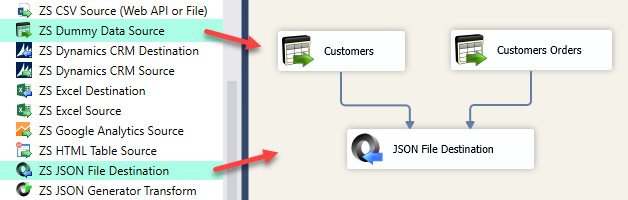
Here, In Visual Studio, drag and drop the DummyData Source and JSON File Destination in the design surface and join the tasks with the blue arrow.
-
Here, you can use our OLE DB Data Source too. Click here for more information.
-
But, we are going through DummyData Source and File Connection for CSV File Destination.
How to create File Connection for JSON File Destination.
-
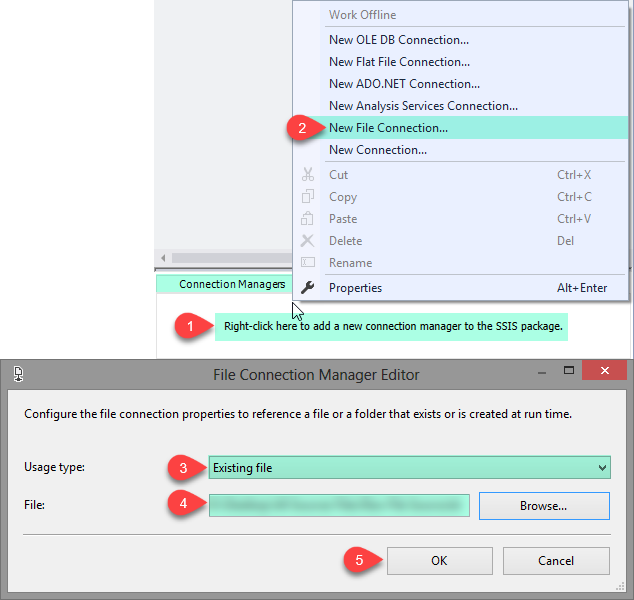
Let's, Right click on Connection Managers Panel to Create File Connection, so you can use Destination Path, and Context Menu will appear, Select New Connection from the Context Menu.
In the File Connection Manager, select the Usage type and specify the path of the JSON file.
-
Click on OK button to save connection configure setting UI.
How to Generate JSON File using JSON File Destination.
-
Double click on DummyData Source to configure it, select Customer and Orders profile from Template dropdown.
-
Once you change Template you will notice that lot of columns automatically added.
-
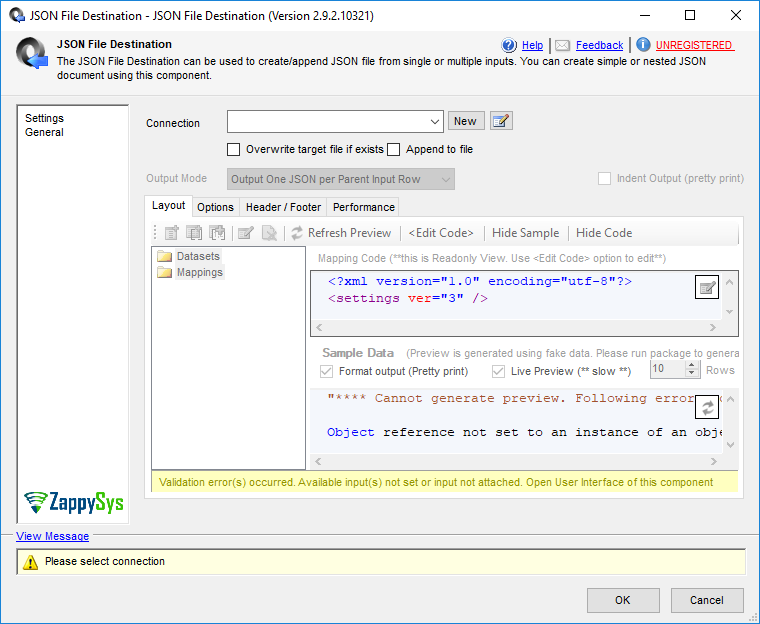
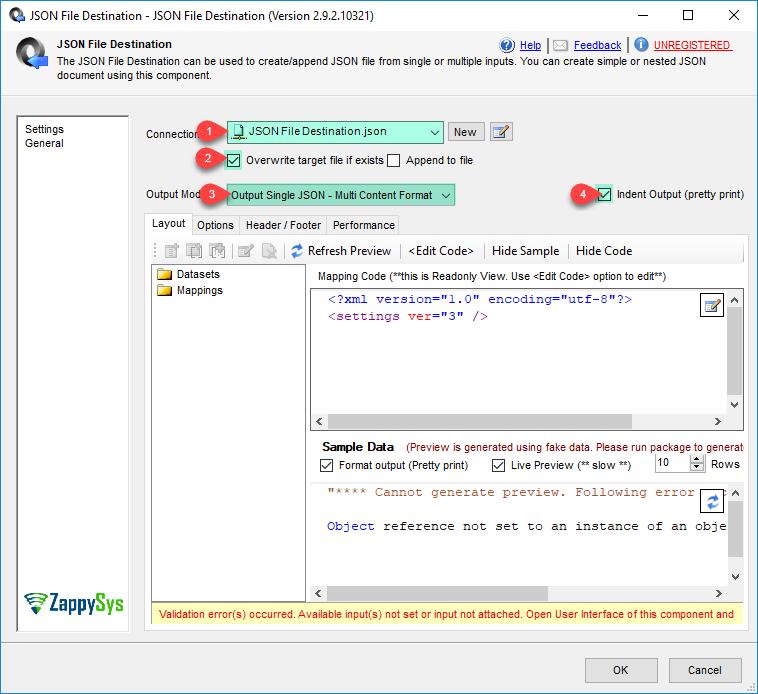
Double click on JSON File Destination to configure it, Select File Connection we have already created. Check on Overwrite target file.
Set Output to Mode Output Single JSON - Multi Content Format and Check on Indent Output (pretty print).
-
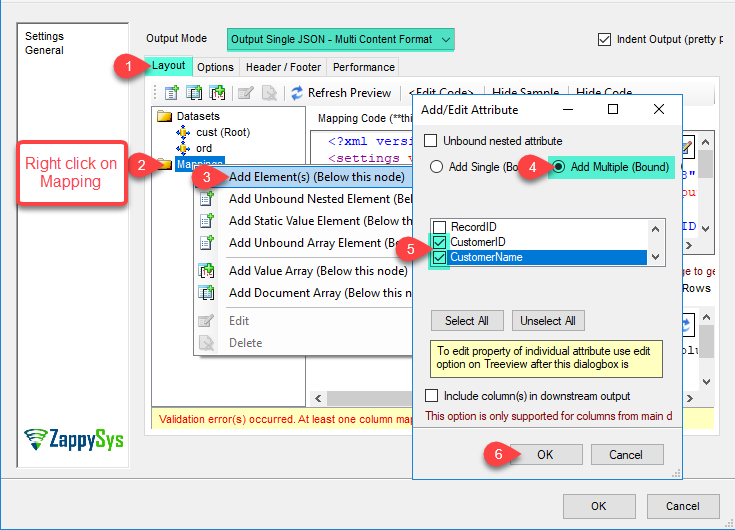
Now, Right Click on Mappings from Left Panel of JSON File Destination, Select Add Element(s) (Below this node).
And than, In Add/Edit Attribute dialogbox for Select Add Multiple (Bound) and Click on Columns for Data.
-
Click on OK to save attribute Settings.
-
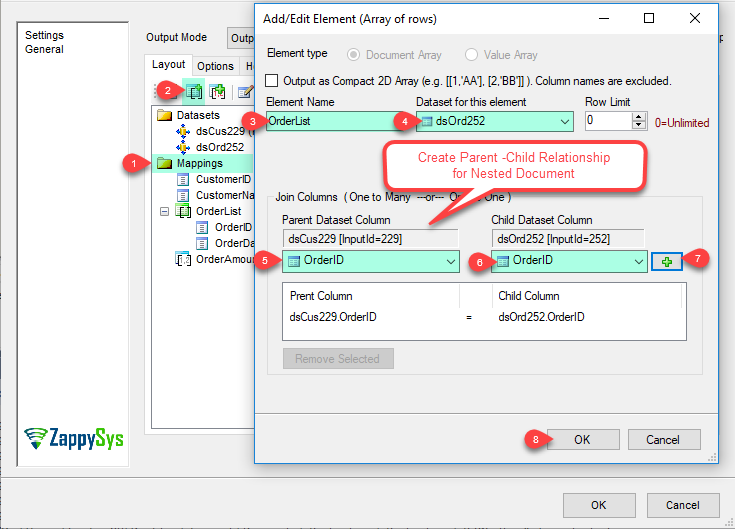
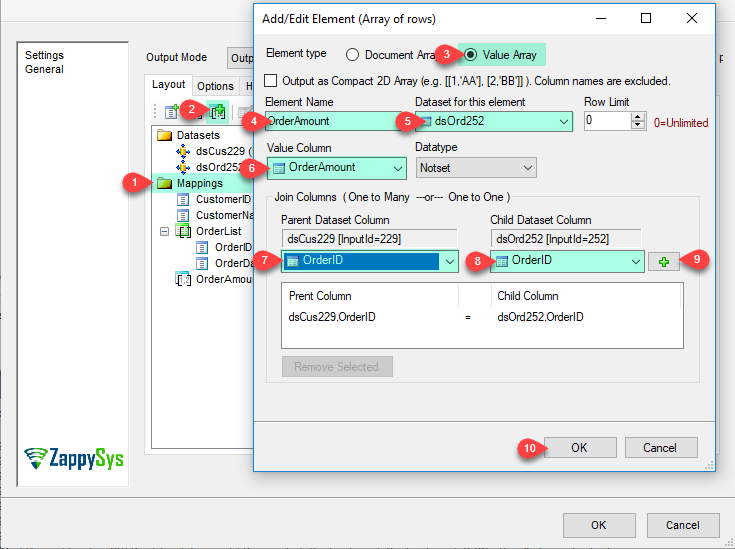
Lets Generate Array, In Add/Edit Element (Array of rows) follow below Image steps.
-
Click on OK to save Add Element Array Settings.
-
Here, we can Add/Edit Value of Array.
-
Click on OK to save Settings.
-
Thats all, Just Save and Run or Execute the Project.
How to Edit Dataset.
-
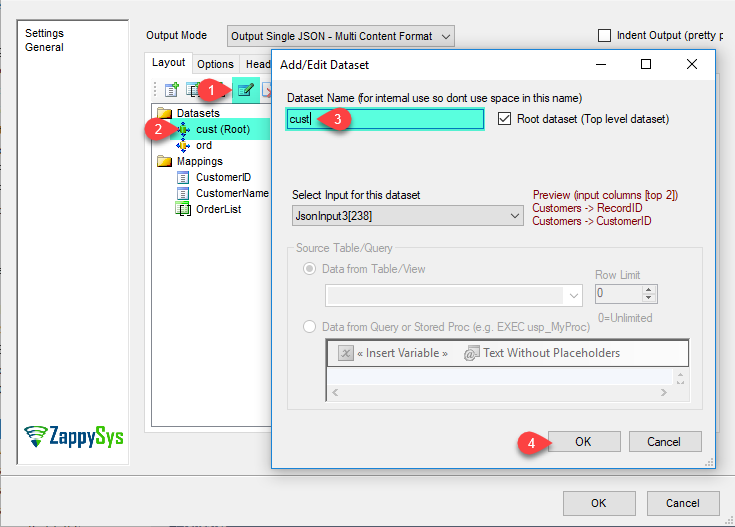
Double click on JSON File destination to configure it.
-
Select Dataset and Click on Edit button, You can change setting in Add/Edit Dataset dialogbox.
-
Click on OK to save Settings.
How to export JSON in 2D Array format
If you have to export JSON as 2D array format then you can change following option.
You can select either Add Document Array or Add Value Array option based on your requirement, just like the below screenshot.
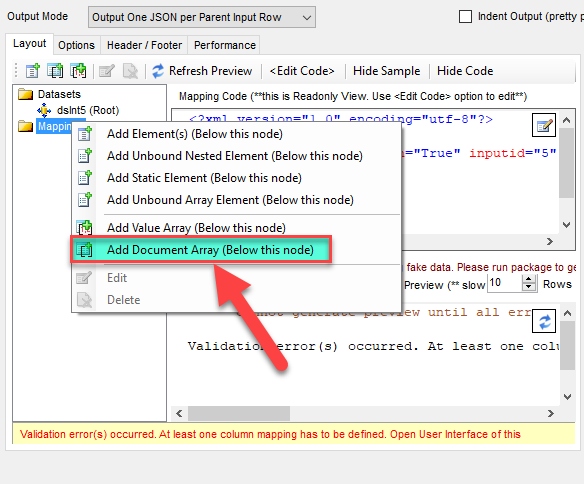
In Add/Edit Element modal, you can select Output as Compact 2D Array checkbox, as highlighted in the below screenshot.
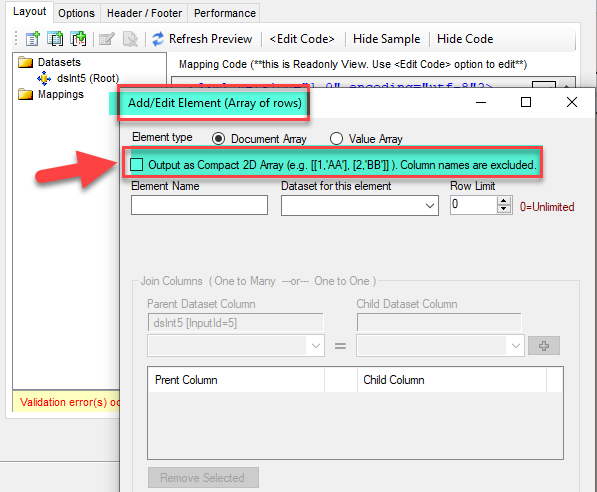
Here are examples of output for each option.
Select say you have source data with 2 columns id and name.
Default
[{id:1,name:"AA"}, {id:2,name:"BB"}]
Multicontent
{id:1,name:"AA"}{id:2,name:"BB"}
ArrayDocs
[{id:1,name:"AA"}, {id:2,name:"BB"}]
Array2D
[[1,"AA"],[2,"BB"]]
Array2DWithHeader
[["id","name"],[1,"AA"],[2,"BB"]]
ArrayLines
[1,"AA"][2,"BB"]
ArrayLinesWithHeader
["id","name"][1,"AA"][2,"BB"]