Reading data in SSIS
In this section we will learn how to configure and use ServiceNow Connector in API Source to extract data from ServiceNow.
Video tutorial
This video covers following and more so watch carefully. After watching this video follow the steps described in this article.
- How to download SSIS PowerPack for ServiceNow integration in SSIS
- How to configure connection for ServiceNow
- How to read data from ServiceNow
- Features about SSIS API Source
- Using ServiceNow Connector in SSIS
Step-by-step instructions
-
Begin with opening Visual Studio and Create a New Project.
-
Select Integration Service Project and in new project window set the appropriate name and location for project. And click OK.
In the new SSIS project screen you will find the following:
- SSIS ToolBox on left side bar
- Solution Explorer and Property Window on right bar
- Control flow, data flow, event Handlers, Package Explorer in tab windows
- Connection Manager Window in the bottom
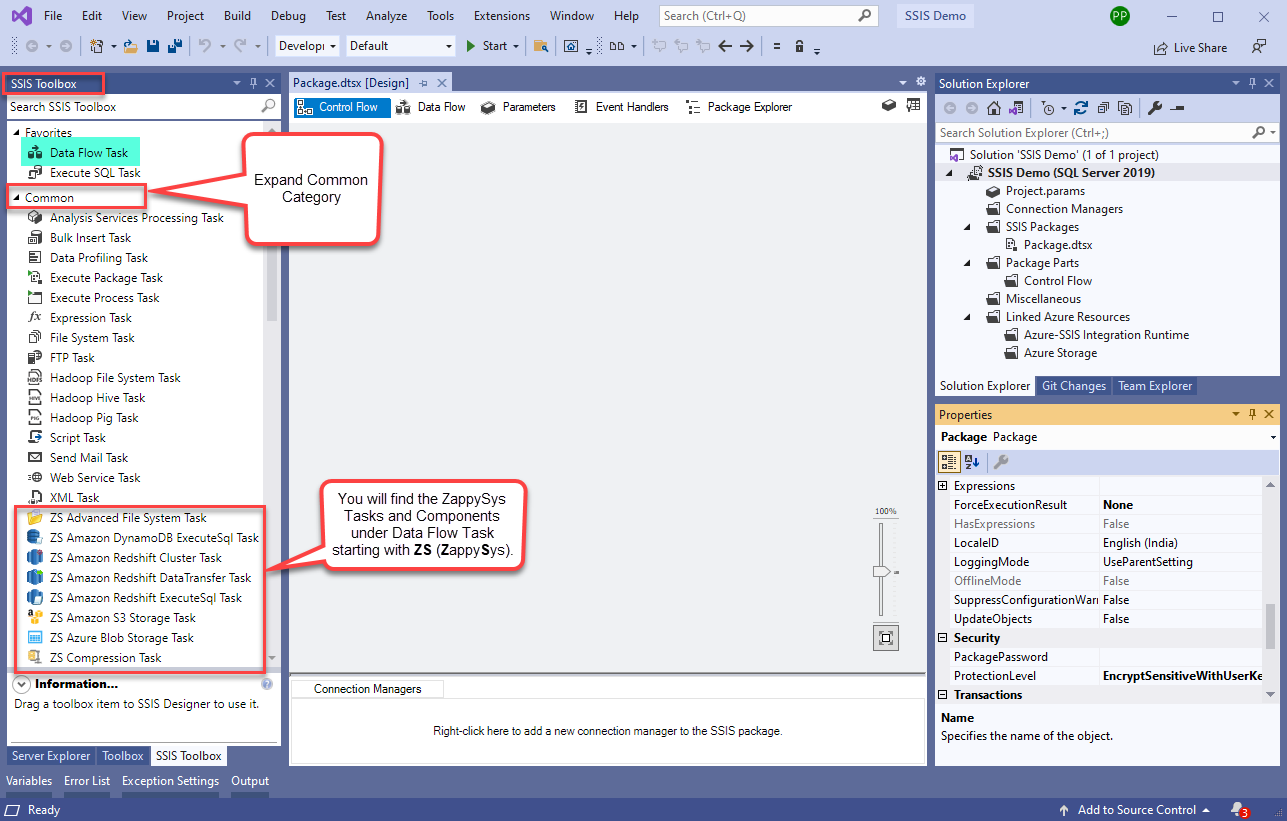 Note: If you don't see ZappySys SSIS PowerPack Task or Components in SSIS Toolbox, please refer to this help link.
 -
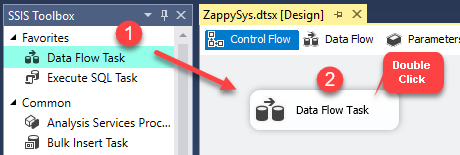
Now, Drag and Drop SSIS Data Flow Task from SSIS Toolbox. Double click on the Data Flow Task to see Data Flow designer.
-
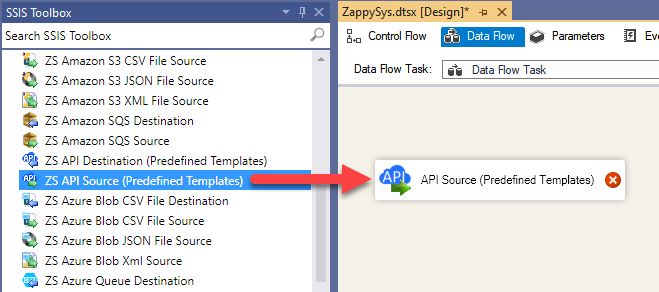
From the SSIS toolbox drag and API Source (Predefined Templates) on the data flow designer surface, and double click on it to edit it:
-
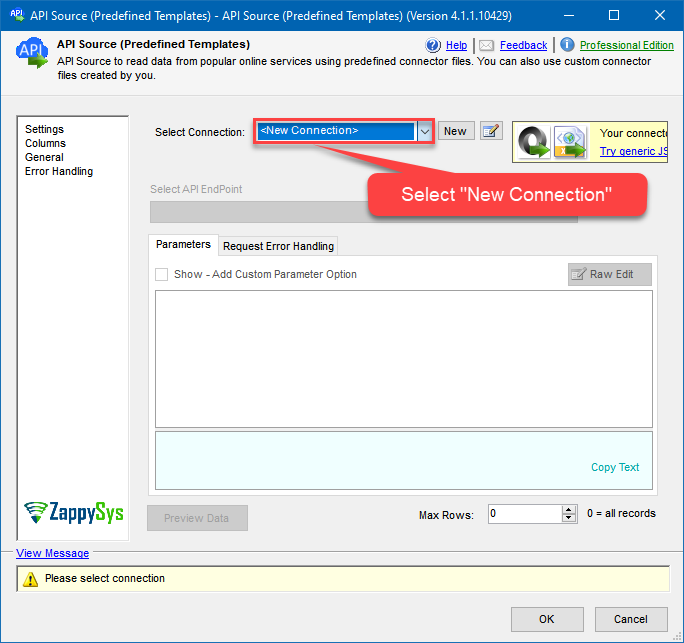
Select New Connection to create a new connection:
-
Use a preinstalled ServiceNow Connector from Popular Connector List or press Search Online radio button to download ServiceNow Connector. Once downloaded simply use it in the configuration:
ServiceNow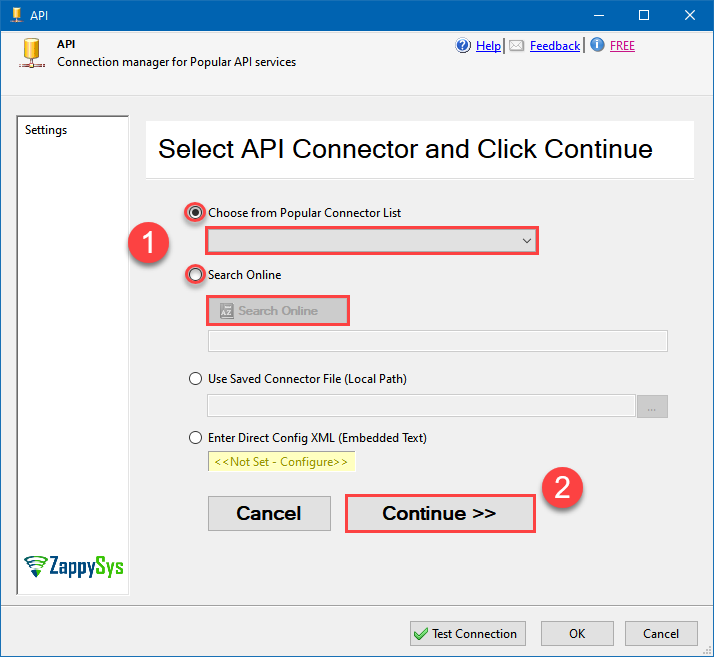
-
Now it's time to configure authentication. Firstly, configure authentication settings in ServiceNow service and then proceed by configuring API Connection Manager. Start by expanding an authentication type:
ServiceNow authentication
Authenticate using ServiceNow instance username and password.
Locate your ServiceNow instance credentials and use them for HTTP authentication:
- Go to https://developer.servicenow.com/dev.do and log in.
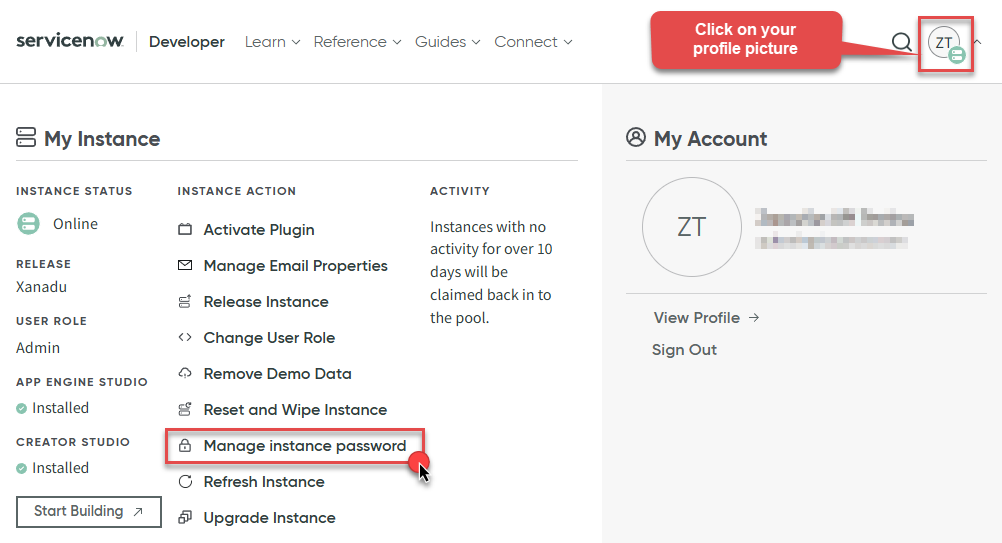
- Click on your profile picture.
-
When a menu appears, click on Manage instance password or a similar option:
-
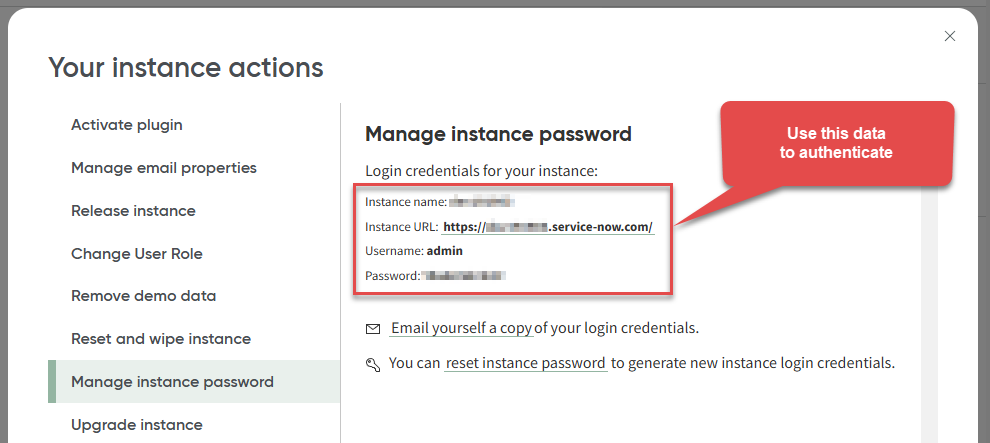
In a new window you will see your HTTP Basic Authentication credentials:
-
Done! Use this username and password when configuring OAuth Authentication parameters.
API Connection Manager configuration
Just perform these simple steps to finish authentication configuration:
-
Set Authentication Type to
Basic Auth [Http] - Optional step. Modify API Base URL if needed (in most cases default will work).
- Fill in all the required parameters and set optional parameters if needed.
- Finally, hit OK button:
ServiceNowBasic Auth [Http]https://[$InstanceName$].service-now.com/api/nowRequired Parameters InstanceName Fill-in the parameter... User name Fill-in the parameter... Password Fill-in the parameter... Optional Parameters ApiVersion v2 RetryMode RetryWhenStatusCodeMatch RetryStatusCodeList 429 RetryCountMax 5 RetryMultiplyWaitTime True 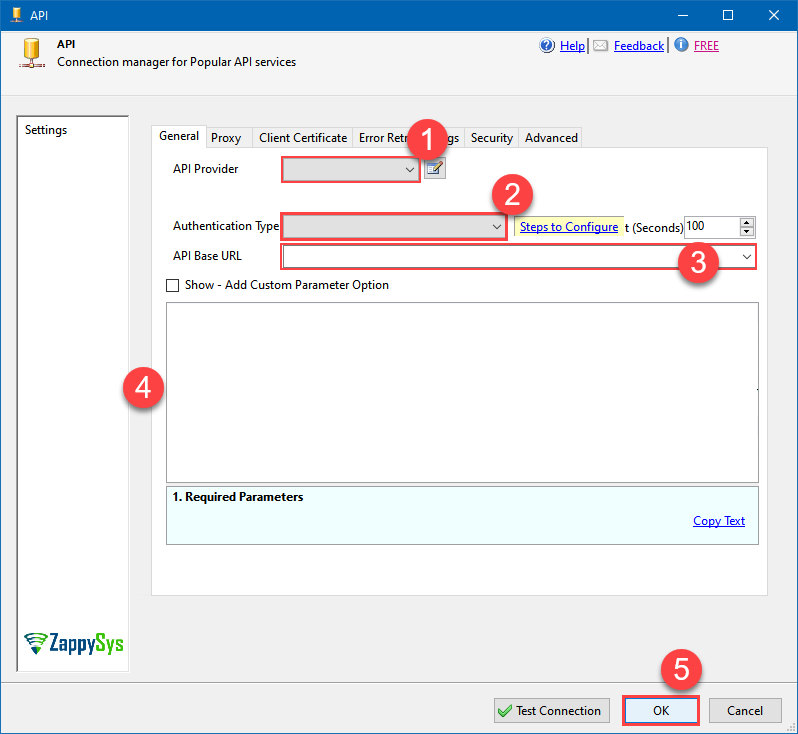
ServiceNow authentication
Authenticate using ServiceNow instance username, password, OAuth Client ID, and Client Secret. [API reference]
Create OAuth application and use it for authentication:
- Login to your instance at https://your-instance-id.service-now.com.
-
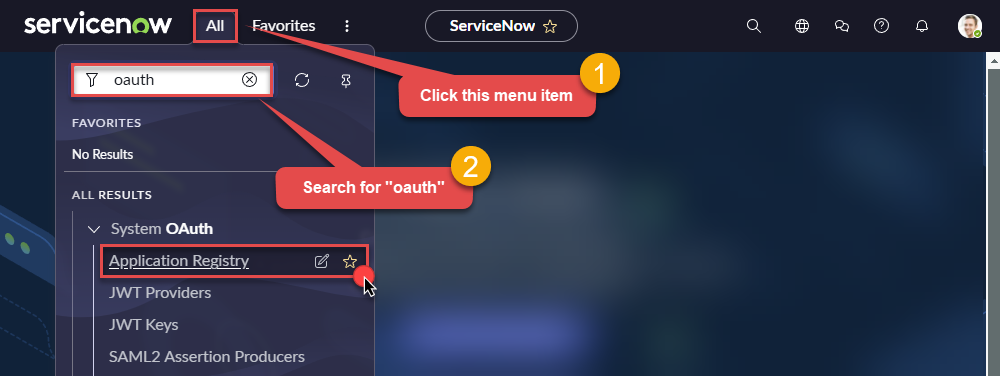
Start by clicking on menu item All, then search for oauth, and click Application Registry option:
-
Then click button New:

-
Continue by clicking Create an OAuth API endpoint for external clients option:

-
Move on by naming your OAuth application and entering a Client Secret (or let it be generated automatically).
-
Finally give it a final touch by increasing the Refresh Token Lifespan value to
315,360,000(it should last for 10 years):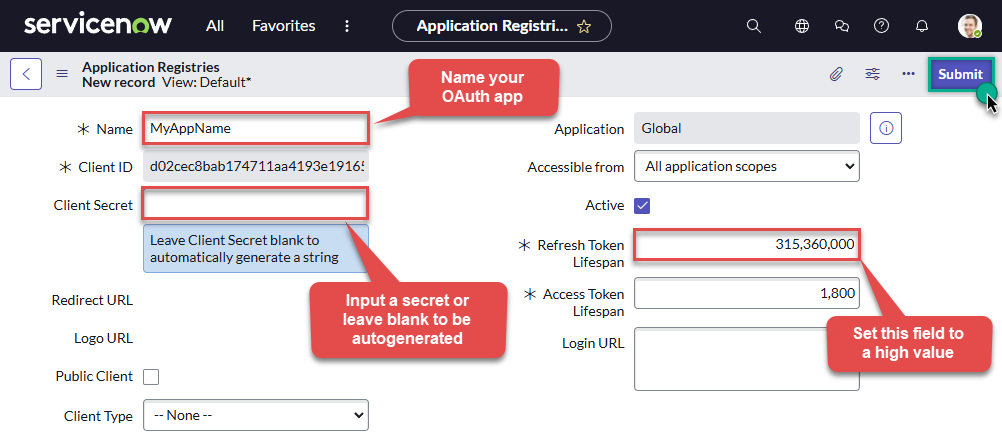
-
Done! Now you can use Client ID and Client Secret when configuring OAuth Authentication parameters.
API Connection Manager configuration
Just perform these simple steps to finish authentication configuration:
-
Set Authentication Type to
OAuth [OAuth] - Optional step. Modify API Base URL if needed (in most cases default will work).
- Fill in all the required parameters and set optional parameters if needed.
- Finally, hit OK button:
ServiceNowOAuth [OAuth]https://[$InstanceName$].service-now.com/api/nowRequired Parameters InstanceName Fill-in the parameter... User name Fill-in the parameter... Password Fill-in the parameter... Client ID Fill-in the parameter... Client Secret Fill-in the parameter... ApiVersion Fill-in the parameter... Optional Parameters RetryMode RetryWhenStatusCodeMatch RetryStatusCodeList 429|503 RetryCountMax 5 RetryMultiplyWaitTime True 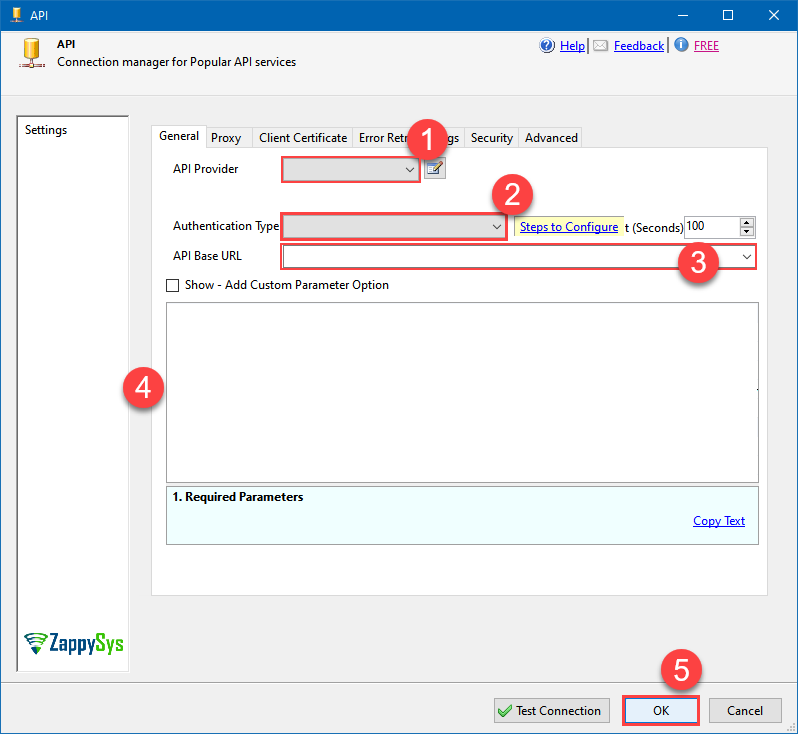
-
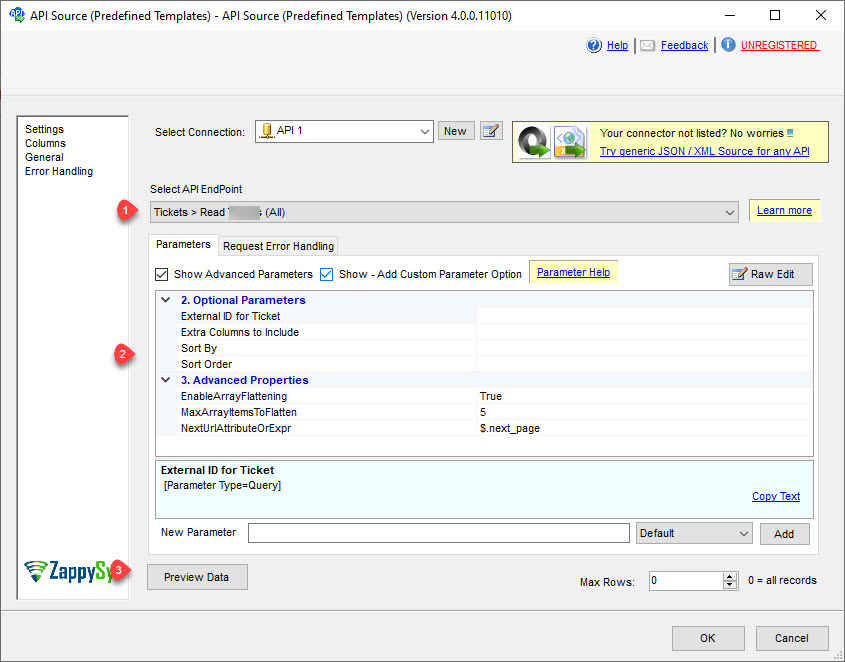
Select the desired endpoint, change/pass the properties values, and click on Preview Data button to make the API call.
API Source - ServiceNowAllows the reading and writing of incidents, attachments, and more in ServiceNow without coding! The ZappySys ServiceNow API Connector provides easy-to-use, high-performance API access.
-
That's it! We are done! Just in a few clicks we configured the call to ServiceNow using ServiceNow Connector.
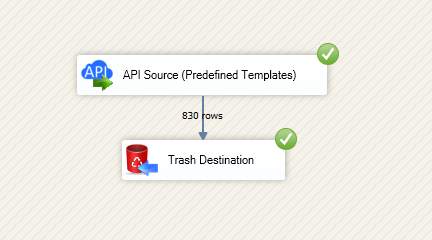
You can load the source data into your desired destination using the Upsert Destination , which supports SQL Server, PostgreSQL, and Amazon Redshift. We also offer other destinations such as CSV , Excel , Azure Table , Salesforce , and more . You can check out our SSIS PowerPack Tasks and components for more options. (*loaded in Trash Destination)
