Authentication OAuth (**Must change API Base URL to V3 OAuth**)
Description
OAuth App must be created in Atlassian Developer Console. It is found at https://developer.atlassian.com/console/myapps/ [API reference]
Instructions
Firstly, login into your Atlassian account and then create Jira application:- Go to Atlassian Developer area.
-
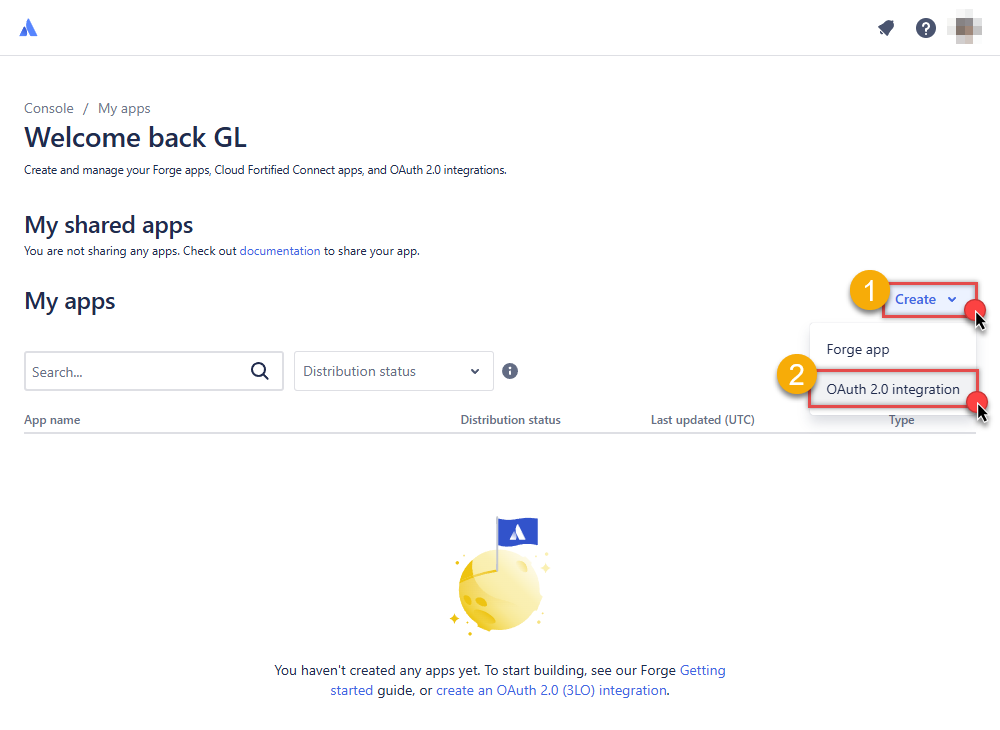
Click Create and select OAuth 2.0 integration item to create an OAuth app:
-
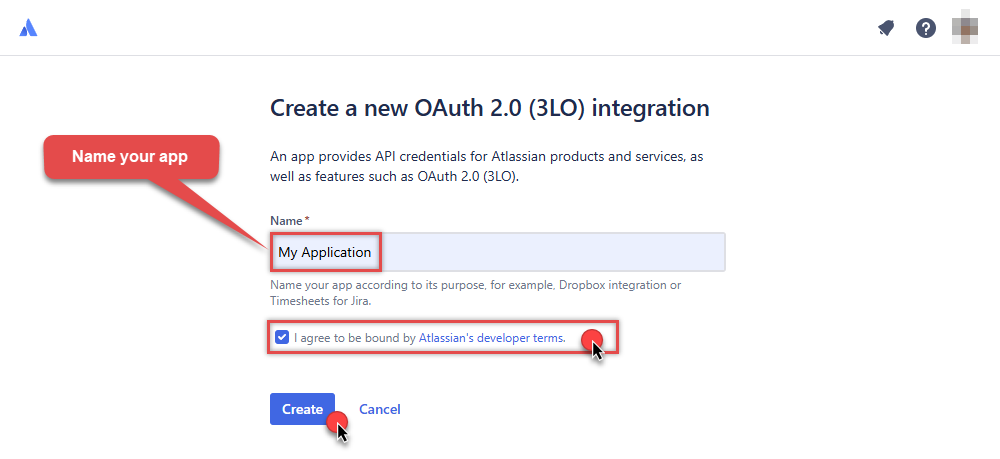
Give your app a name, accept the terms and hit Create:
-
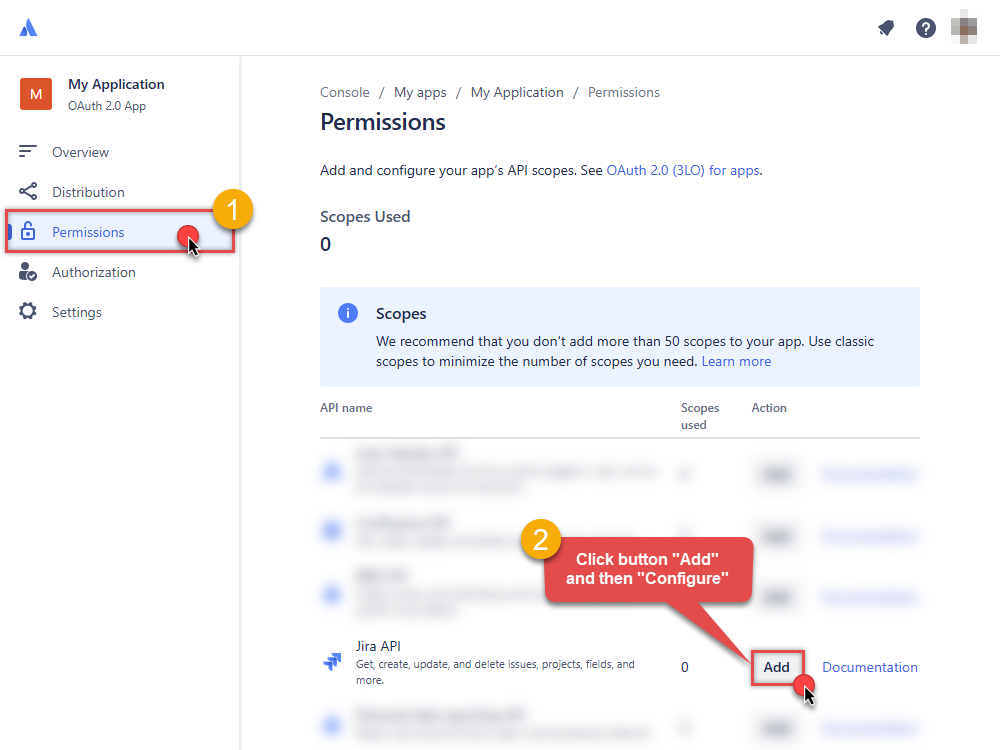
To enable permissions/scopes for your application, click Permissions tab, then hit Add button, and click Configure button, once it appears:
-
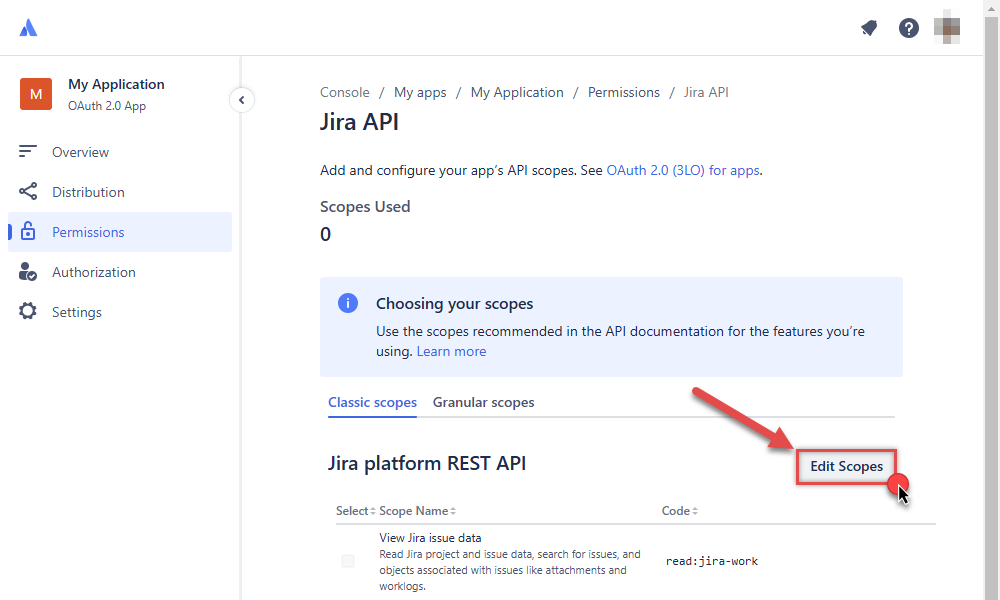
Continue by hitting Edit Scopes button to assign scopes for the application:
-
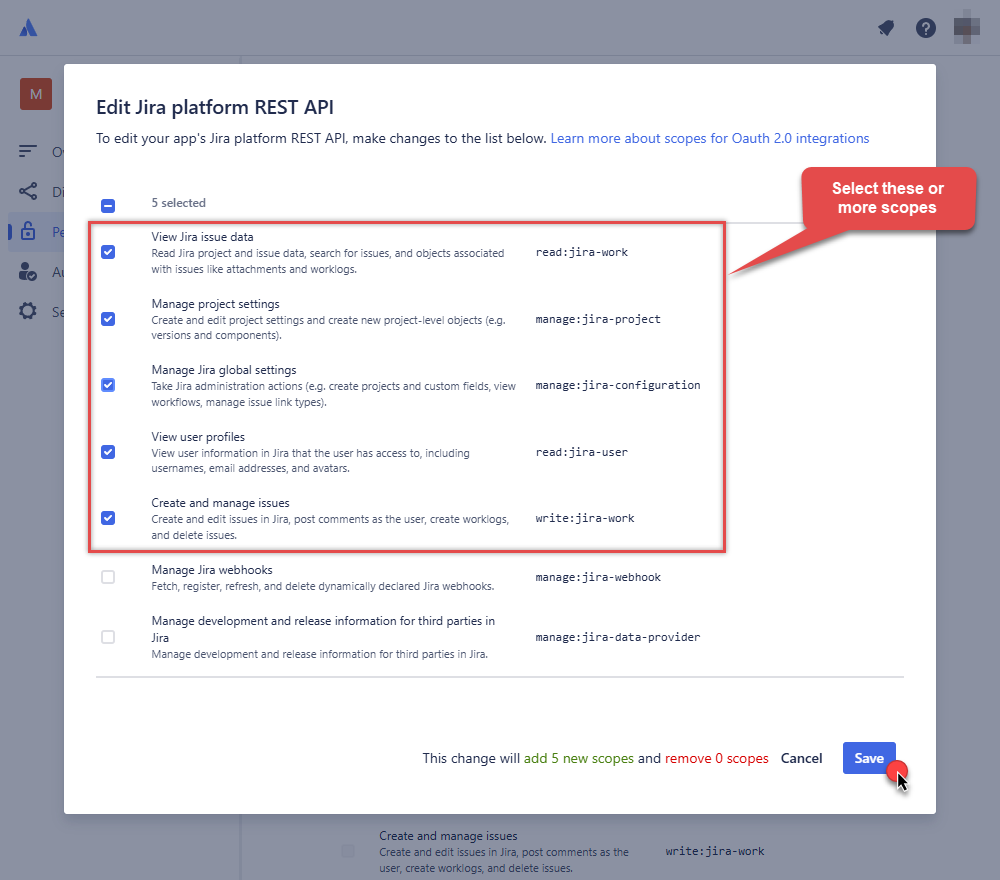
Select these scopes or all of them:
-
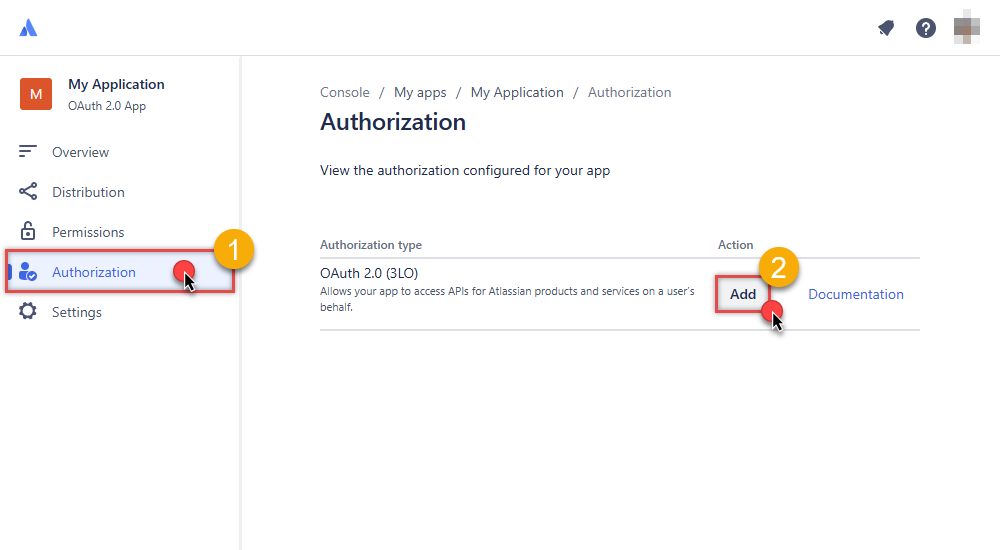
Then click Authorization option on the left and click Add button:
-
Enter your own Callback URL (Redirect URL) or simply enter
https://zappysys.com/oauth, if you don't have one: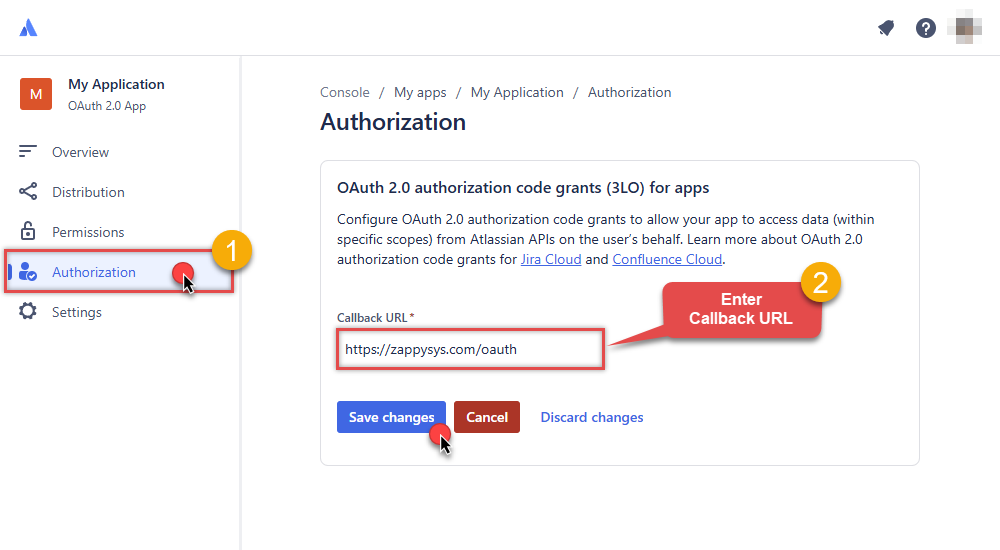
-
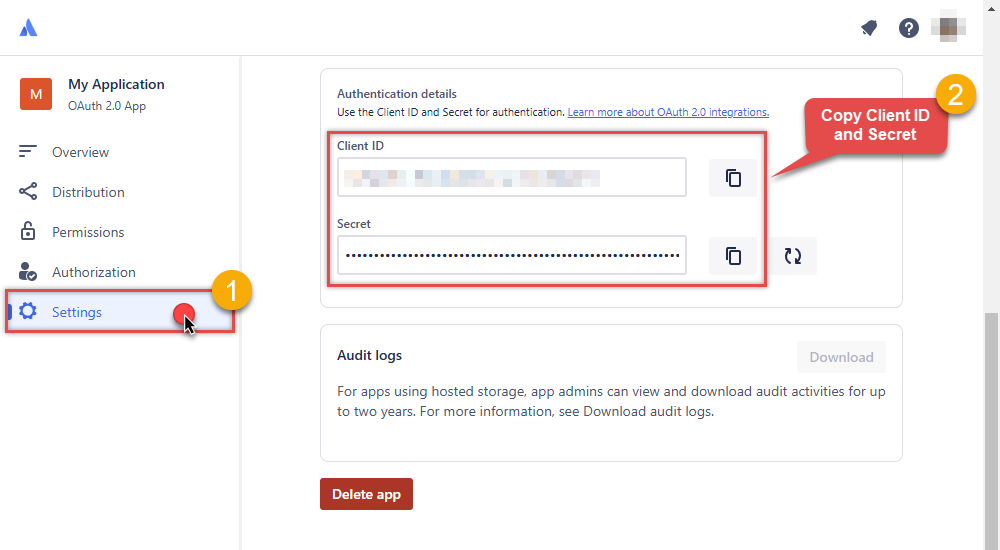
Then hit Settings option and copy Client ID and Secret into your favorite text editor (we will need them in the next step):
-
Now go to SSIS package or ODBC data source and in OAuth authentication set these parameters:
- For ClientId parameter use Client ID value from the previous steps.
- For ClientSecret parameter use Secret value from the previous steps.
- For Scope parameter use the Scopes you set previously (specify them all here):
- offline_access (a must)
- read:jira-user
- read:jira-work
- write:jira-work
- manage:jira-project
- manage:jira-configuration
NOTE: A full list of available scopes is available in Atlassian documentation. -
For Subdomain parameter use your Atlassian subdomain value
(e.g.
mycompany, if full host name ismycompany.atlassian.net).
- Click Generate Token to generate tokens.
- Finally, select Organization Id from the drop down.
- That's it! You can now use Jira Connector!
Parameters
| Parameter | Required | Default value | Options | ||||||||||||||||
|---|---|---|---|---|---|---|---|---|---|---|---|---|---|---|---|---|---|---|---|
|
Name:
Label: ClientId |
YES | ||||||||||||||||||
|
Name:
Label: ClientSecret |
YES | ||||||||||||||||||
|
Name:
Label: Scope Permissions you want to use. |
YES |
offline_access~read:jira-user~read:jira-work~write:jira-work~manage:jira-project~manage:jira-configuration
|
|
||||||||||||||||
|
Name:
Label: ReturnUrl |
YES |
https://zappysys.com/oauth
|
|||||||||||||||||
|
Name:
Label: Organization Id (Select after clicking [Generate Token]) Your company's Alphanumeric ID (e.g. c66xxx-xxx-xxx). This is obtained by calling GET |
YES | ||||||||||||||||||
|
Name:
Label: Custom Columns for output (Select after clicking [Generate Token]) Enter regular expression for custom columns which you like to output. Use Pipe to type multiple column names (must use key - internal names for columns e.g. customfield_10004). You can use Regex too (e.g. field_100\d+ ). This filter is only applied for those fields which has flag custom=true. |
