Authentication ApiKey Auth
Description
Instructions
The simplest way to authenticate a request to the Mailchimp Marketing API is by using an API key (If you require access to Mailchimp on behalf of other Mailchimp users, you'll want to set up OAuth authentication instead)::-
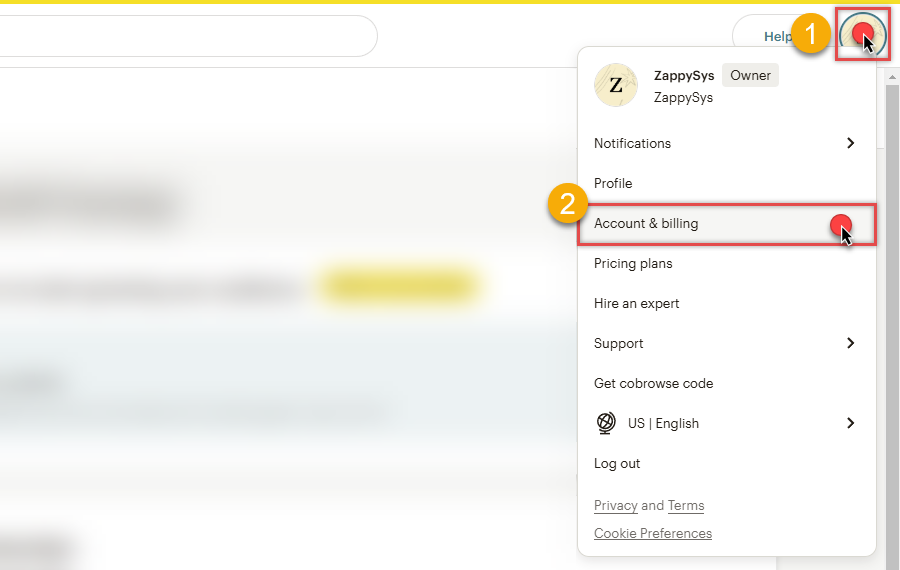
Login into your Mailchimp account, click on your Profile Icon, and hit Account & billing:
-
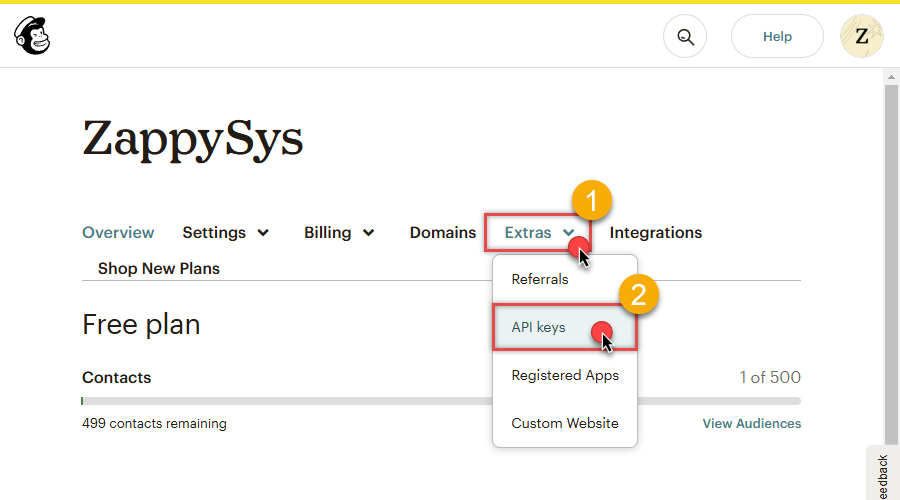
Navigate to the API keys page in your Mailchimp account:
-
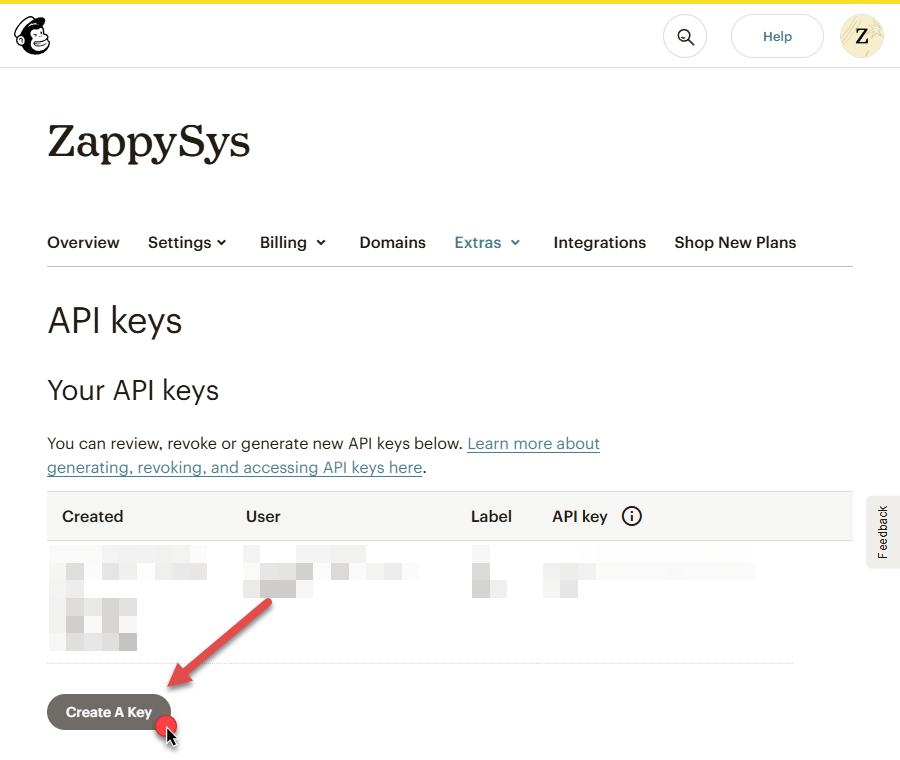
In the Your API keys section of the page, click Create A Key button:
-
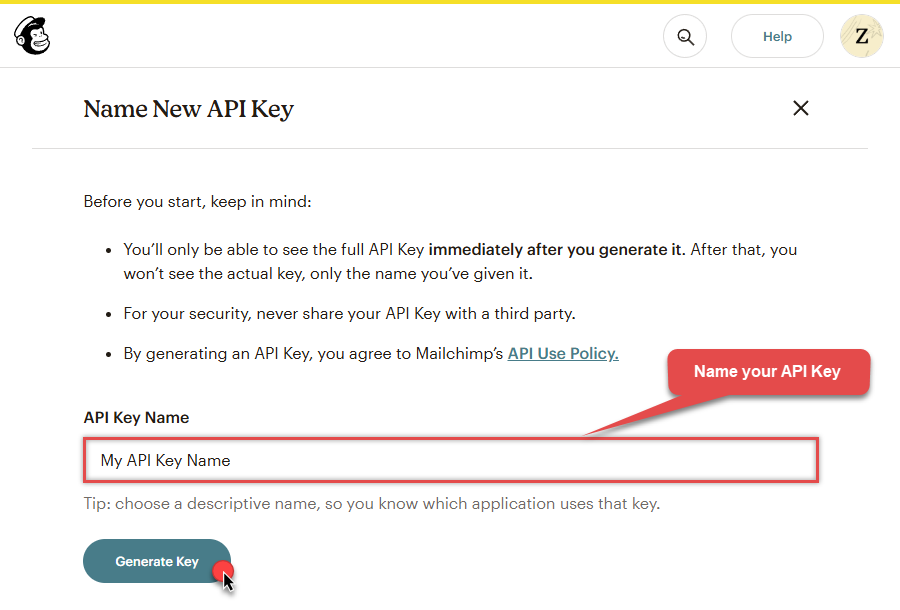
Give your new key a descriptive name that will remind you which application it's used for:
-
Copy the API key immediately and store it in a secure location (you won't be able to see or copy the key once you finish generating it):
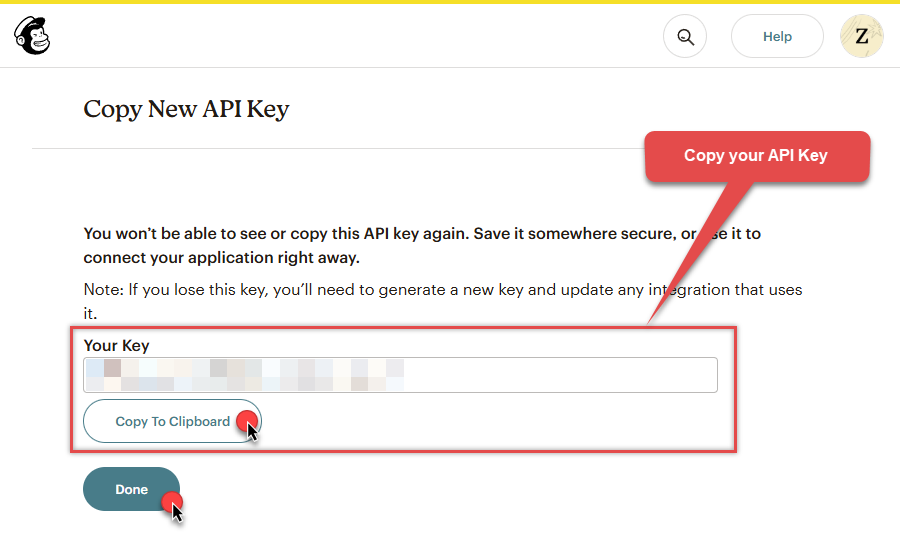
-
Record your Mailchimp data center, since we will need it later.
The data center is located in your browser's address bar URL.
If the URL is
https://us21.admin.mailchimp.com/account/api, then your data center isus21. - Now go to SSIS package or ODBC data source ApiKey Auth authentication configuration.
- Proceed by entering the data center into the Data Center field that was recorded in the previous step.
- Then enter the API key into the Api Key field that you copied earlier.
- Finally, click the Test Connection button at the bottom of the window to verify proper connectivity with your Mailchimp account.
- Done! Now you can use Mailchimp Connector!
Parameters
| Parameter | Required | Default value | Options | ||||||||||||||
|---|---|---|---|---|---|---|---|---|---|---|---|---|---|---|---|---|---|
|
Name:
Label: Api Key |
YES | ||||||||||||||||
|
Name:
Label: Default List Id The ID of the list for which you like to perform this operation. |
YES | ||||||||||||||||
|
Name:
Label: Data Center usually last few letters from your key. E.g. If you key is abcxxxx-us14 then type your datacenter as us14. |
|
||||||||||||||||
|
Name:
Label: RetryMode |
RetryWhenStatusCodeMatch
|
|
|||||||||||||||
|
Name:
Label: RetryStatusCodeList |
429
|
||||||||||||||||
|
Name:
Label: RetryCountMax |
5
|
||||||||||||||||
|
Name:
Label: RetryMultiplyWaitTime |
True
|
