Authentication User Account
Description
No description available [API reference]
Instructions
To use OAuth authentication, firstly, you need to create OAuth application:
- Log into your Dropbox account.
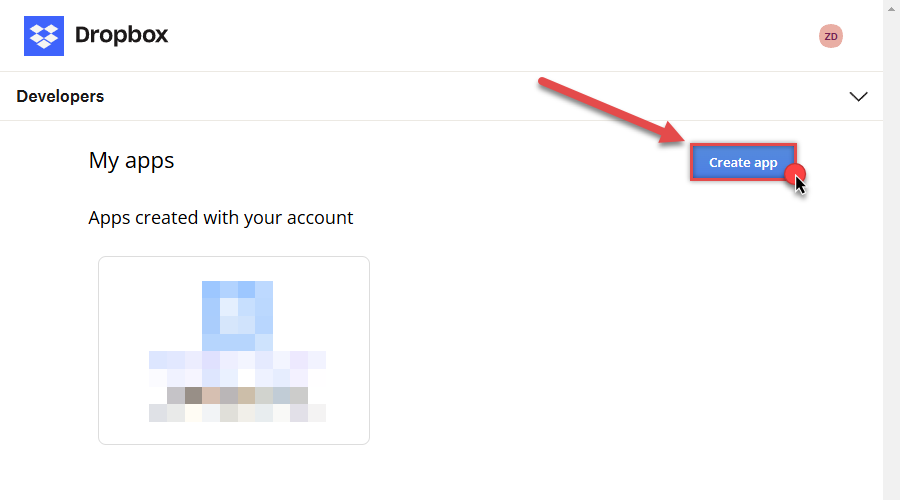
- Go to Dropbox My Apps.
-
Then press Create app button to create a new app:

-
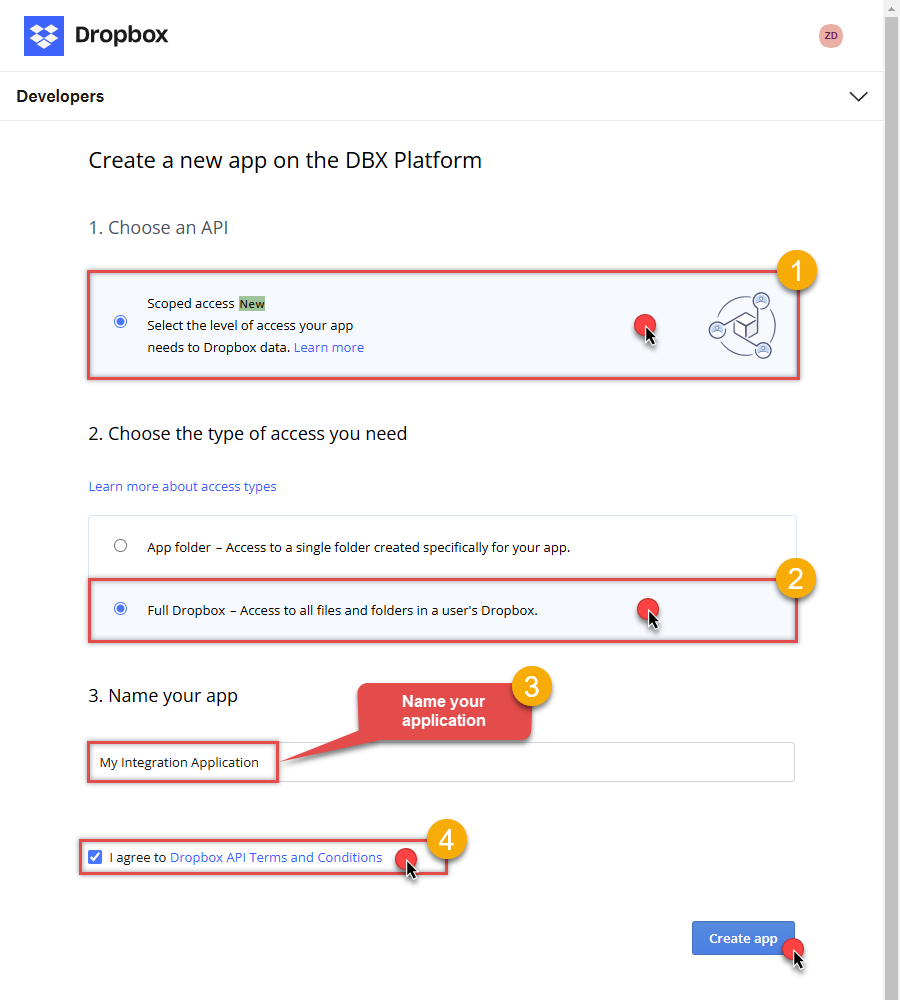
Once a new page opens, select Scoped access option:

- Next, select Full Dropbox to access all files and folders or App folder to access specific folder's files and folders option.
- Continue by giving your app a name.
- Then check I agree to Dropbox API Terms and Conditions checkbox.
- Click Create app button.
-
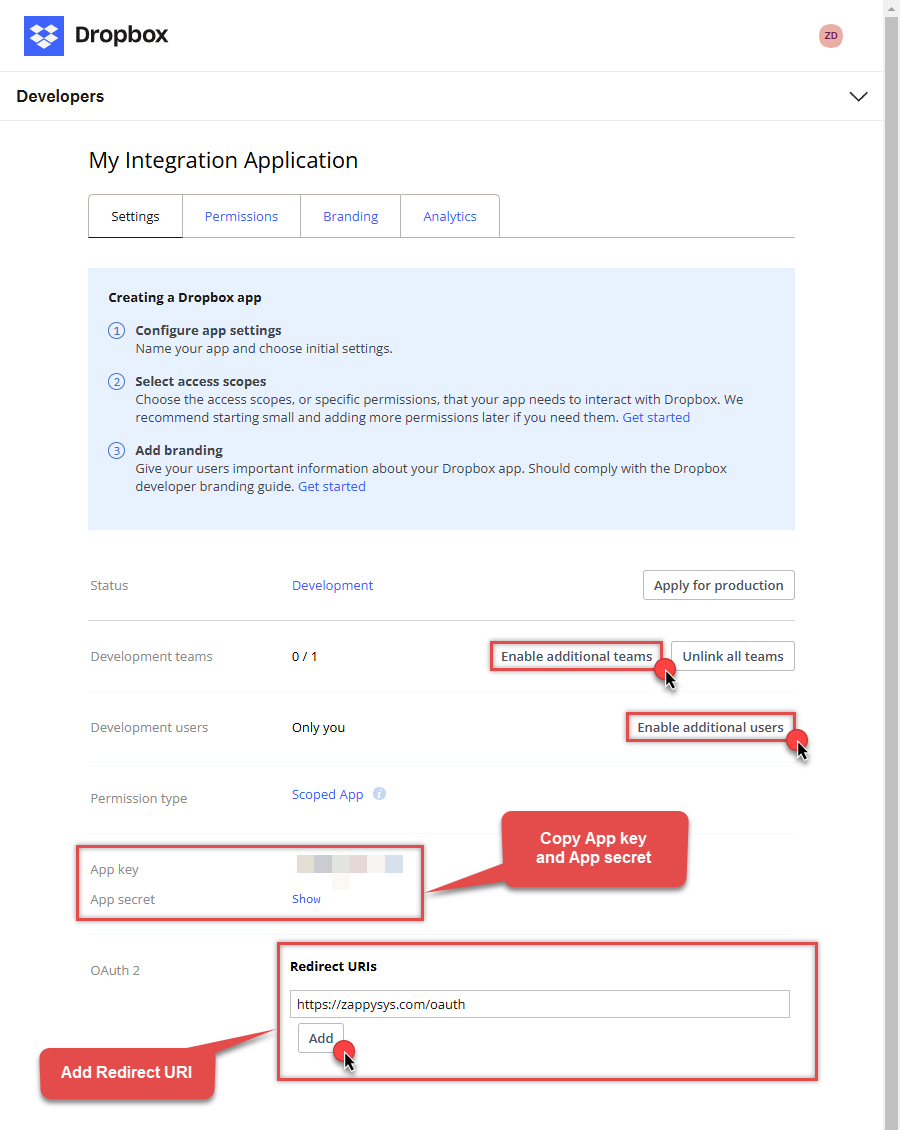
Once a new page opens, click Enable additional teams and Enable additional users buttons:

- Then copy App key and App secret and copy paste them into your favorite text editor (you will need them later).
-
Proceed by setting a Redirect URI and clicking Add button.
NOTE: If you don't have a working Redirect URI, you can use
https://zappysys.com/oauth(it's safe). -
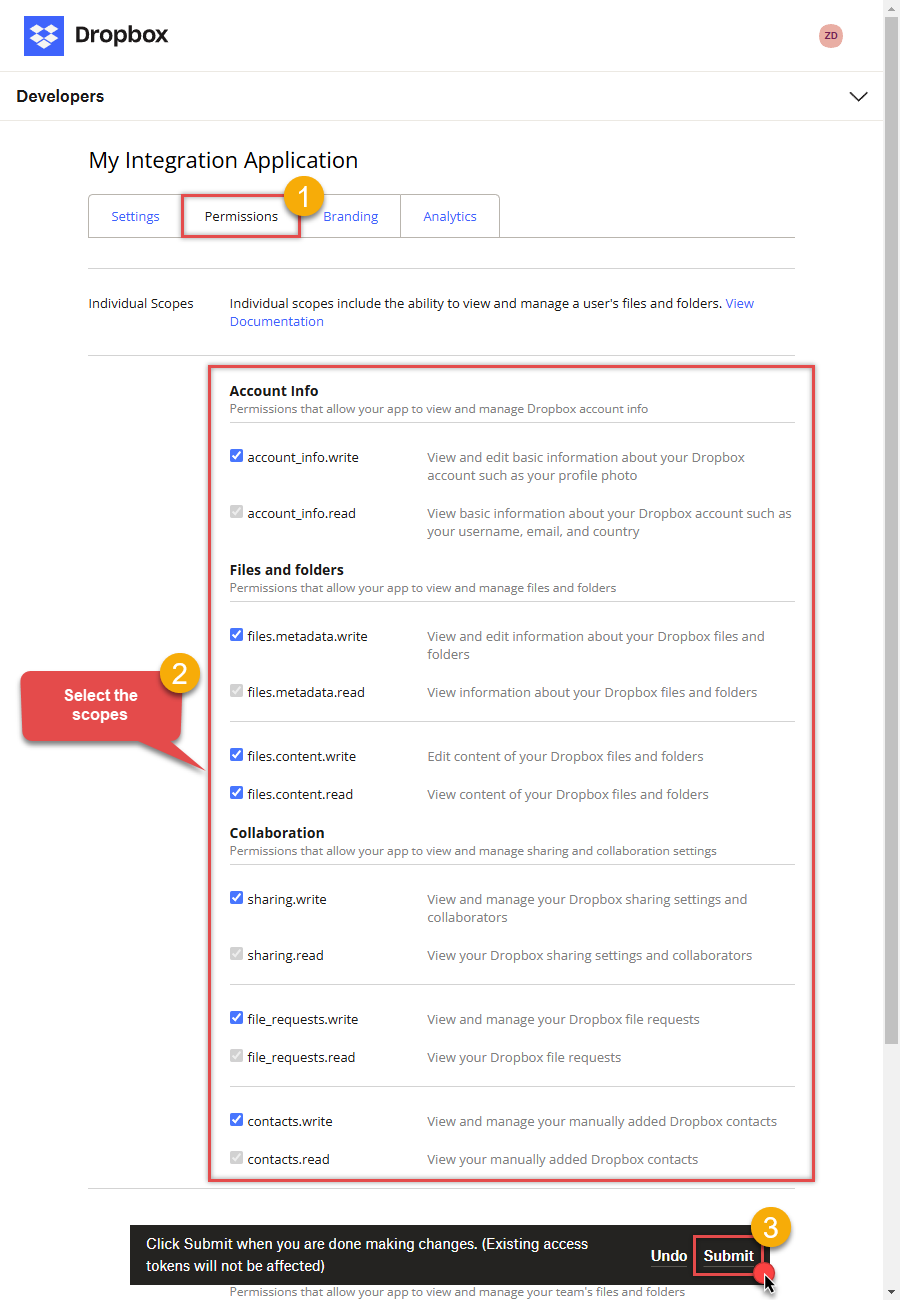
Then click on Permissions tab and select application scopes:

- Select all Individual Scopes and Team Scopes if you want to manage team data.
- Click Submit button.
- Now go to SSIS package or ODBC data source and in User Account authentication set these parameters:
- For ClientId field use App key value.
- For ClientSecret field use App secret value.
- For ReturnUrl field use Redirect URI value.
NOTE:
If you are planning to use your current data connection/token for automated processes,
we recommend that you use a generic account for token generation when the login box appears (e.g. sales_automation@mycompany.com instead of bob_smith@mycompany.com).
When you use a personal account which is tied to a specific employee profile and that employee leaves the company,
the token may become invalid and any automated processes using that token will fail.
Another potentially unwanted effect of using a personal token is incorrect logging;
the API calls (e.g. Read, Edit, Delete, Upload) made with that token will record the specific user as performing the calls instead of an automated process.
Parameters
| Parameter | Required | Default value | Options | ||||||||
|---|---|---|---|---|---|---|---|---|---|---|---|
|
Name:
Label: UseCustomApp Use your own app credentials or inbuilt app provided by ZappySys for ease of use. If you choose UseCustomApp=true then make sure to obtain your own ClientId and Secret using steps provided (Click [Steps to Configure] link found next to Authentication Type dropdown) |
YES |
True
|
|||||||||
|
Name:
Label: ReturnUrl |
YES |
https://zappysys.com/oauth
|
|||||||||
|
Name:
Label: ClientId |
YES, if UseCustomApp, otherwise NO
|
||||||||||
|
Name:
Label: ClientSecret |
YES, if UseCustomApp, otherwise NO
|
||||||||||
|
Name:
Label: Scope |
|||||||||||
|
Name:
Label: RetryMode |
RetryWhenStatusCodeMatch
|
|
|||||||||
|
Name:
Label: RetryStatusCodeList |
429
|
||||||||||
|
Name:
Label: RetryCountMax |
5
|
||||||||||
|
Name:
Label: RetryMultiplyWaitTime |
True
|
