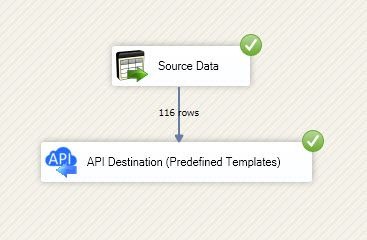
Writing data in SSIS
In this section we will learn how to configure and use Asana Connector in the API Destination to write data to Asana.
Video tutorial
This video covers following and more so watch carefully. After watching this video follow the steps described in this article.
- How to download SSIS PowerPack for Asana integration in SSIS
- How to configure connection for Asana
- How to write or lookup data to Asana
- Features about SSIS API Destination
- Using Asana Connector in SSIS
Step-by-step instructions
In upper section we learned how to read data, now in this section we will learn how to configure Asana in the API Source to POST data to the Asana.
-
Read the data from the source, being any desired source component. In example we will use ZappySys Dummy Data Source component.
-
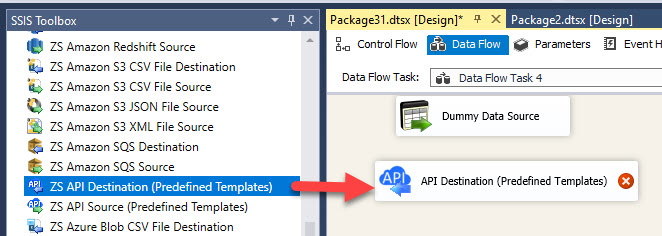
From the SSIS Toolbox drag and drop API Destination (Predefined Templates) on the Data Flow Designer surface and connect source component with it, and double click to edit it.
-
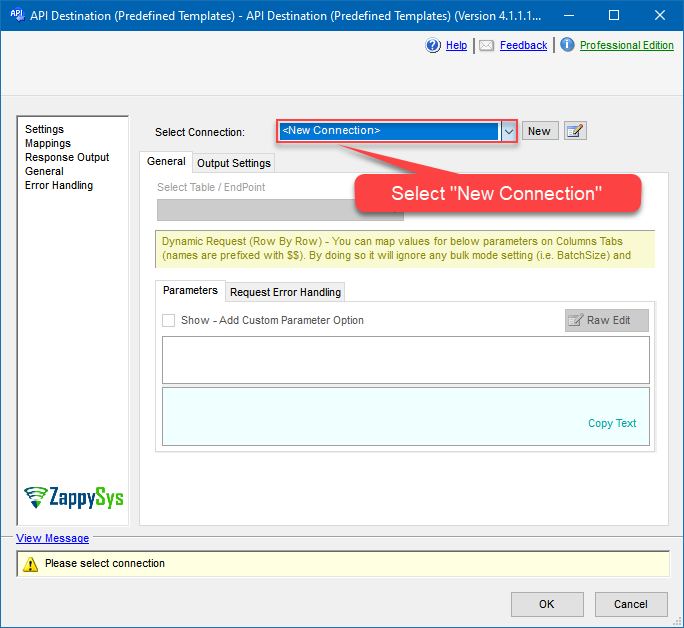
Select New Connection to create a new connection:
API Destination - AsanaRead and write data related to Tasks, Projects, Workspaces, Portfolios, TimeEntries, Memberships and more.
-
Use a preinstalled Asana Connector from Popular Connector List or press Search Online radio button to download Asana Connector. Once downloaded simply use it in the configuration:
Asana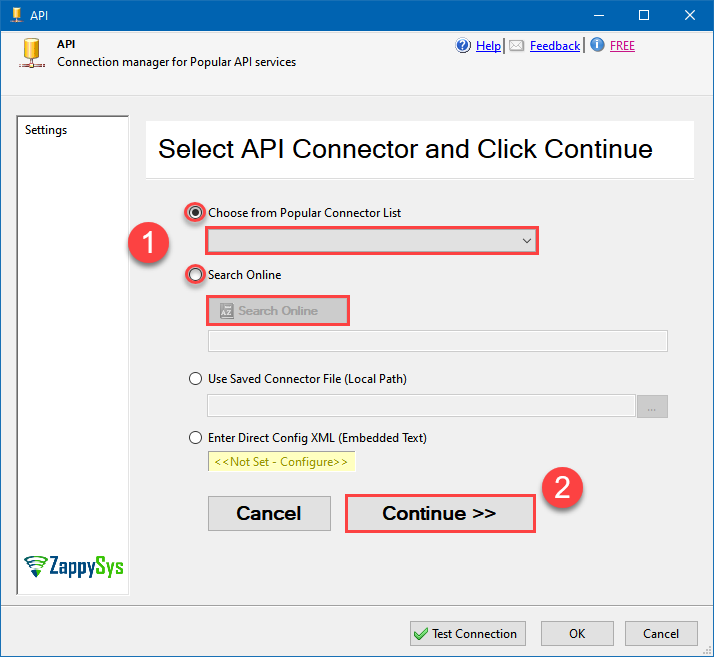
-
Proceed with selecting the desired Authentication Type. Then select API Base URL (in most cases default one is the right one). Finally, fill in all the required parameters and set optional parameters if needed. You may press a link Steps to Configure which will help set certain parameters. More info is available in Authentication section.
Asana authentication
Here is how to obtain a Personal Access Token (PAT) in Asana:-
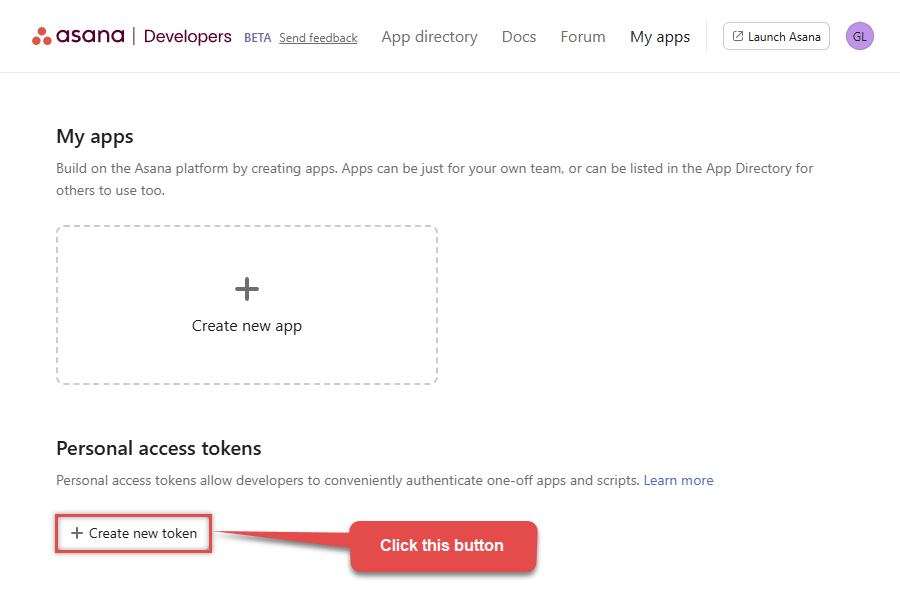
Open My apps in Asana portal
and click Create new token button:
-
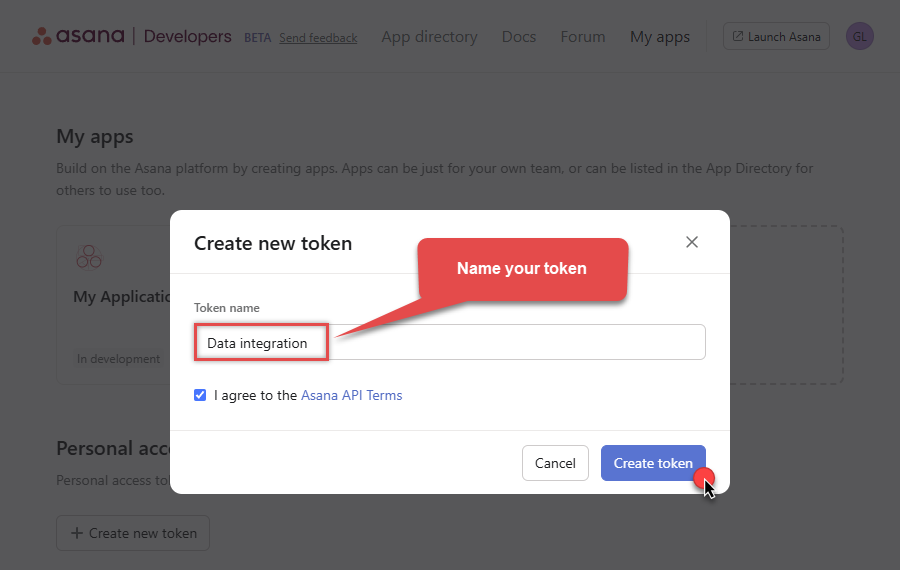
Once a popup opens, name your new token:
-
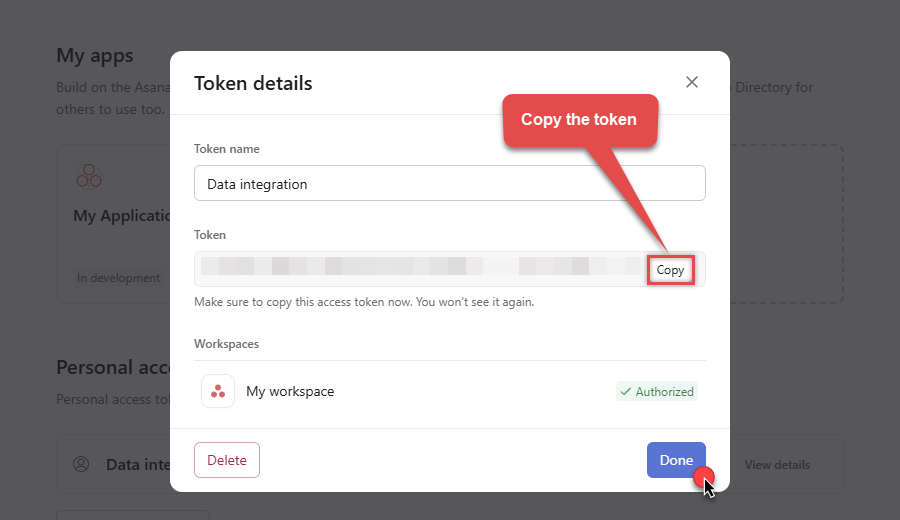
Then click Copy button to copy the token:
- Now go to SSIS package or ODBC data source and use this token in Personal Access Token authentication configuration.
- Choose Default Workspace and Default Project to work with.
- Click Test Connection to confirm the connection is working.
- Done! Now you are ready to use Asana Connector!
API Connection Manager configuration
Just perform these simple steps to finish authentication configuration:
-
Set Authentication Type to
Personal Access Token [Http] - Optional step. Modify API Base URL if needed (in most cases default will work).
- Fill in all the required parameters and set optional parameters if needed.
- Finally, hit OK button:
AsanaPersonal Access Token [Http]https://app.asana.com/api/1.0Required Parameters Enter Token (Personal Access Token - PAT) Fill-in the parameter... Default Workspace Fill-in the parameter... Default Project Fill-in the parameter... Optional Parameters RetryMode RetryWhenStatusCodeMatch RetryStatusCodeList 429 RetryCountMax 5 RetryMultiplyWaitTime True 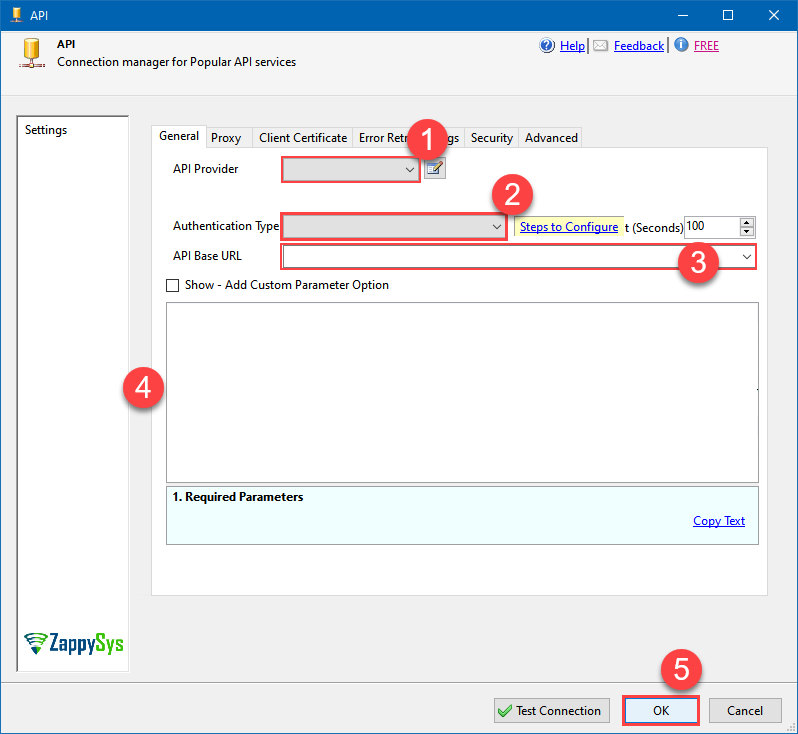
Asana authentication
Here is how to register an OAuth app in Asana:-
Open My apps in Asana portal
and click Create new app button:
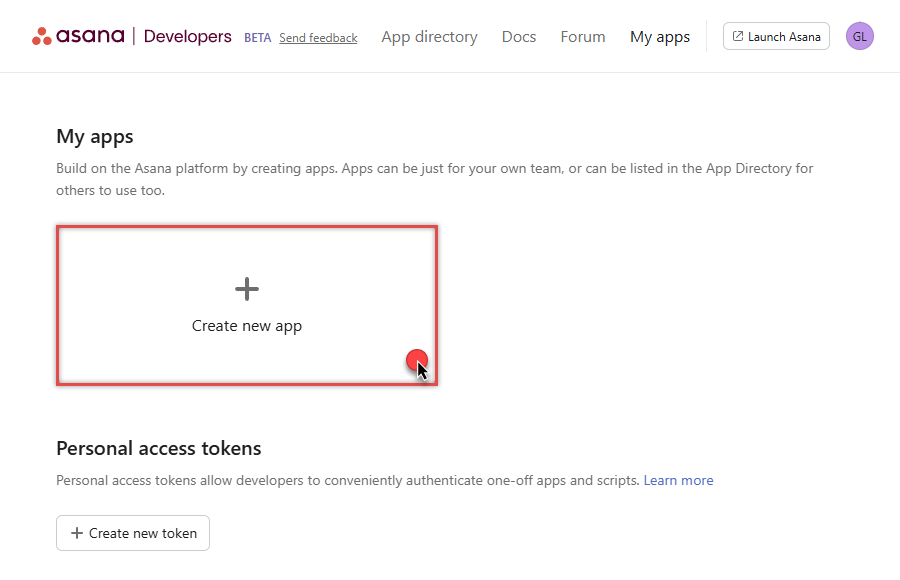
-
Once a popup opens, name your app and check two options, and click Create app button:
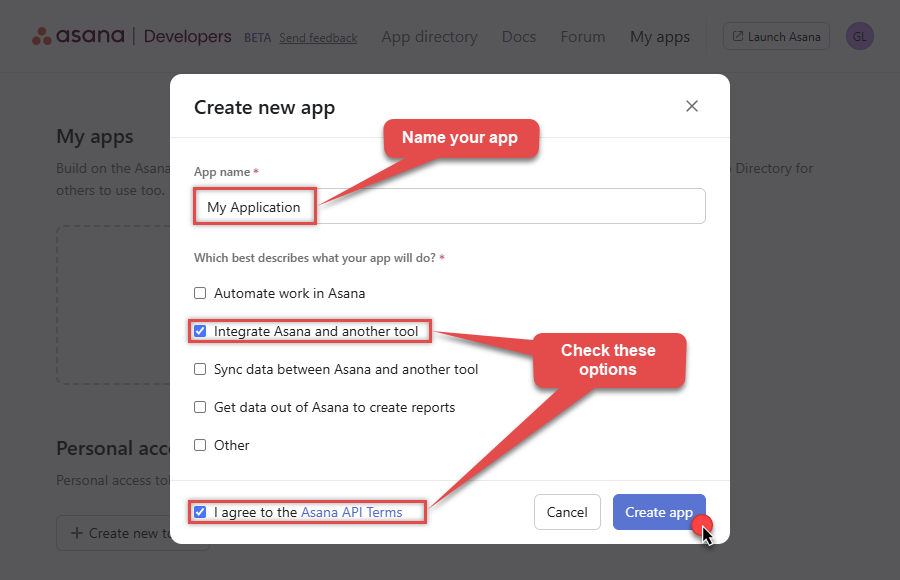
-
Then copy Client ID and Client secret and save them in a file (we will need them for authentication):
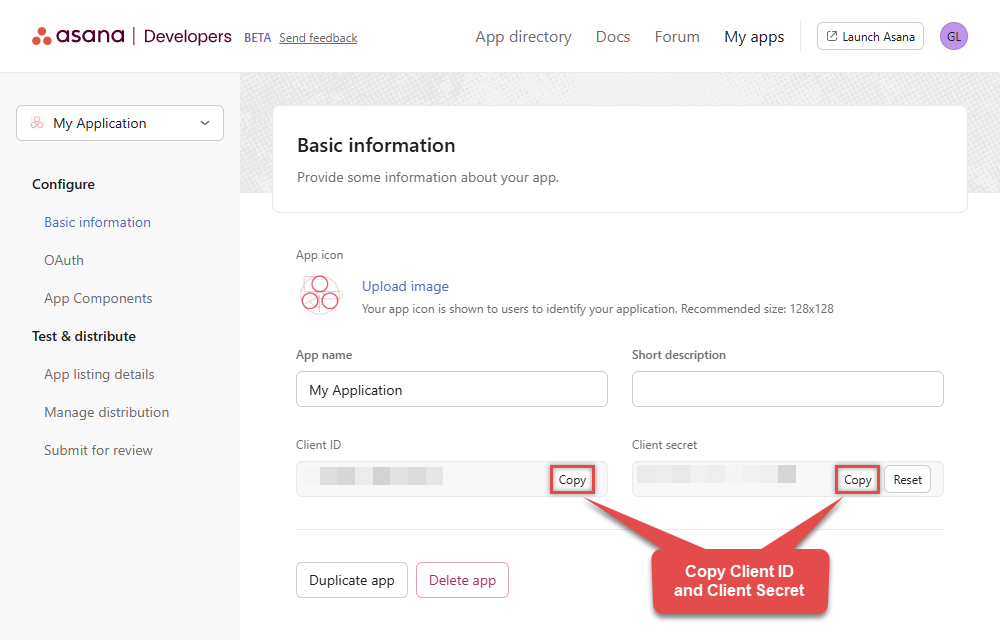
-
Continue by selecting OAuth menu item on your left and click Add redirect URL button (you can have your own or use
https://zappysys.com/oauth):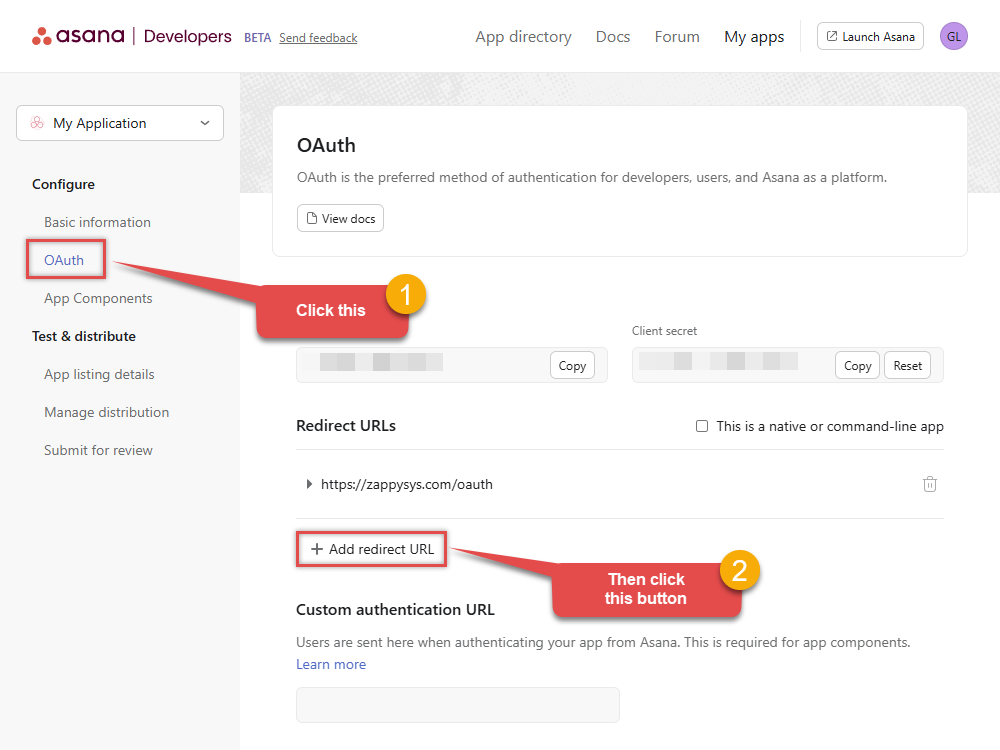
- Proceed by clicking on the Manage distribution section on your left.
-
Then specify workspaces your app needs to access (use Any workspace to access them all):
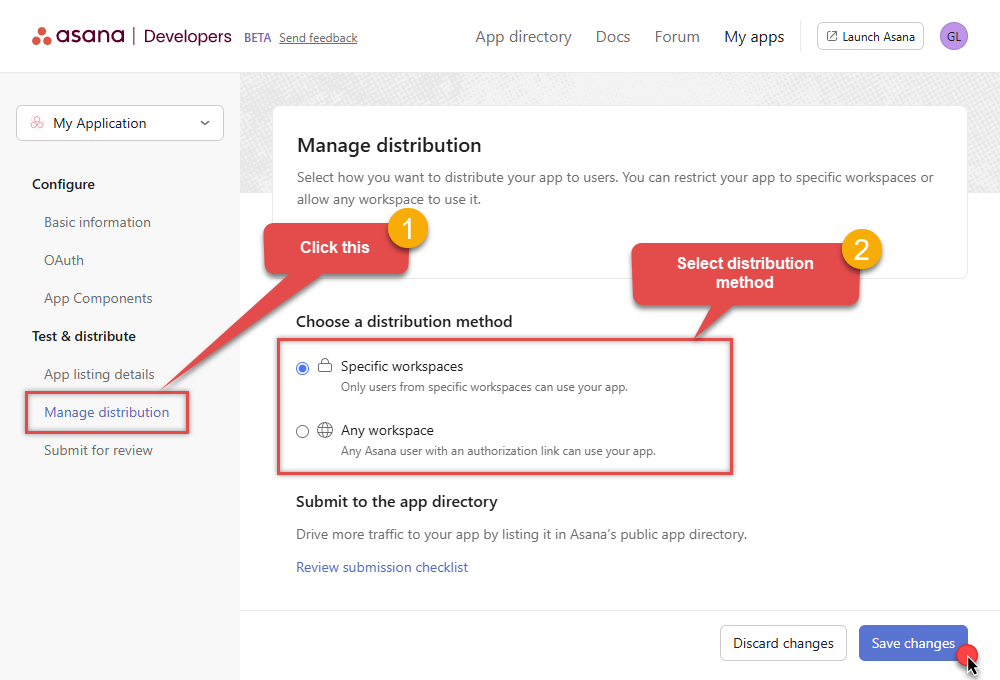
- Once you do that, click Save changes button.
- Now go to SSIS package or ODBC data source and use Client ID, Client Secret, and Redirect URL in OAuth app authentication configuration.
- When you are done with that, click Generate Token button to generate Access and Refresh Tokens.
- Choose Default Workspace and Default Project to work with.
- Click Test Connection to confirm the connection is working.
- Done! Now you are ready to use Asana Connector!
API Connection Manager configuration
Just perform these simple steps to finish authentication configuration:
-
Set Authentication Type to
OAuth app [OAuth] - Optional step. Modify API Base URL if needed (in most cases default will work).
- Fill in all the required parameters and set optional parameters if needed.
- Press Generate Token button to generate the tokens.
- Finally, hit OK button:
AsanaOAuth app [OAuth]https://app.asana.com/api/1.0Required Parameters ClientId Fill-in the parameter... Client Secret Fill-in the parameter... Default Workspace (** Select after Token is generated **) Fill-in the parameter... Default Project (** Select after Token is generated **) Fill-in the parameter... Optional Parameters Permissions default Redirect URL https://zappysys.com/oauth RetryMode RetryWhenStatusCodeMatch RetryStatusCodeList 429 RetryCountMax 5 RetryMultiplyWaitTime True 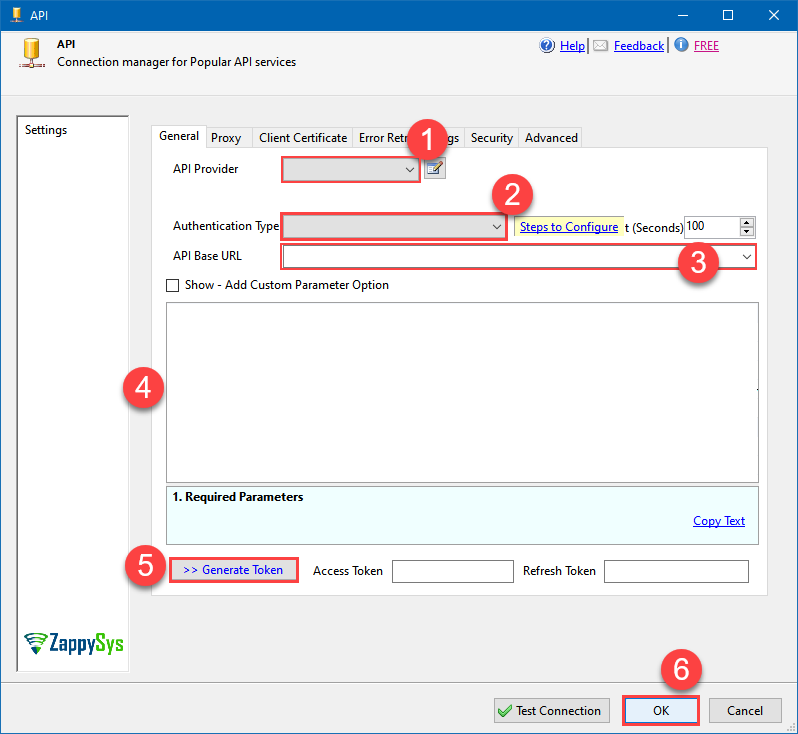
-
Open My apps in Asana portal
and click Create new token button:
-
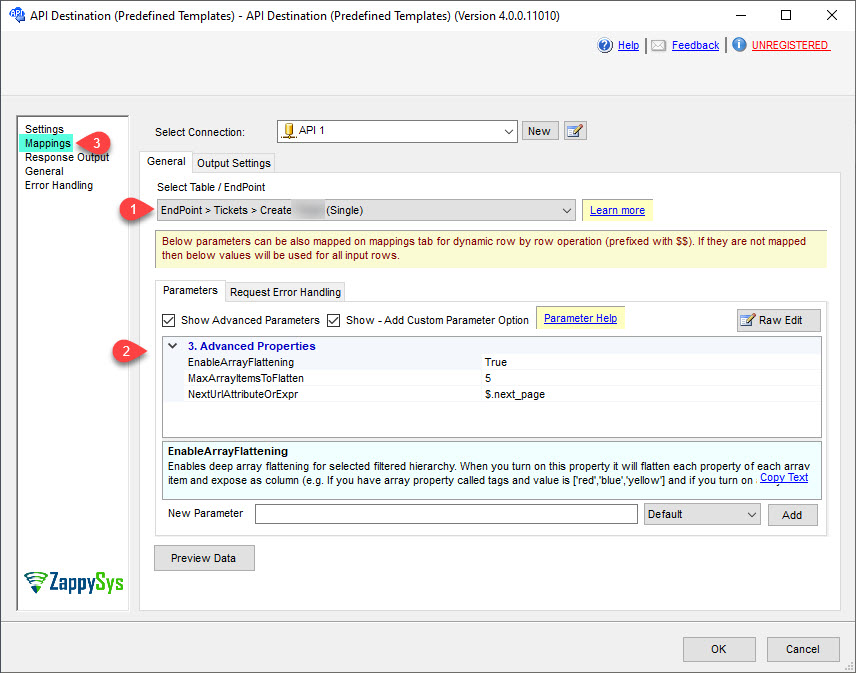
Select the desired endpoint, change/pass the properties values, and go to the Mappings tab to map the columns.
API Destination - AsanaRead and write data related to Tasks, Projects, Workspaces, Portfolios, TimeEntries, Memberships and more.
-
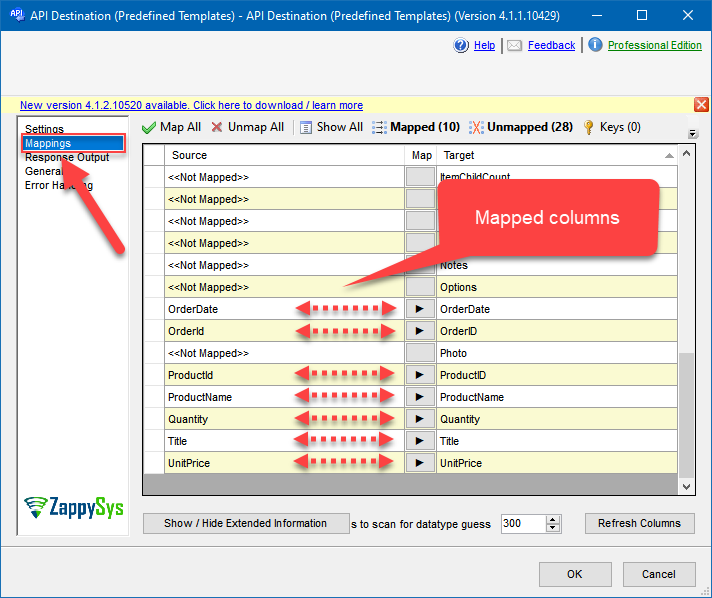
Finally, map the desired columns:
API Destination - AsanaRead and write data related to Tasks, Projects, Workspaces, Portfolios, TimeEntries, Memberships and more.
-
That's it; we successfully configured the POST API Call. In a few clicks we configured the Asana API call using ZappySys Asana Connector
