Introduction
![]() In this article, you will learn how to load data from Exact Online into SQL Server using SSIS. Exact Online is a popular CRM, ERP and HRM tool which also lets you manage your finances. As an example, we will use Exact Online contacts as data to load it into a SQL Server database. We will use ZappySys SSIS PowerPack connector to get contacts from Exact Online and then use standard SSIS connector OLE DB Destination to load data into a table. This SSIS PowerPack connector will be used to get the data:
In this article, you will learn how to load data from Exact Online into SQL Server using SSIS. Exact Online is a popular CRM, ERP and HRM tool which also lets you manage your finances. As an example, we will use Exact Online contacts as data to load it into a SQL Server database. We will use ZappySys SSIS PowerPack connector to get contacts from Exact Online and then use standard SSIS connector OLE DB Destination to load data into a table. This SSIS PowerPack connector will be used to get the data:

Prerequisites
Before we perform the steps listed in this article, you will need to make sure the following prerequisites are met:- SSIS designer installed. Sometimes it is referred to as BIDS or SSDT (download it from the Microsoft site).
- Basic knowledge of SSIS package development using Microsoft SQL Server Integration Services.
- Make sure ZappySys SSIS PowerPack is installed (download it, if you haven't already).
- (Optional step). Read this article, if you are planning to deploy packages to a server and schedule their execution later.
Step-by-step – Load data from Exact Online into SQL Server using SSIS
Getting started
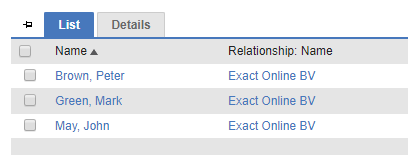
We will get these contacts and load them into a SQL Server database:
Loading Exact Online contacts into SQL Server
The first thing you will need to do is to create an OAuth application in Exact App Center and then we will proceed in getting the data and loading it into a SQL Server database.
Create OAuth application in Exact App Center
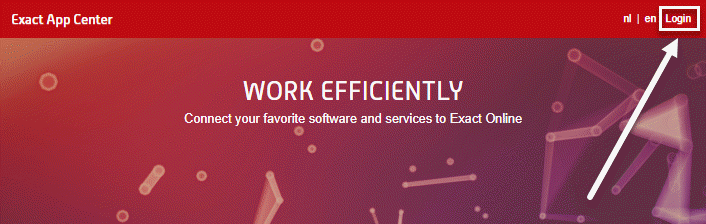
- Visit Exact App Center and login:
Exact App Center login window
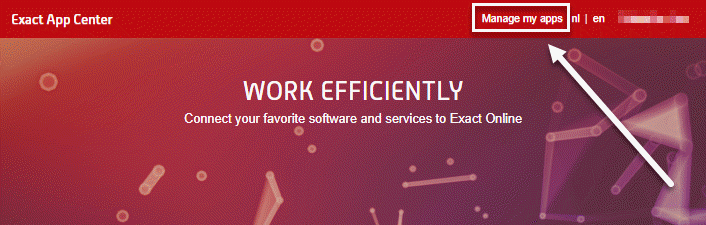
- Once logged in, click on Manage my apps link:
Exact App Center login area
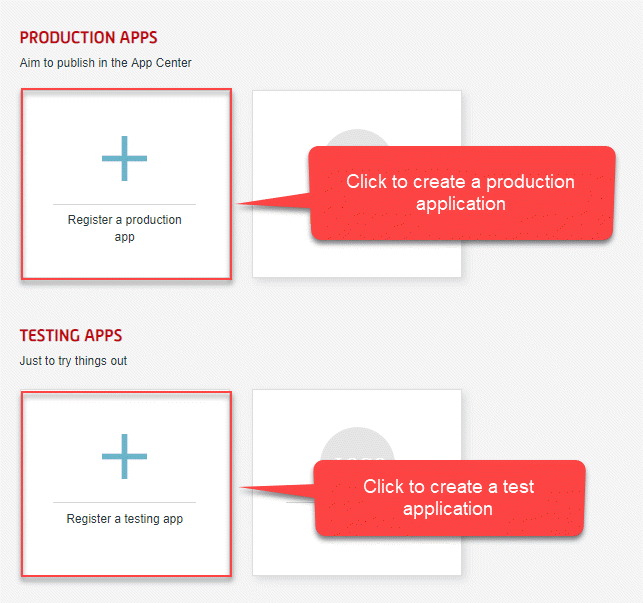
- Create a new OAuth application:
Exact Online API applications management page
- Give it a name.
- In Redirect URI field enter: https://www.zappysyscom/oauth2
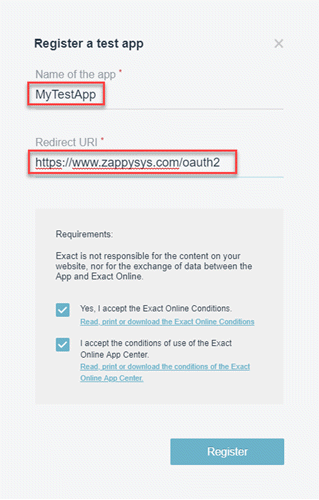
Registering Exact Online API application to load data into SQL Server
- Hit Register.
- Don’t close the browser, we will use App information later.
Create OAuth Connection Manager to connect to Exact Online
- Create a new SSIS package.
- Create a new OAuth Connection Manager, by right-clicking on the Connection Managers pane:
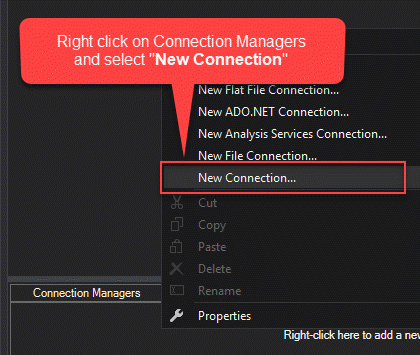
Creating OAuth Connection Manager to connect to Exact Online API application
- Select ZS-OAUTH to create one:
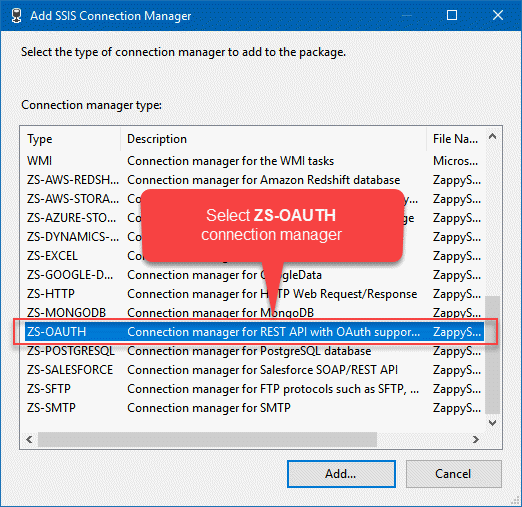
Selecting ZS-OAUTH option to create OAuth Connection Manager
- Then open your Exact App Center API application configuration we left open in the previous step. We will use that data from that window.
- Select Custom as OAuth Provider.
- Select Authorization Code Grant as OAuth Grant Type.
- Copy Client ID and paste it into Client Id field.
- Copy Client secret and paste it into Client Secret field.
- Set Authorization Url to https://start.exactonline.nl/api/oauth2/auth.
- Set Access Token Url to https://start.exactonline.nl/api/oauth2/token.
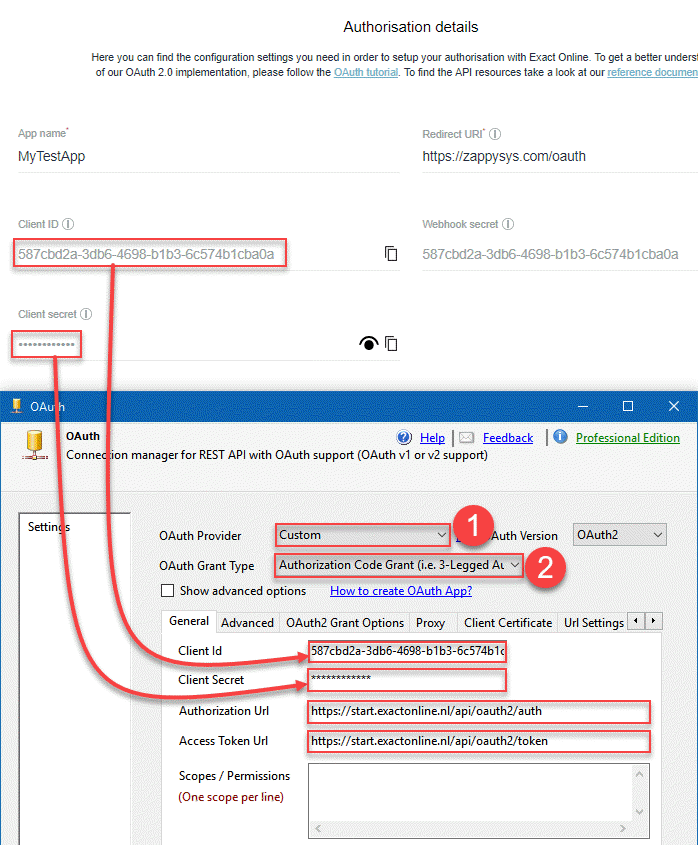
Configuring OAuth Connection Manager to access Exact Online data via API
- Then open Advanced tab and copy paste Redirect URI to Callback/Return Url field:
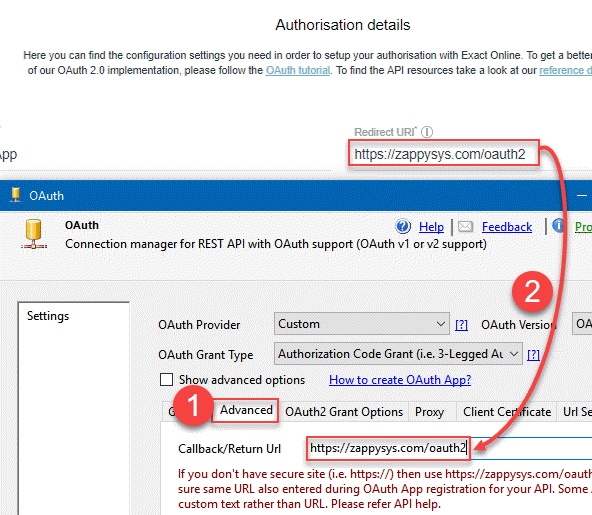
Configuring OAuth application Callback/Return URL
- Then click on OAuth2 Grant Options tab and check option below.
- Finally, since Exact Online refresh token keeps changing, enter a filename where to store the refresh token:
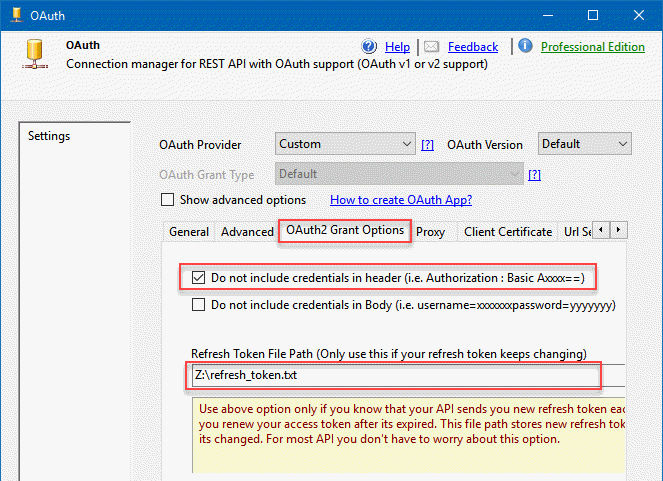
Configuring OAuth2 Grant specifics
NOTE: Can be a non-existent file or must be an empty, existing file.
Getting data from Exact Online
- Drag and drop Data Flow and then JSON Source into it:
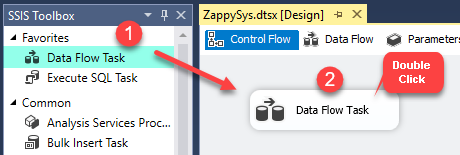
Dragging and dropping Data Flow Task into Control Flow
- Double click on JSON Source to modify it.
- Check Use Credentials checkbox and select OAuth 1 as your Connection Manager.
- Add HTTP Header named Accept and set the value to application/json.
- In Array Filter field enter $.d.results[*].
- In Enter Path or Web URL field enter this URL:
https://start.exactonline.nl/api/v1/current/Me?$select=CurrentDivision - Hit Preview button.
- Copy your division number, you will need it when constructing a URL for getting contacts.
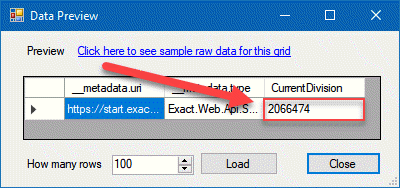
Getting division number
- Now enter this URL in the field:
https://start.exactonline.nl/api/v1/{division}/crm/Contacts?$select=FirstName,LastName
Replace {division} with your division number.

Configuring JSON Source to get Exact Online data and load it into SQL Server
Pagination
To paginate through the results, perform these steps:
- Open Pagination tab.
- In Next Link/Cursor Expression field enter $.d.__next
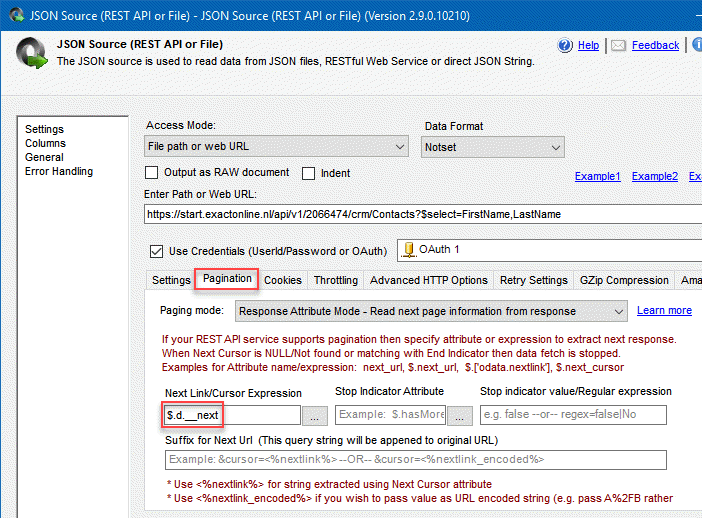
Configuring pagination in JSON Source to paginate through Exact Online contacts
Loading Exact Online data into SQL Server
- Drag and drop OLE DB Destination or similar connector.
- Connect JSON Source with OLE DB Destination.
- Create a new connection.
- Click New to create a new table.
- Hit OK.
- Select Mappings to map the columns.
- Hit OK to close the window.
- Execute the package.
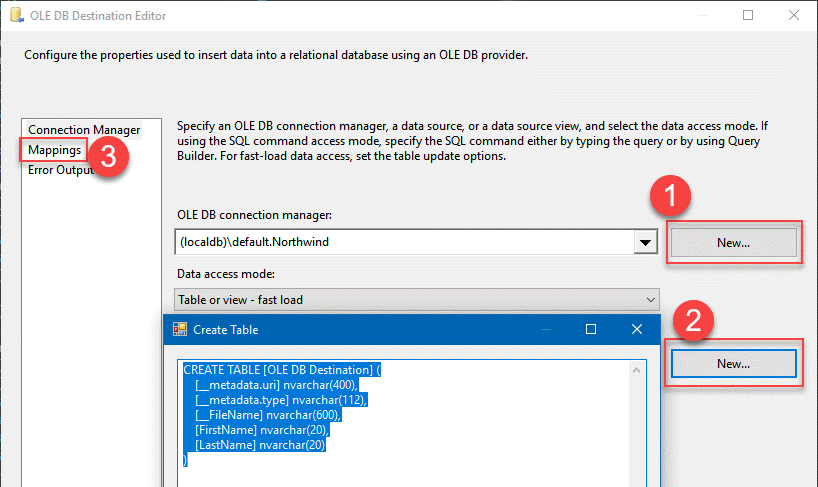
Configuring OLE DB Destination to load Exact Online data into SQL Server
The results
Once you execute the package, you should see similar results in Visual Studio and SQL Server Management Studio:
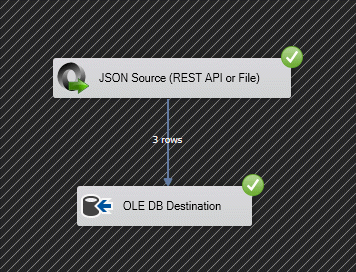
Executing SSIS package and loading Exact Online data into SQL Server
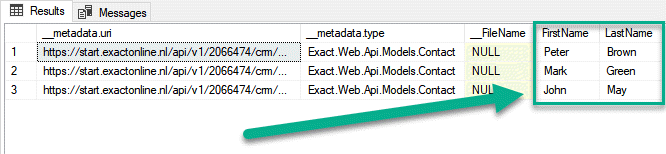
Successfully loading Exact Online data into SQL Server
As you see, these are the same Exact Online contacts showed in the Getting Started section.
Conclusion
You learned how to load data from Exact Online into SQL Server using SSIS and ZappySys SSIS PowerPack. At first, we created an Exact Online OAuth application, then created an OAuth Connection Manager based on its information and finally loaded contacts using JSON Source connector.
References