Introduction
![]()
In this blog, we will show how to download files from Azure Blob Storage using SSIS. To illustrate, we will use ZappySys SSIS PowerPack, which includes several tasks to import/export data from multiples sources to multiple destinations like flat files, Azure, AWS, databases, Office files and more. They are Coding free, drag and drop high-performance suite of Custom SSIS Components and SSIS Tasks
Prerequisite
- First, you will need to have SSIS installed
- Secondly, make sure to have SSDT
- Download and install Microsoft Azure Storage Emulator
- Download and install Microsoft Azure Storage Explorer
- Finally, do not forget to install ZappySys SSIS PowerPack
What is Azure Blob Storage
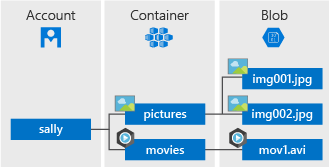
Azure Blob storage is Microsoft’s object storage solution for the cloud. you can store large amounts of unstructured data, such as text or binary data. Blob storage discloses three resources:
- storage account (You can access data objects in Azure Storage through a storage account.
For more information, click here.) - the containers in the account(constructs a set of blobs, it is similar to a folder in a file system.
All blobs lie within a container, Note: Container name must be lowercase) - the blobs in a container. (Azure Storage offers three types of blobs: block blobs, append blobs, and page blobs)
See the below-attached diagram. It shows the relationship between these resources.
 You can also use Azure Storage Explorer on your Local machine. Azure Storage Explorer is a standalone app that enables you to easily work with Azure Storage data on Windows, macOS, and Linux. You can use Blob storage to expose data publicly to the world or to store application data privately. Connect to an Azure storage account or service
Getting Started
In order to start, we will show several examples. ZappySys includes an SSIS Azure Blob Storage Task that will help you in Download File from Azure Blob to the Local machine, Upload files(s) to Azure Blob Storage. It will also support Delete, Rename, List, Get Property, Copy, Move, Create, Set Permission … and many more operations. Here we are showing you is, How to download files from Azure Blob Storage.
You can connect to your Azure Storage Account by entering your storage account credentials. Here I am showing an example of the use of local Azure Storage Emulator.
Setup necessary client tools
- Once you have downloaded and installed storage emulator You can launch Microsoft Azure Storage Emulator from its Physical location or from the desktop or start menu shortcut.

Microsoft Azure Storage Emulator Physical Location
- If You can see the below-attached Command Prompt screen after Emulator started. Then you can proceed to start Microsoft Azure Storage Explorer as the Azure Storage Emulator is started successfully.
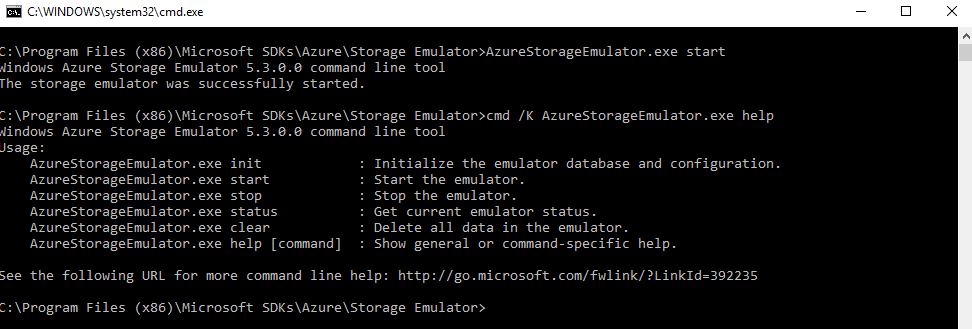
Command Prompt Screen after Microsoft Azure Storage Emulator Started
- Now, You have to download and install Microsoft Azure Storage Explorer and then You can launch Microsoft Azure Storage Explorer from its Physical location or from the desktop or start menu shortcut.

Microsoft Azure Storage Explorer Physical Location
Create Blob Container
For Creating a Blob Container, First of all, you need to go to Microsoft Storage Explorer Window. Then you can go through like this way (Storage Accounts –> (Development) –> Blob Containers).
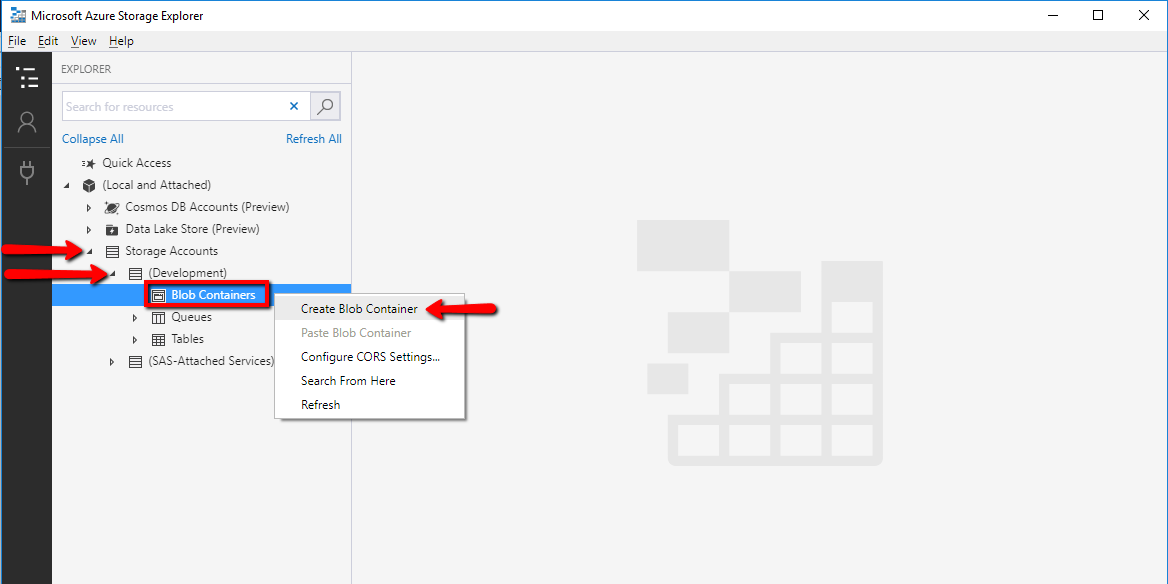
Microsoft Azure Storage Explorer: Create Blob Container
you can also create a Virtual Directory under it. A Virtual Directory does not actually exist in Azure until you paste, drag or upload blobs into it.
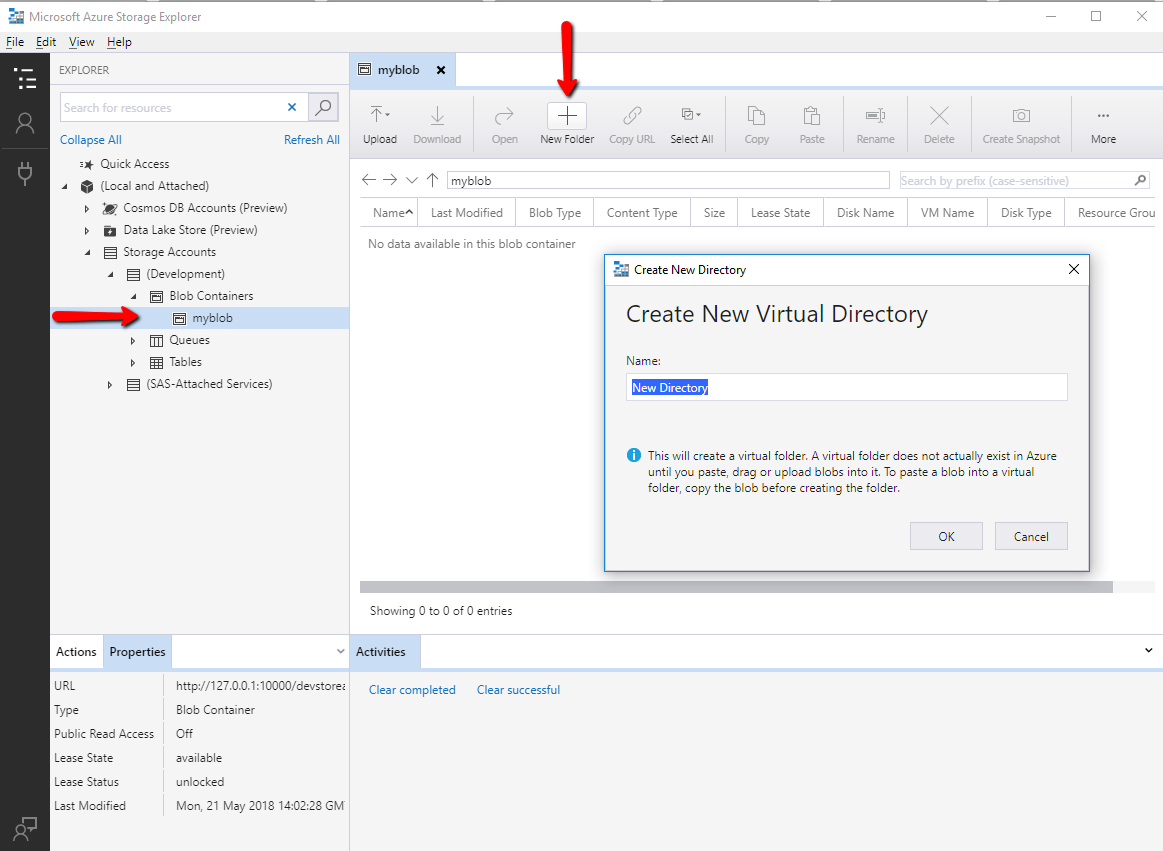
Creating the new Virtual Directory under Blob Container
Download Files from Azure Blob Storage
Let´s start with an example. In this SSIS Azure Blob Storage task example, we will show how to download files from Azure Blob Storage to local folders.
- First of All, Goto Control Flow Section, Drag and Drop ZS Azure Blob Storage Task from the SSIS Toolbox.
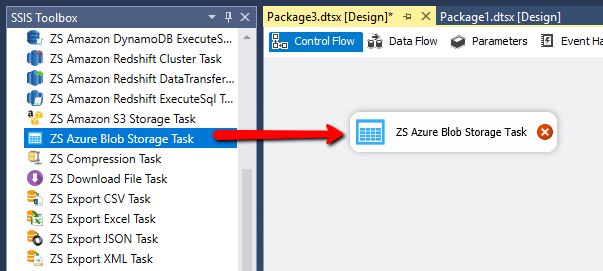
Drag and Drop Azure Blob Storage Task
- Double click on that Task to Edit the Configurations. You can see the Storage Action DropDown. It has many actions listed. you can do all that things with the use of this Task also, Create a connection
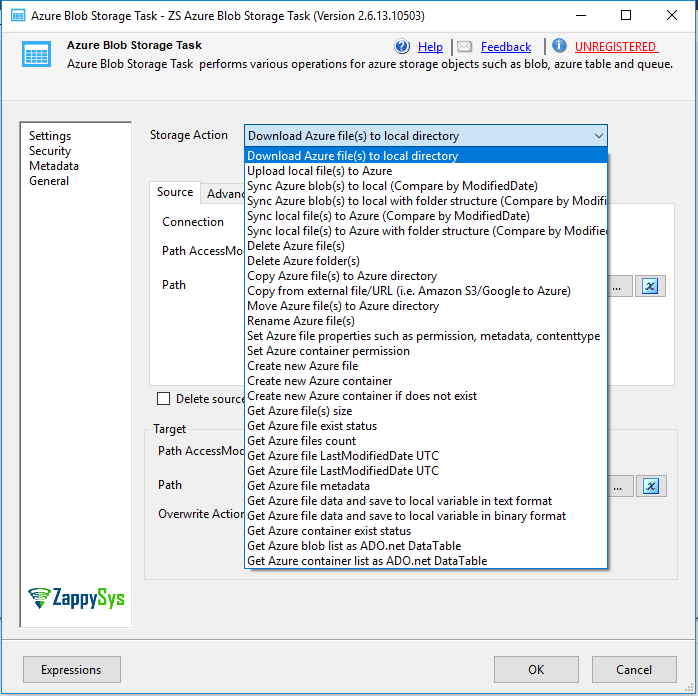
Azure Blob Storage Task with Listing of All Storage Action
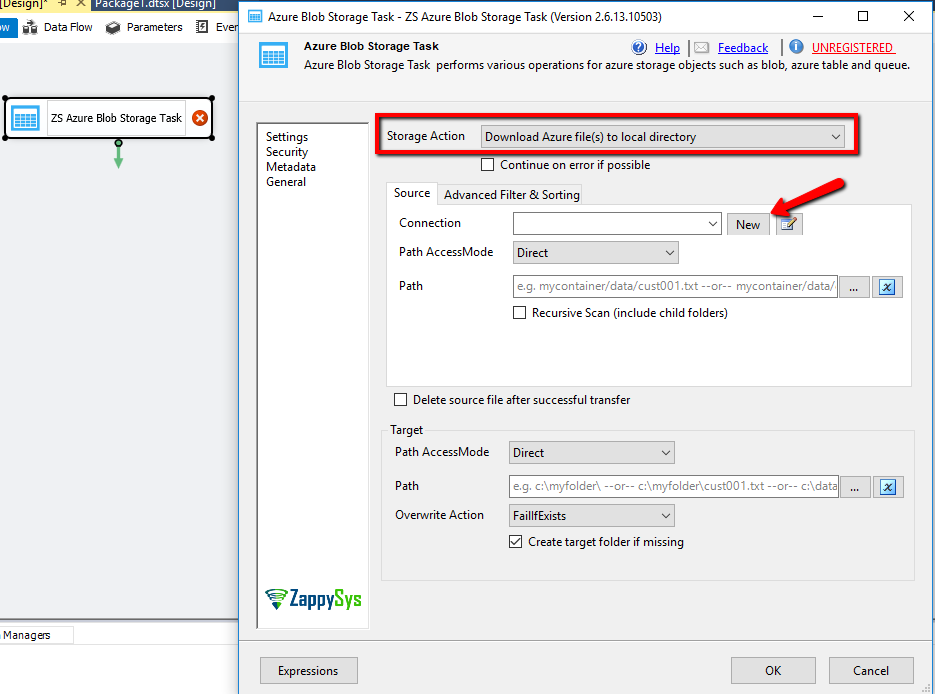
How to Set Connection: Create New Connection
- Connection Window: Configure the necessary settings and hit Test Connection button
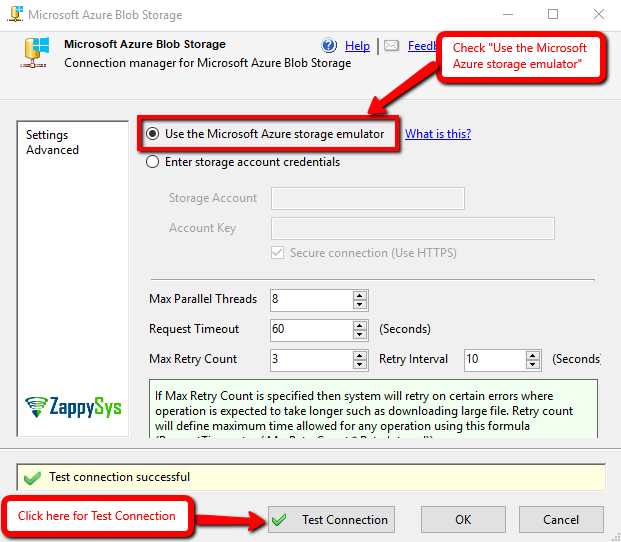
Connection Form of Azure Blob Storage Account
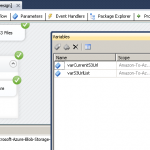
- Now, Set the Path Variable by Selecting Existing Variable OR Creating a New Variable.
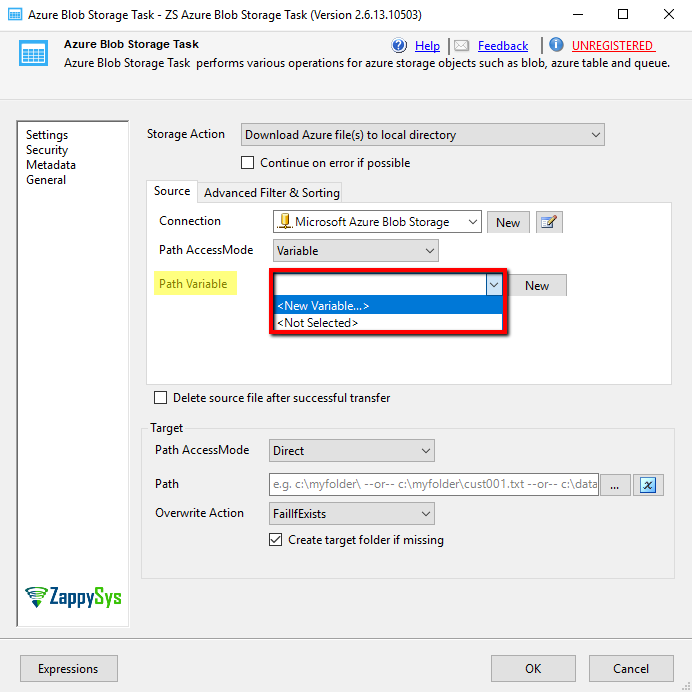
Select Path Variable Option
- Set Value in Variable: Specify FileName along with the Path. Select that Variable in Source Path Variable.

Set Variable by giving File Name with File Path
- Now configure the Target Settings: Select Path AccessMode.
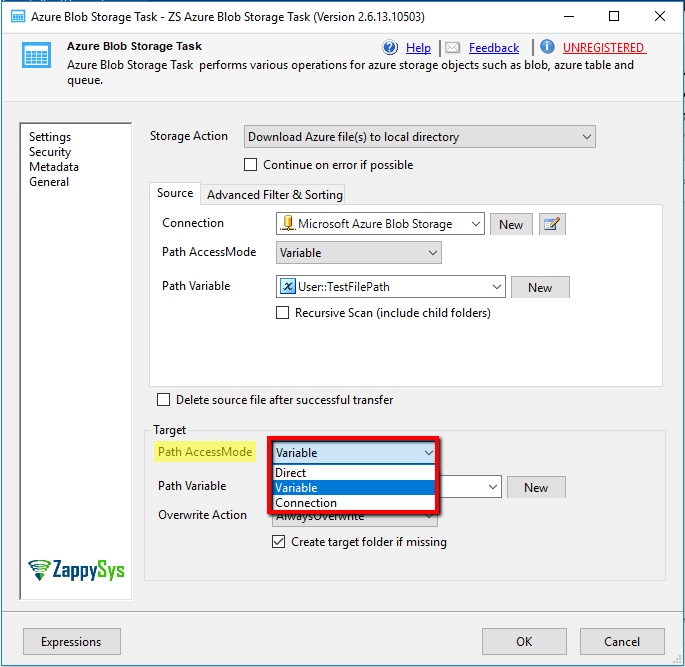
Select Path Access Mode in Target Section
- We are selecting Connection as Path AccessMode. Creating new Connection:
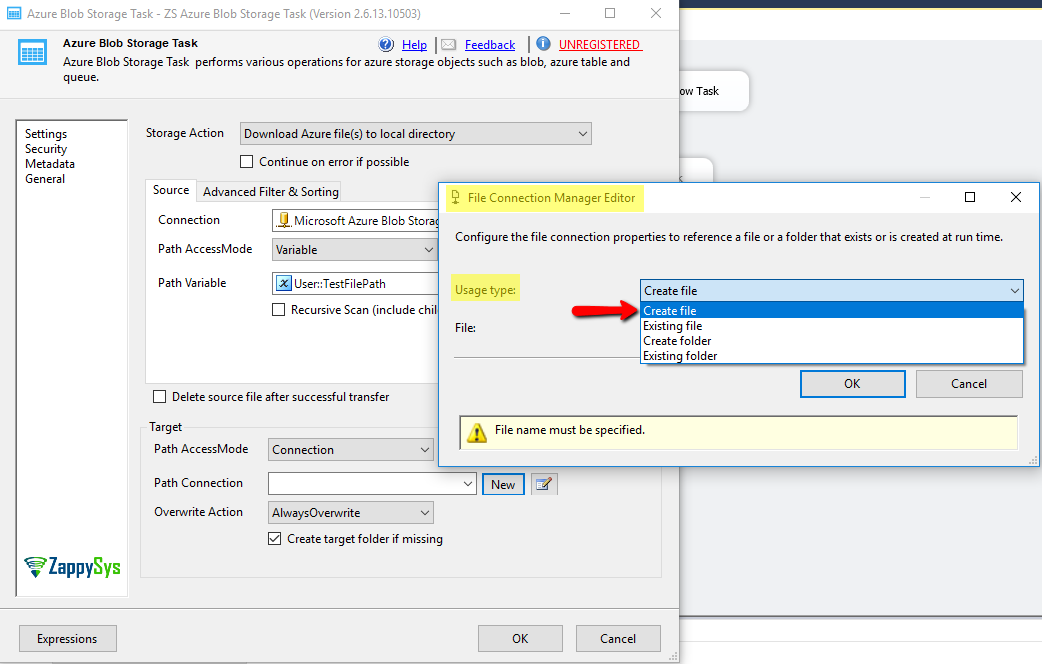
Specify Usage Type in file Connection Manager
- After that just Specify the Target File with File Name and Path.
- Then just select the OverWrite Action in the Target Section:

Select Overwrite Action in Target Section
- you can mark checked the checkbox “Delete source file after successful transfer” If you want to delete the file which you are downloading from Blob Container after the successful downloading of that file.
- You can also specify the Advanced Filter & Sorting :
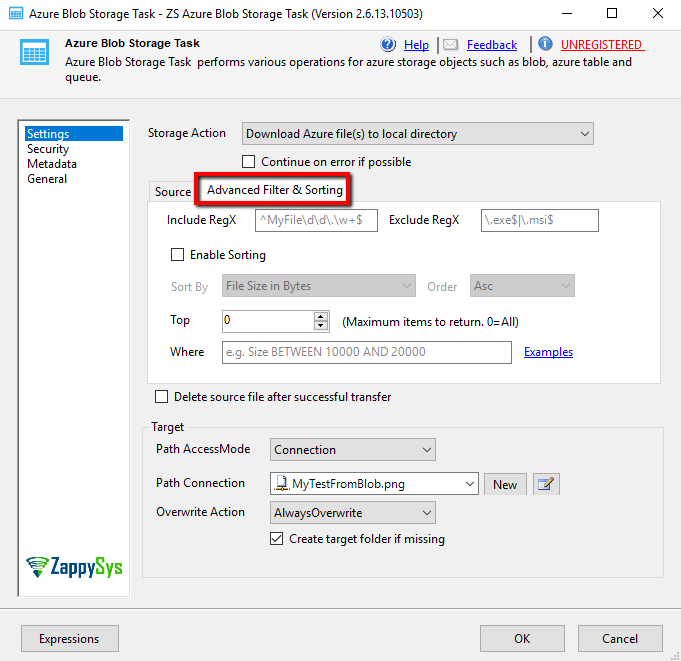
Specify Advanced Filter and Sorting If you have requirements
- After all the configurations settings are done, you can execute the Package.

A Package was Executed and the File Downloaded successfully
Conclusion
In this blog, we learned how to Download files from Azure Blob Storage using SSIS PowerPack ZS Azure Blob Storage Task in a very simple way. You can achieve many more functionalities with the use of this Task. Check our Blog articles on Azure Blob Storage to find out what Azure Blob Storage task is capable of more.
References
Finally, you can use the following links for more information about Azure Blob Storage Task:
- Introduction to Microsoft Azure Storage
- How to: View, copy, and regenerate storage access keys
- Using the Azure Storage Emulator for Development and Testing
- Lending Page: SSIS Azure Blob Storage Task you can also find Tutorial Video here
- Help File: Documentation of SSIS Azure Blob Storage Task